Upgrading your Chevrolet Silverado’s interior with leather seat covers is one of the smartest moves you can make. Whether you’re protecting factory seats from kids, pets, or daily wear, or simply craving that premium look, how to install leather seat covers on Silverado trucks is a rewarding DIY project that saves hundreds over professional installation. With the right prep, tools, and patience, you can achieve a snug, factory-like finish on 2019–2026 models in just a few hours.
This guide covers everything from workspace setup to final tensioning, including slip-on covers (Clazzio, TigerTuff) and full upholstery replacements (Katzkins). You’ll learn how to handle tricky headrest pins, route drawstrings correctly, verify airbag safety, and troubleshoot common issues like sagging or wrinkles.
Prepare Your Workspace and Tools

A clean, organized setup is the foundation of a smooth installation. Rushing into the job without proper prep leads to frustration, scratches, and poor fit.
Position Seats for Maximum Access
Start by sliding the front seats all the way forward to open up space underneath. If your Silverado has electric seats, raise them to their highest setting for better visibility and reach. For manual seats, extend the headrests fully by pressing the side release button. This extra clearance makes it much easier to slide covers over the seat back later.
Locate the carpet flap beneath each front seat. It’s typically held by two elastic straps with plastic hooks connected to the seat springs. Unhook these straps, twist the flap, and tuck it into the factory pocket on the side of the seat. Keeping this flap out of the way ensures clean routing of drawstrings and prevents bunching.
Gather Essential Installation Tools
You don’t need a full mechanic’s toolbox, but these items make a huge difference:
- Plastic trim tools for tucking fabric without scratching surfaces
- Pick tool or small hook (around $5 from Harbor Freight) for releasing hidden headrest pins
- 10mm socket wrench for removing seats or rear bench bolts
- Heat gun or steamer for softening leather and removing wrinkles
- Flathead and Phillips screwdrivers for bolts and J-clips
- Scissors for trimming excess material only when necessary
- Microfiber cloths and mild cleaner for surface prep
Avoid metal tools near leather, as they can puncture or scratch the material.
Condition Leather and Prep Surfaces
Freshly unboxed leather often arrives stiff from packaging. Expose the covers to direct sunlight for 15–30 minutes before installation. This warms the material, improves flexibility, and reduces tearing risk. For tighter areas like bolsters, use a heat gun on low setting, but never overheat, as this can damage stitching or backing.
Wipe down your factory seats with a mild cleaner and microfiber cloth. Let them dry completely. Trapped moisture under the cover can cause mold or odors over time. Inspect seat contours to familiarize yourself with the geometry, especially around headrests and side bolsters.
Remove and Cover Front Headrests
Headrest removal trips up many first-timers because of hidden locking mechanisms. Getting this step right makes the rest of the installation much smoother.
Release Standard and Hidden Headrest Pins
On most 2019–2024 Silverado models, press the side release button and pull straight up. If the headrest won’t budge, there’s likely a secondary pin lock inside the post. Insert a small pick tool into the hole at the base of the post, feel for a silver pin, hook it gently, and pull upward while lifting the headrest. This dual-action releases the internal lock.
Install Headrest Covers
Headrest covers fit tight. Slide the cover on slowly, twisting side to side to work it over the foam. Align the adjustment button with the hole in the post, then compress the foam by pressing both sides together. This lets the cover slip over the button smoothly.
Tuck the bottom flap underneath and secure it using the provided Velcro or insert it into the J-shaped clip using a flathead screwdriver. For kits with headrest caps (like Kustom Interiors), place the cap on top of the cover, not underneath, so you can remove it later if needed.
Install Front Seat Bottom Covers
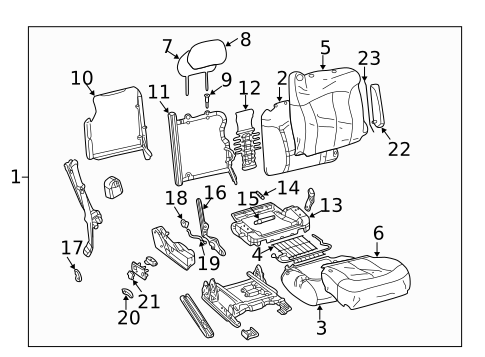
A loose or sagging seat bottom ruins the entire look. Proper routing and tensioning here ensure long-term durability.
Confirm Orientation and Initial Placement
Check for tags labeled “Driver,” “Passenger,” or brand names like TigerTuff. Installing the wrong cover on the wrong side leads to incorrect strap routing and poor fit. Unfasten all Velcro straps before draping the cover over the cushion, aligning seams with the cushion corners.
Push the main flap (a long piece at the back) between the seat back and seat bottom. This replaces the factory carpet flap you moved earlier.
Route Drawstrings Correctly
This is where most people go wrong. Find the two drawstrings at the front of the cover. Do not run them along the outside of the seat or through the seat belt path. Instead, route each string between the cushion and the metal frame, pushing them deep into the gap, then pull them forward under the seat.
Run the front flaps over the metal bar beneath the seat for maximum leverage when tightening.
Tighten and Lock Drawstrings
Reach under the rear of the seat and pull both strings firmly toward the front. This cinches the cover like a drawstring bag. Use the string locks to secure them: insert, pull tight, and lock. Tuck excess string up and out of the way.
Pull the main back flap tight, fold it under, and attach the three Velcro straps to the underside of the frame. Pull each as tight as possible; tighter tension equals fewer wrinkles. Tuck excess material into the front corners using a trim tool to engage internal securing strings.
Fit and Secure Seat Back Covers

The seat back requires precision, especially for airbag safety and seam alignment.
Verify Airbag Tag Orientation
The “Airbag” tag must face the door. Side-impact airbags deploy toward the door, and the cover has a tear-away seam designed to split in that direction. Installing it backward could block deployment. The brand tag should also face outward toward the door.
Apply Cover and Align Seams
Turn the cover partially inside out. Slide it down over the extended headrest or exposed post. Twist slightly to align corners as you pull it down. Make sure the cover goes under the seat belt guide, not over it.
Gently wiggle the cover to match its seams with the factory seat seams. Pay close attention to side bolsters, as they’re prone to wrinkles.
Secure Flaps
The cover has three flaps: two corner flaps at the top sides and one center flap. Fold the hook side of Velcro over itself temporarily to prevent snagging. Slide the cover under the headrest trim, pull corner flaps straight back for tension, and pull the center flap down and back, then up and over to attach to the rear of the seat.
Press all flaps firmly onto the back of the seat to hide attachments and secure the top edge. Use a trim tool to tuck excess fabric into tight spaces around the headrest housing.
Install Rear Seat Covers
Rear seats vary by configuration, with some featuring 40/60 splits and others including a center jump seat.
Access and Cover the Rear Base
Fold up the rear seat bottom to expose the base. Start with the 60% side (passenger side), as it’s usually larger and easier to work with. Pull the cover over the base, holding it taut. If your Silverado has child safety anchors, slide the cover under them before securing, never over.
Lower the seat back into place and reach through the gap between back and base to pull the cover taut toward the rear.
Secure with Velcro Tabs
Locate the Velcro tab on the cover and pull it through the gap to the underside. Attach it to the matching patch to hide the seam and prevent lifting. Repeat for the 40% side, working slowly because Velcro can stick to the wrong area and tear if pulled too hard.
Tuck the center gap between seats and ensure seat belts aren’t caught underneath.
Cover Rear Backrest and Headrests
The backrest cover needs tight tucking at the top to avoid sagging.
Remove Rear Headrests and Install Cover
Insert a pick tool into the holes at the base of each post, push the release pin inward, and lift the headrest straight up. Some models have three rear headrests; remove all before installing the back cover.
Lift the seat bottom slightly to create space between the seat back and cab wall. Slide the cover over the backrest, making sure it goes under the seat belt path. Compress the headrest foam slightly to help the cover fit. Once in place, the foam expands and holds the cover snug.
Tuck Top Edge Behind Trim
Flip the top edge of the cover over the headrest area and push it behind the plastic trim and cab frame. Use a trim tool to work the fabric into this tight space. Push hard to get it fully seated, including the seat belt guide section.
Reinsert headrests by aligning posts with slots and pressing down until they click. Install headrest covers the same way as front ones.
Handle Center Jump Seat (If Equipped)
The jump seat is the most complex due to integrated cup holders and trim.
Remove Trim and Tuck Cover
Loosen the seat belt trim and unscrew visible bolts. The plastic piece usually pops off, revealing space to tuck the cover underneath. Use the cover’s edge to pull fabric under the trim, working one side at a time: tuck left side, snap trim down, repeat on right. Maintain tension to avoid sagging, then reattach bolts and cup holder assembly.
Prevent Console Lift
The front section of the jump seat cover often lifts when the console is opened. Fix this by adding adhesive-backed Velcro to the underside or installing a small stabilizing bracket. This keeps the cover flush and factory-like.
Full Leather Upholstery Replacement (Advanced)
For a permanent, OEM-level upgrade, consider full replacement with kits like Katzkins or Kustom Interiors. This is a full reupholstery job, not a slip-on.
Remove Seats and Disconnect Electronics
Use a 10mm socket wrench to unbolt front seats from the floor for 360° access. Remove plastic trim with a trim tool, steaming first to soften adhesive. Disconnect heater wires, unplug memory seat modules, and detach side-impact airbag sensors. Label connectors if needed.
Remove Factory Fabric and Install New Leather
Unclip hog rings or plastic fasteners around the frame. For the seat back, unzip the bottom seam to access the inner lining. Carefully detach the airbag sleeve without cutting or damaging it. Cut stitching threads along edges to free the fabric without tearing foam.
Turn the new leather inside out and slide it over the foam, aligning grain outward. Use steam to soften leather and stretch it over contours, especially bolsters and corners. Tuck edges into channels using fingers or a trim tool, working from center to edges to minimize wrinkles.
Reattach all clips firmly and score leather around hardware like seatbelt anchors to allow stretching. Reconnect the airbag sleeve securely; this is non-negotiable for safety. Let the leather cool and settle for 30+ minutes before reinstalling seats.
Fix Wrinkles and Final Checks
A few creases are normal. Don’t panic; most will settle with time.
Remove Wrinkles with Heat
Use a heat gun on low or park in direct sunlight. The heat expands the leather, helping it relax and conform to the seat shape. Gently pull fabric outward to smooth creases, pressing wrinkles toward corners where they’re less visible. Allow 2–3 days of regular use for the material to naturally settle.
Troubleshoot Common Issues
| Issue | Solution |
|---|---|
| Console pops out | Add Velcro or bracket underneath |
| Bottom edges stick out | Tuck more aggressively with trim tool |
| Visible zippers | Use optional zipper covers or hide under trim |
| Loose fit or sagging | Recheck drawstring routing between cushion and frame |
| Headrest won’t slide in | Compress foam, align button with hole, use flat tool for J-clip |
Ensure Safety and Longevity
Your upgrade must be safe and durable, not just stylish.
Verify Airbag Safety
Double-check that airbag tags face the door and tear-away seams align with the deployment path. Never cover or obstruct side-impact airbag zones. Ensure no fabric blocks sensor areas.
Check for Interference
Confirm the seat slide lever moves freely, seat belts retract smoothly, no straps cross heating elements, and all electronics function post-installation.
Clean and Maintain Leather
Use leather-specific cleaner and conditioner every 3–6 months. Avoid harsh chemicals or ammonia-based products. Wipe spills immediately with a damp microfiber cloth. Proper care extends life to 8+ years, even with kids and pets.
Choose the Right Kit for Your Needs
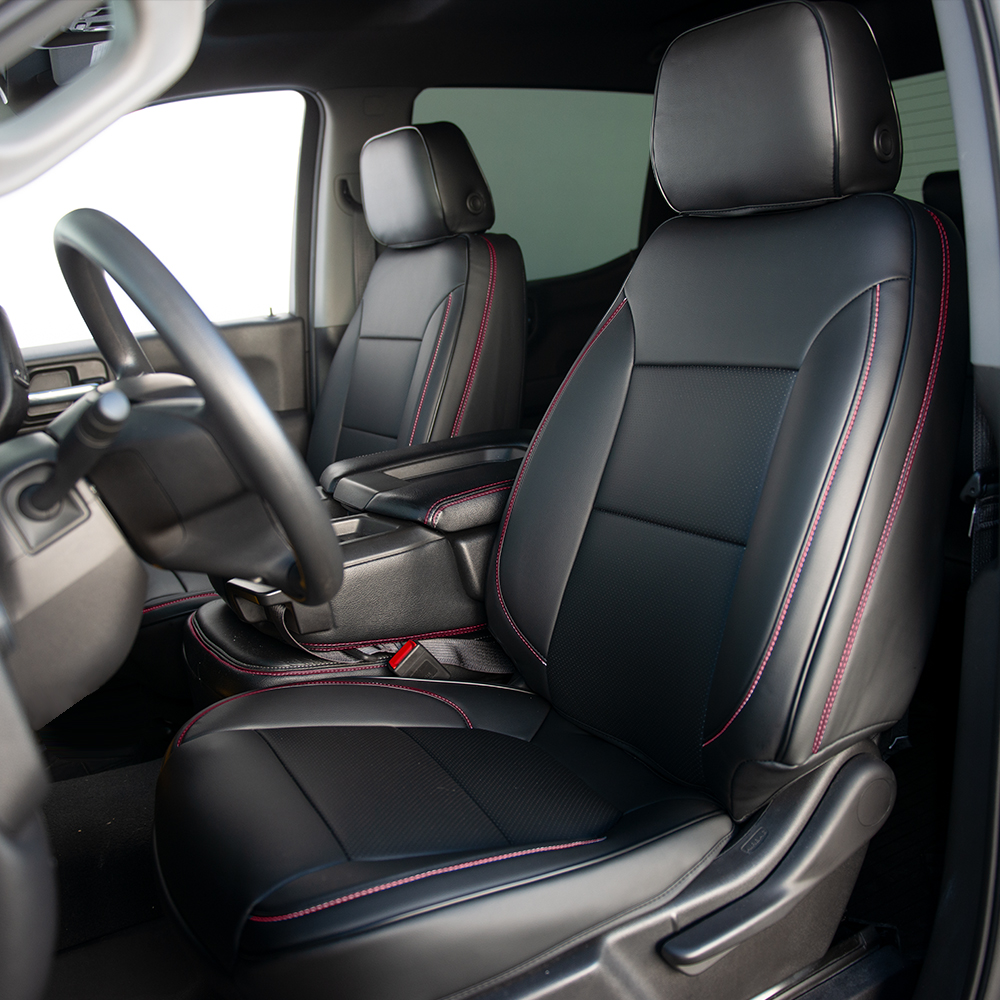
Match your goals with the right product:
- Clazzio: Premium fit, red stitching, OEM-like finish, great for resale value
- TigerTuff: Precision cut, secure string-lock system, ideal for DIY
- Katzkins: Real leather, professional install recommended, best for permanence
- Kustom Interiors: Sleek design, steam-assisted fit, budget OEM alternative
DIY slip-ons cost $300–$700 and take 2–4 hours. Full replacements cost $1,500+ but deliver unmatched quality.
Frequently Asked Questions About Installing Leather Seat Covers on Silverado
Do leather seat covers affect airbag deployment?
Yes, if installed incorrectly. The “Airbag” tag must face the door, and the tear-away seam must align with the deployment path. Incorrect orientation can block side-impact airbags from deploying properly.
How long does it take to install leather seat covers on a Silverado?
DIY slip-on covers typically take 2–4 hours for a first-timer. Full upholstery replacement kits like Katzkins can take around 10 hours for a novice and may require professional installation.
Can I install leather seat covers without removing the seats?
Yes, for slip-on covers, you can install them while seats remain in the vehicle by sliding seats forward and working underneath. Full upholstery replacements require seat removal for proper access.
How do I stop the rear seat cover from sagging?
Ensure drawstrings or straps are routed between the cushion and metal frame, not along the outside. Pull all Velcro straps as tight as possible and tuck excess material into trim pieces. Recheck tension after a few days of use.
What’s the best way to remove wrinkles after installation?
Use a heat gun on low setting or park in direct sunlight. The heat expands the leather and helps it conform to seat contours. Allow 2–3 days of regular use for natural settling.
Are slip-on leather seat covers worth it compared to full replacement?
Slip-ons offer excellent value at $300–$700 and protect factory seats while delivering a premium look. Full replacements cost $1,500+ but provide a permanent OEM-level upgrade. For most owners, slip-ons strike the best balance of cost, durability, and aesthetics.
Key Takeaways for a Professional Leather Seat Cover Installation
Installing leather seat covers on your Silverado is a rewarding upgrade that boosts comfort, style, and resale value. The three most critical points are: route drawstrings between the cushion and frame (never along the outside), verify airbag tag orientation faces the door, and condition leather with sunlight or low heat before installation.
Start with a slip-on kit like Clazzio or TigerTuff if you’re new to DIY. Gather your tools, prep your workspace, and follow each section methodically. Take your time with headrest pins and tensioning; these details separate an amateur install from a factory-like finish.