Your Chevy Silverado is built tough, but daily driving throws rocks, mud, and road salt at your paint and undercarriage. Mud flaps act as a simple shield, protecting your wheel wells, fenders, and the vehicles behind you from flying debris. Whether you drive a 2004 Single Cab or a 2024 HD, the right mud flap setup preserves resale value and cuts down on cleanup time.
The best part? You can install mud flaps on your Silverado in as little as 15 minutes with basic hand tools. This guide covers every method, from no-drill WeatherTech systems to heavy-duty Rokblokz kits for HD trucks. You’ll learn exactly which tools to grab, which steps to follow for your model year, and how to avoid the common mistakes that lead to rubbing, loose screws, or failed adhesive bonds.
No-Drill Installation: WeatherTech Style

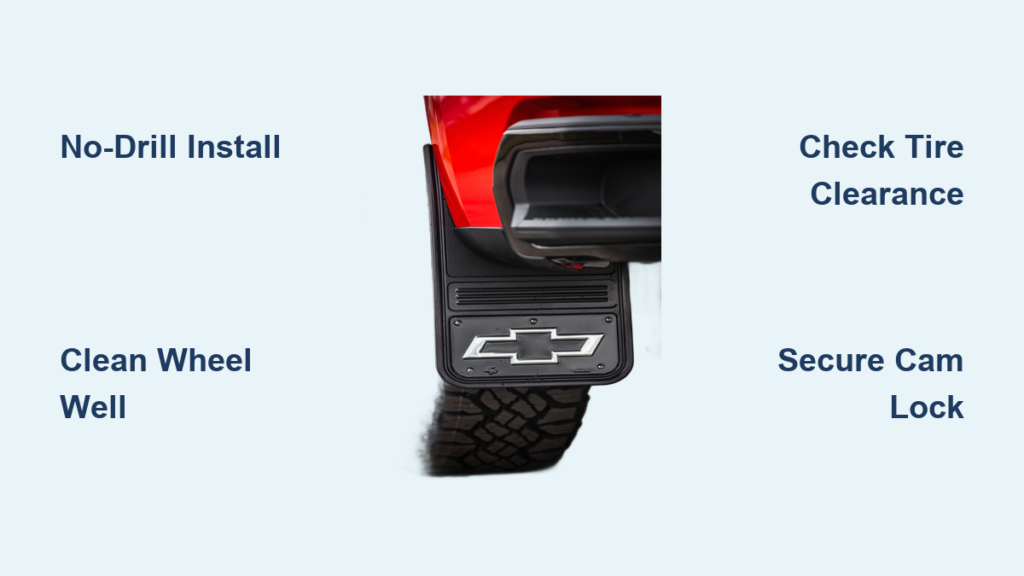
For 2019 and newer Silverado 1500 models, WeatherTech no-drill mud flaps offer the fastest, cleanest install. These kits use your truck’s existing mounting points and a cam lock mechanism, so you skip the drill entirely.
Why Choose No-Drill?
No-drill systems preserve your factory warranty and structural integrity. They’re reversible, rust-free, and ideal for leased trucks. WeatherTech leads this category with a precision fit, reusable hardware, and included 3M protective tape.
Prepare the Wheel Well Area
Start by cleaning the wheel well with a mild cleaner like Formula 409 and a lint-free rag. Remove all dirt, grime, and road buildup. Use a small brush to clear debris behind the liner. This space is where the cam lock engages, and any blockage can prevent a secure fit.
If your kit includes clear 3M-type protective tape, apply it to the paint where the flap contacts the body. This prevents abrasion and chipping over time.
Remove Factory Torx Screws
Locate the two T15 Torx screws behind the wheel well liner on each side, usually near the bottom. Use a ratchet with a T15 bit to remove them. Keep these screws; you’ll reuse them.
Install Lower Screws First
Hold the new mud flap in place and align it with the two existing mounting holes. Insert the original Torx screws through the flap and into the liner clips. Hand-tighten both screws.
Pro Tip: The liner clips can be tricky. Gently push the liner inward with your free hand while threading the screw to help it catch.
Secure the Cam Lock Mechanism
At the top of the flap, you’ll find the cam lock. On the driver’s side, make sure the lever is in the unlocked position (standing straight up). Insert the provided Allen wrench and push the mechanism firmly against the truck body.
Turn the wrench clockwise until you hear a distinct click. This means the cam has engaged the metal panel behind the liner. The locking lip prevents it from rotating back, so don’t overtighten.
Repeat for Passenger Side
The process is identical on the other side. Total time for both front flaps is usually under 15 minutes. Once done, rotate the wheels by hand to confirm no tire interference.
OEM Rear Splash Guard Installation

For factory-style protection on 2019–2023 Silverados, OEM rear splash guards offer a seamless look. Unlike no-drill kits, these require drilling, riveting, and adhesive bonding.
Clean Surface for Adhesive Bond
OEM guards use a red adhesive strip on the inner edge. For it to stick, the mounting surface must be spotless. Wipe the rear quarter panel with alcohol prep wipes to remove grease, wax, and dirt. Let it dry completely.
Reuse Factory Torx Screws
Remove the two T15 Torx screws from the bottom of the existing splash guard or empty mounting points. Align the new guard with these holes and reinstall the screws using a 90° ratchet for tight clearance.
Tuck the top hinge behind the fender edge for a flush fit before tightening.
Drill and Install Rivets
Using a 5mm (13/64″) drill bit, drill two holes through the guard at the marked locations. A 90° ratchet makes this easy from underneath, with no tire removal needed.
Load a rivet into the rivet gun, insert it through the hole, and pull the trigger. The pin breaks off, securing the guard. Repeat for both sides.
Add Under-Vehicle U-Hooks
Beneath the truck, locate the plastic reinforcement tab. Drill a 5mm hole through it, then insert the U-hook fastener from below.
Reach up and thread a T15 screw into the U-hook. Use a flashlight to ensure proper engagement and tighten securely.
Press On Adhesive Strip
Peel the red backing from the adhesive strip on the guard’s inner edge. Press the guard firmly against the quarter panel and hold for 60 seconds to activate the bond.
Critical: If the adhesive fails later, it’s almost always due to poor cleaning. Re-clean and reapply pressure if needed.
Rokblokz Installation for HD Models
For 2020+ Silverado 2500/3500 HDs, Rokblokz delivers heavy-duty protection with a modular system. It includes fender caps, clamps, and hardware designed for larger tires and rugged use.
Preassemble Fender Edge Clamp
Press the dome nuts into the hex recesses of the clamp. Ensure they’re perfectly aligned; use a mallet if needed. Misaligned nuts can strip during tightening.
Install Fender Cap
Slide the fender cap into place from below. Push up until the rear pin clicks into the liner. Secure it internally with a 20 mm flathead M6 bolt, washer, and lock nut.
Tighten the internal bolt with a 10 mm wrench, then secure the outer clamp with a 4 mm Allen key.
Mount Front Mud Flap
Remove the factory front flap by unscrewing three inner Torx screws and pulling out the plastic pins.
Attach the fender edge clamp to the new flap with #10 machine screws (hand-tight only). Slide it around the fender edge, then install:
- Outermost hole: 1-inch #8 screw + washer + spacer
- Second and third holes: Remaining machine screws
- Inner mount: Reuse factory screws
Use a 90° ratchet in tight spots. Check alignment with a level before final tightening.
Install Rear Mud Flap
Remove the factory rear flap and cap. Press the new Rokblokz cap into place; teeth should click into slots.
Start with the outermost #8 screw + washer, threading into the OEM body clip. Slide the fender clamp around the fender and install the remaining two screws.
Adjust for level, then tighten all hardware starting with the clamp.
Legacy Installation: 2004–2018 Models

Older Silverados (2004–2018) may not support no-drill kits. These require manual marking, drilling, and custom fitting, which is common for generic aftermarket flaps.
Prepare the Vehicle
Park on level ground, engage the parking brake, and disconnect the negative battery terminal as a safety precaution, especially if wiring runs near the wheel well.
Remove Old Flaps and Inspect
Use a socket wrench to remove existing mud flaps. Check mounting points for rust or damage. Clean the area thoroughly with a degreaser and dry completely.
Mark and Drill Mounting Holes
Hold the new flap in place and use a measuring tape to ensure even alignment with the tire and fender. Mark hole positions with chalk or a marker.
Drill pilot holes first with a smaller bit, then enlarge to match your bolt size. Avoid drilling too close to frame or fuel lines.
Install and Test Clearance
Insert bolts with washers and nuts. Tighten firmly but don’t over-torque, as this can warp plastic flaps.
Critical Check: Rotate the wheels by hand. Ensure 1–2 inches of clearance between the tire and flap. Adjust if rubbing occurs.
Test Drive and Finalize
Reconnect the battery and take a short test drive at low speed. Listen for vibrations or rubbing. Recheck all fasteners after the first 20 miles.
Tool Guide by Installation Type

Having the right tools makes or breaks the job. Here’s what you’ll need based on your system.
No-Drill (WeatherTech)
- T15 Torx bit
- Allen wrench (4 mm)
- Ratchet
- Lint-free rags
- Small brush (for liner cleaning)
No drill, no rivet gun, just basic hand tools.
OEM (GM Splash Guards)
- Drill
- 5mm (13/64″) drill bit
- Rivet gun
- 90° ratchet
- Alcohol prep wipes
- Flashlight
Adhesive bonding is critical, so don’t skip the cleaning step.
Rokblokz (HD Models)
- Drill
- Level
- 4 mm Allen wrench
- 10 mm wrench
- T15 bit
- Flathead screwdriver (for prying clips)
The fender cap system demands precision, so use a level for even alignment.
Legacy/Custom Fits
- Measuring tape
- Marker/chalk
- Socket set
- Drill and bits
- Wrench set
Expect variability; measure twice, drill once.
Troubleshooting Common Issues
Even with perfect prep, problems can arise. Here’s how to fix them fast.
Screws Won’t Catch the Clip
If the T15 screw spins but won’t bite, the liner clip is misaligned. Gently push the liner inward while threading the screw. This helps the threads engage the clip behind the panel.
Adhesive Strip Won’t Stick
This is always a cleaning issue. Residual grease or wax prevents bonding. Clean the surface again with alcohol wipes, let it dry, and reapply with firm pressure for 60+ seconds.
Mud Flap Rubs the Tire
Check clearance; 1–2 inches minimum. If rubbing occurs, remount the flap slightly higher or adjust the fender cap (on Rokblokz). For no-drill kits, ensure the cam lock isn’t forcing the flap too low.
Cam Lock Won’t Click
Make sure the lever is in the unlocked position (standing straight up) before installation. Push the mechanism firmly against the body and turn clockwise. If it still won’t engage, debris may be blocking the rear panel, so clean behind the liner.
Maintenance and Warranty Tips
A proper install lasts years, but only with basic upkeep.
Clean Flaps Regularly
Wash mud flaps with soapy water every few weeks. Built-up road salt, grime, and chemicals degrade rubber and plastic over time.
Inspect Fasteners Monthly
After the first few drives, vibrations can loosen screws. Check cam locks, Torx screws, and rivets every 30 days. Retighten as needed.
Preserve Your Warranty
No-drill systems protect your warranty because they don’t modify the body. Drilling, however, may void coverage for corrosion or structural issues in the drilled areas. When in doubt, choose a no-drill option.
Frequently Asked Questions About Installing Mud Flaps on Chevy Silverado
Do I need to drill to install mud flaps on a 2019+ Silverado?
No. WeatherTech and similar no-drill kits use existing factory mounting points and cam lock mechanisms. You only need a T15 Torx bit and an Allen wrench. Drilling is required for OEM GM rear splash guards and Rokblokz HD kits.
How long does it take to install mud flaps on a Silverado?
A no-drill WeatherTech install takes under 15 minutes for both front flaps. OEM rear guards take 30–45 minutes due to drilling and riveting. Rokblokz HD installations typically run 45 minutes or more because of the fender cap system.
Will mud flap installation void my Silverado’s warranty?
No-drill systems do not void your warranty because they don’t alter the body. Drilling into the fender or wheel well may void coverage for corrosion or structural issues in those specific areas. Check your warranty terms if you’re unsure.
What clearance do I need between the mud flap and tire?
Maintain at least 1–2 inches of clearance between the flap and tire. Rotate the wheels by hand after installation to verify. If rubbing occurs, remount the flap slightly higher or adjust the fender cap.
Can I install mud flaps without removing the tires?
Yes. All methods described here (no-drill, OEM, Rokblokz, and legacy) can be completed without removing the tires. A 90° ratchet attachment helps you reach tight spaces behind the wheel well.
Which mud flap brand is best for a Silverado HD?
Rokblokz is the top choice for 2020+ Silverado 2500/3500 HD models. Its modular fender cap and clamp system accommodates larger tires and handles rugged use better than standard no-drill kits.
Key Takeaways for Installing Mud Flaps on Your Silverado
Installing mud flaps on your Chevy Silverado is one of the easiest upgrades you can make, and it pays off in long-term protection. For 2019+ models, WeatherTech delivers a 15-minute, no-drill install that preserves your warranty. For HD trucks, Rokblokz offers unmatched durability and tire clearance. For older Silverados, a little drilling and measuring gets you the same reliable protection.
Grab your tools, pick the right kit for your model year, and follow the steps above. Your truck will stay cleaner, your paint will last longer, and you’ll drive with confidence through rain, mud, or gravel.