Tired of watching your factory whip antenna bend every time you pull into a parking garage? A bullet antenna for your Silverado solves that problem while giving your truck an aggressive, modern look that matches today’s off-road and performance trims. The stubby design clears low ceilings, resists car wash damage, and complements blacked-out ZR2 styling perfectly.
This guide covers everything you need to know about installing a bullet antenna on a Chevrolet Silverado, including compatibility checks, required tools, two installation methods, reception trade-offs, and pro tips for a wobble-free, theft-resistant mount.
Verify Silverado Bullet Antenna Compatibility
Confirm Your Model Year and Trim
Bullet antennas fit Chevrolet Silverado 1500, 2500, and 3500 models from 1999 to 2023. However, the installation process changes depending on generation and base style. The mounting design shifted slightly over the years, which affects whether you need modifications.
- 2014–2023 Silverados typically support true plug-and-play kits from brands like 50 Cal, Ronin Factory, and Tecreddy.
- Pre-2014 models often require hole modification because the factory opening is oval while most bullet antenna bases are circular.
Always verify fitment with your VIN or the kit’s compatibility chart before purchasing.
Match Thread Size and Base Type
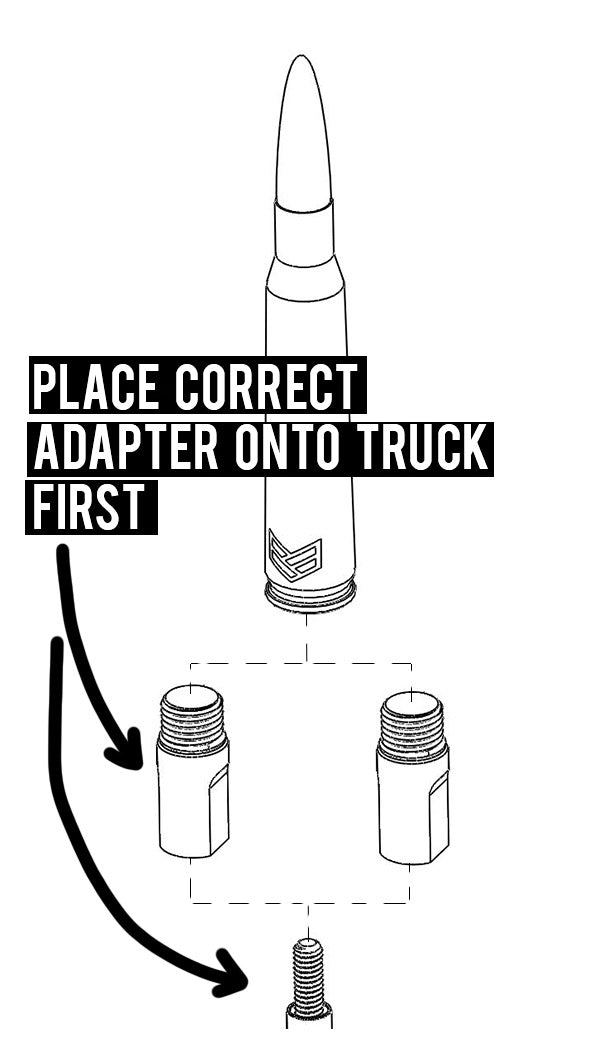
Most quality kits include 9 different screws and adapters to cover various GM thread pitches. Factory antennas use either M10x1.00 or M10x1.25 threads, so test-fitting the included brass or bronze adapters ensures a snug connection. A loose adapter causes wobble and poor grounding, which leads to static.
Pro Tip: Test every adapter in your kit before final installation. The right one should thread smoothly without play.
Gather Tools for Bullet Antenna Installation
Essential Tools
You need only basic hand tools, but the right ones protect your roof from damage:
- Crescent wrench or 10mm socket (for loosening the factory mounting nut)
- Trim removal tool or flathead screwdriver (for prying trim clips)
- Rotary tool like a Dremel with a grinding bit (only if modifying the hole)
- Metal file (to smooth modified edges)
- Rubber mallet (for reseating trim)
- Microfiber cloth (to protect paint)
Warning: The roof metal is thin. Excessive force, over-tightening, or aggressive drilling can crack the metal or cause leaks.
Remove the Factory Silverado Antenna
Unscrew the Stock Whip
- Stand on a step stool or ladder for safe roof access.
- Grasp the base of the factory antenna firmly.
- Turn counterclockwise to unscrew it from the roof mount.
- If stuck, use a crescent wrench on the mounting nut underneath, accessible through the headliner or antenna well.
After removal, inspect the mounting base for rust, debris, or damage. Wipe it clean with a microfiber cloth before moving forward.
Choose Your Installation Method

Method 1: Plug-and-Play (No Modification)
This method works for 2014+ Silverados using 50 Cal, Ronin Factory, or Tecreddy kits with the correct adapter.
Steps:
- Select the correct GM adapter from your kit.
- Insert the adapter into the factory base until it clicks or seats fully.
- Align the bullet antenna’s base lip with the factory bracket groove.
- Slide and press down until it locks.
- Screw the antenna in clockwise until flush. Do not over-tighten.
The entire process takes under five minutes, requires no drilling, and remains fully reversible.
Method 2: Trim Removal and Hole Modification
Use this method when your bullet antenna has a circular base but your Silverado has an oval opening, or when the factory trim interferes with the new base.
Remove the antenna trim:
- Gently pry up the rubber or plastic trim ring around the antenna hole.
- The trim is held by plastic clips, so pull straight up with even pressure.
- Set it aside safely. You will reuse it.
Enlarge the opening:
- Test-fit the new antenna base.
- If too tight, use a Dremel with a grinding bit to carefully widen the oval hole into a circle.
- Work slowly in small increments and check fit after each pass.
- Aim for a snug fit with no gaps.
Smooth and clean the edges:
- Use a metal file to deburr sharp edges.
- Wipe away metal shavings and keep debris from falling into the cabin.
- Blow out the cavity with compressed air if available.
Reinstall the trim first:
This step is critical. The trim must go in before the antenna.
- Slightly file the inner edge of the trim if needed.
- Press it back into the groove around the hole, tapping gently with a rubber mallet.
- Confirm it sits fully and level.
Mount the bullet antenna:
- Insert the antenna through the hole.
- From underneath, secure with a nut or tightening mechanism if accessible.
- Tighten top-mounted units until snug, but avoid over-torquing.
Pro Tip: Place a small rubber O-ring or sealant under the base to prevent water intrusion.
Secure the Antenna Against Vibration and Theft

Prevent Loosening on Rough Roads
Even premium bullet antennas can vibrate loose off-road. Two affordable upgrades solve this problem.
Use a star lock washer:
- Place a star lock washer between the antenna base and roof.
- The teeth dig into both surfaces, increasing friction.
- This also deters quick removal in theft-prone areas.
Apply thread locker:
- Use blue thread locker (Loctite 242) on the mounting threads.
- It prevents vibration loosening while still allowing future removal.
- Avoid red thread locker, which is permanent.
Combining both a star washer and thread locker delivers the best off-road durability.
Test Fit and Confirm a Flush Mount
Check for Wobble and Gaps
- Press down on the antenna. No movement should occur.
- View from multiple angles to confirm it sits perfectly flush with the roof.
- Look for gaps between the base and roof. If visible, recheck hole size and trim fit.
Verify Electrical Grounding
Bullet antennas do not amplify signals, but they must ground properly. Poor grounding causes static or complete signal loss. Ensure metal-to-metal contact between the base and roof, and clean any paint or sealant from the contact point if needed.
Understand Reception Trade-Offs Before You Buy
Shorter Antenna Means Weaker Signal
You sacrifice roughly 15–20% of AM/FM reception with a 5.5-inch bullet antenna compared to the 30+ inch stock whip.
Urban and suburban areas:
- Reception is usually fine for strong local stations.
- FM music, sports, and news come in clearly.
- Ideal if you use Bluetooth, Apple CarPlay, or SiriusXM.
Rural and remote areas:
- Signal drops significantly.
- Weak stations disappear and static increases.
- One user reported losing all rock and country stations after switching to a 5-inch stubby.
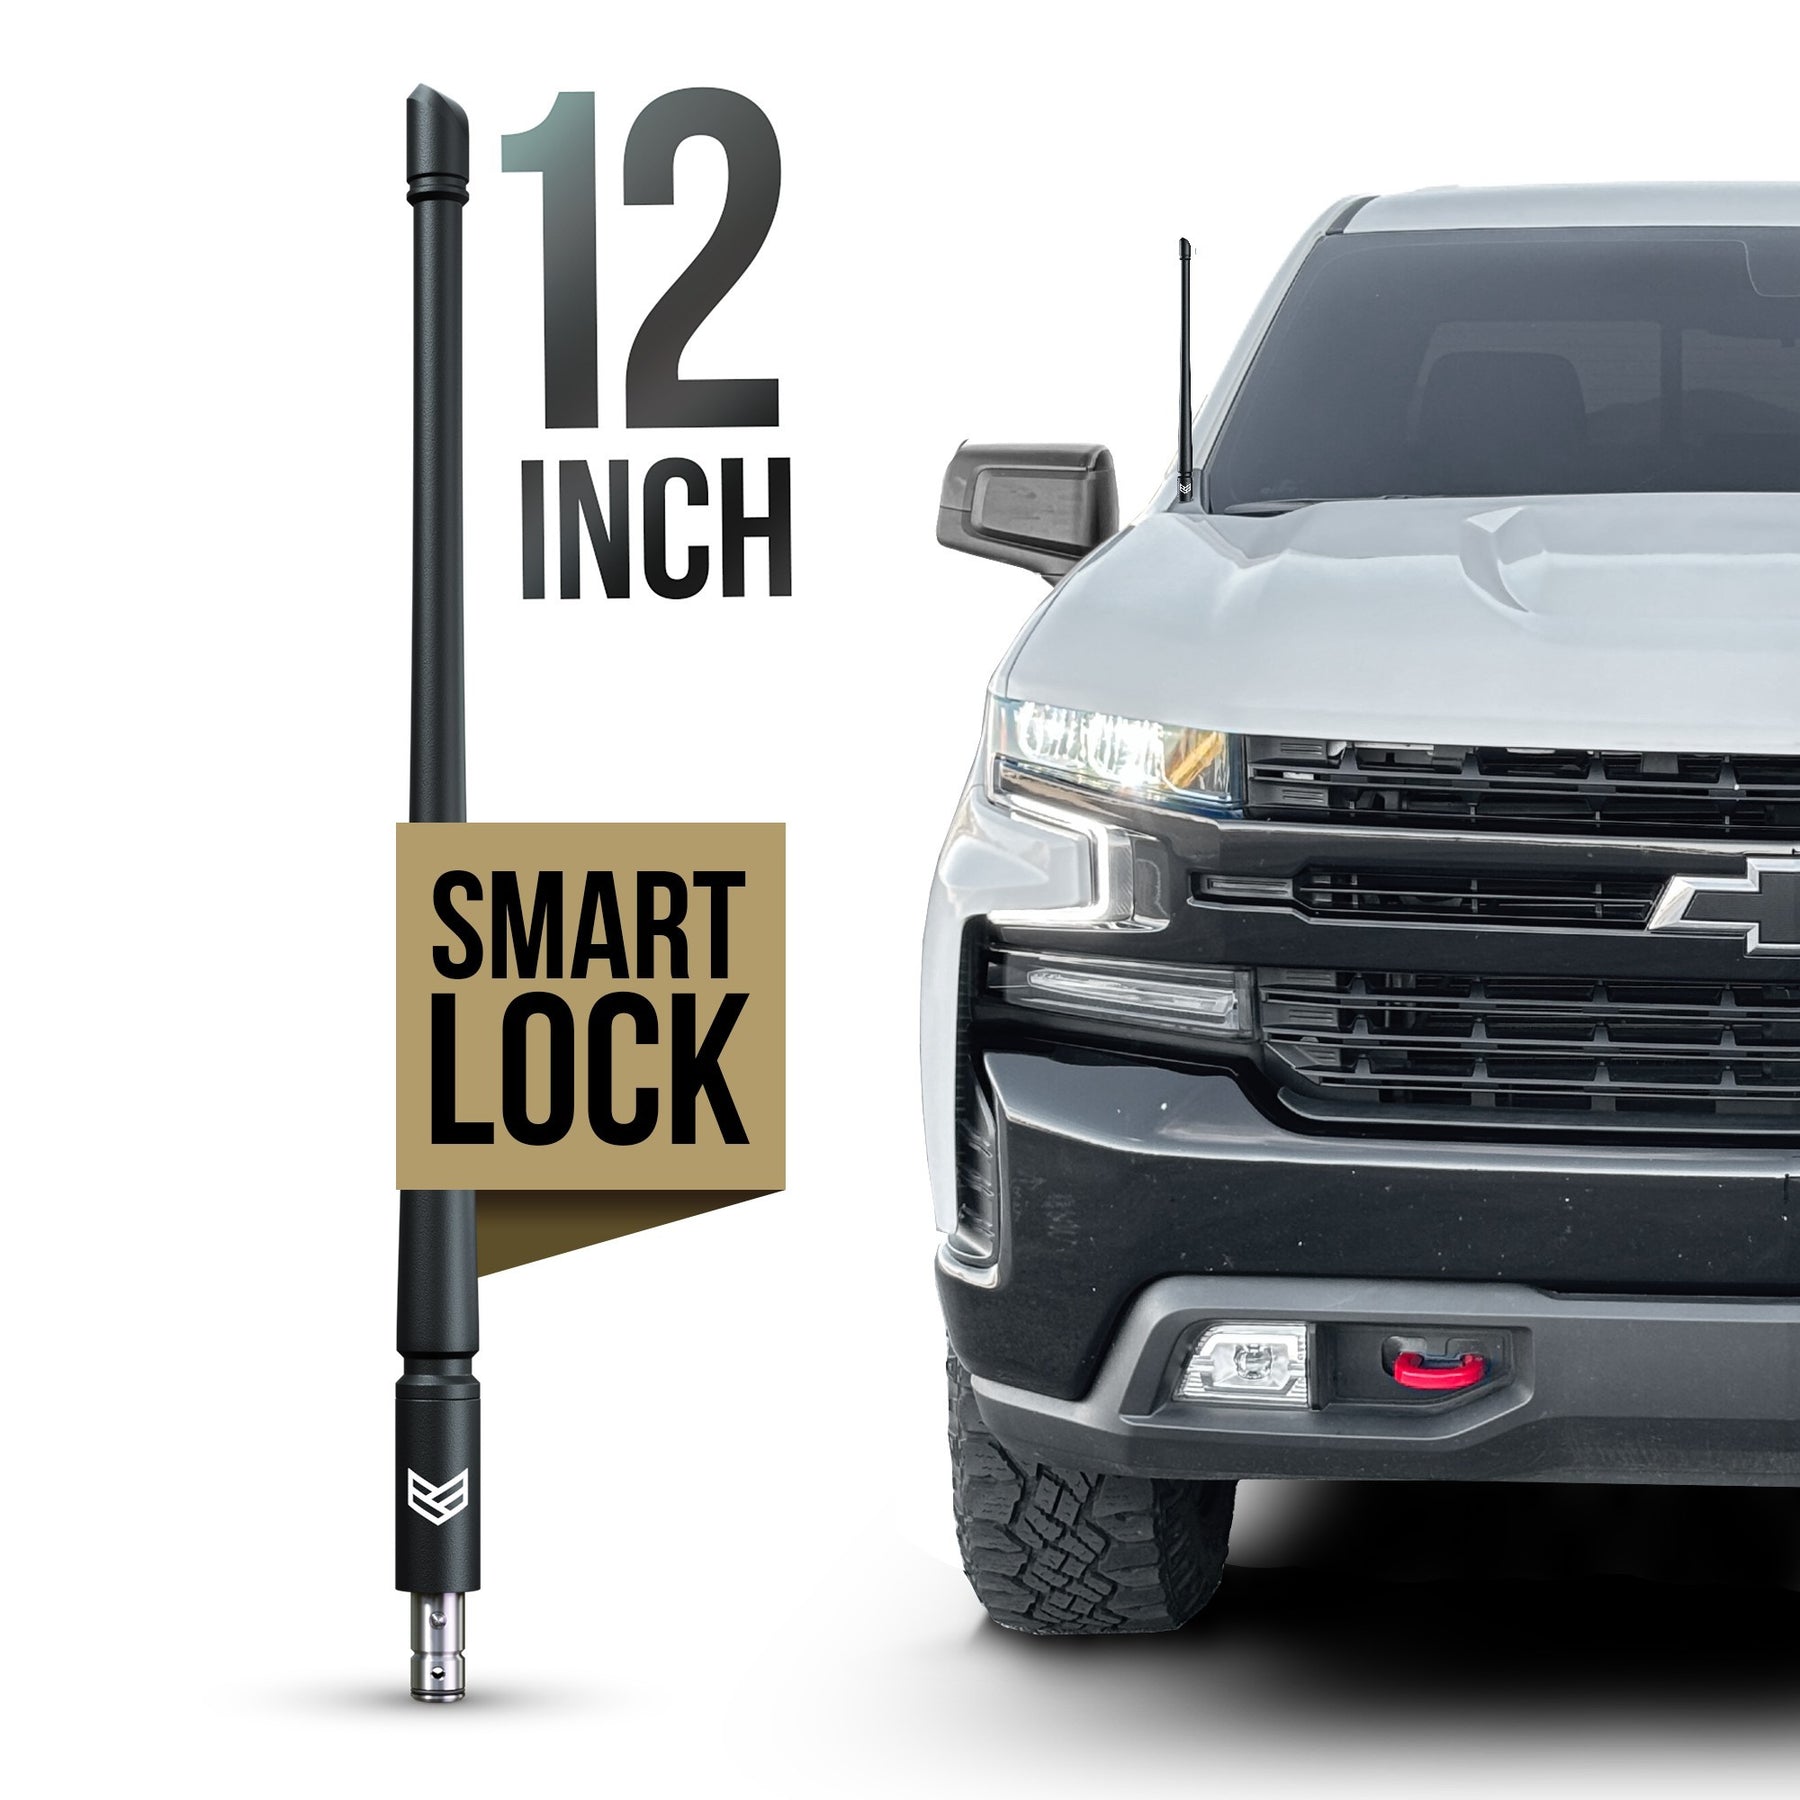
Solution: Upgrade to a 12-inch bullet antenna to recover most of the lost range while keeping a stubby profile.
Choose the Right Antenna Length
5.5-Inch Bullet Antenna
- Best for: Aesthetics, car washes, and low-clearance garages.
- Pros: Sleek look with zero snag risk.
- Cons: Poor rural reception and weak AM/traffic radio.
12-Inch Stubby Antenna
- Best for: Drivers who want style plus usable AM/FM.
- Pros: Near-stock performance in a shorter package.
- Cons: Slightly less stealthy and can catch on very low branches.
If you regularly drive outside city limits, the 12-inch version is the smarter choice.
Troubleshoot Common Bullet Antenna Problems
Antenna Wobbles After Installation
Cause: Rough hole edges or the wrong adapter.
Fix: Remove the antenna, file the hole smooth, test different adapters for a tighter fit, and reinstall with a rubber O-ring for added snugness.
Trim Won’t Snap Back Into Place
Cause: The trim was installed after the antenna.
Fix: Remove the antenna, install the trim first by pressing it fully into the groove, then slide the antenna through the center. This is the most common installation mistake.
Poor Radio Reception
Cause: The antenna is too short for your location.
Fix: Switch to a 12-inch bullet antenna, rely on Bluetooth audio or satellite radio, or reset radio presets and perform a full station scan.
Antenna Feels Loose Over Time
Cause: Vibration from rough roads.
Fix: Remove the antenna, install a star lock washer, apply blue thread locker to the threads, then retighten and retest.
Maintain Your Bullet Antenna for Long-Term Use
Clean Without Damaging the Finish
- Wipe with a damp microfiber cloth monthly.
- Use mild soap for stubborn dirt and avoid harsh chemicals.
- Powder-coated finishes resist UV fading and rust, but road grime still builds up.
Check Tightness Regularly
- Every 3–6 months, press and twist the antenna.
- If you detect movement, tighten and consider adding thread locker.
Avoid Car Wash Damage
- T-6061 billet aluminum is car wash proof, but aggressive brushes can scratch the finish.
- Use touchless car washes when possible.
- Avoid aiming pressure washers directly at the base.
Frequently Asked Questions About Bullet Antenna Installation on Silverado
Does a bullet antenna fit all Silverado model years?
Bullet antennas fit Chevrolet Silverado 1500, 2500, and 3500 models from 1999 to 2023. However, 2014 and newer trucks typically support plug-and-play kits, while older models may require hole modification due to oval factory openings.
Will a bullet antenna hurt my radio reception?
A 5.5-inch bullet antenna can reduce AM/FM reception by 15–20% compared to the stock whip. In urban areas the difference is minimal, but rural drivers may lose weaker stations. Choosing a 12-inch bullet antenna recovers most of the lost range.
How long does it take to install a bullet antenna on a Silverado?
A plug-and-play installation takes under five minutes with no tools beyond your hands. Trim removal and hole modification adds another 20–30 minutes if your kit requires it.
Do I need to drill holes in my roof?
Most 2014+ Silverados do not require drilling when using a compatible plug-and-play kit. Older trucks or universal circular-base antennas may require carefully widening the existing oval hole with a Dremel.
How do I keep my bullet antenna from being stolen?
Install a star lock washer between the base and roof, apply blue thread locker to the threads, and tighten firmly. Both methods deter quick removal and prevent vibration loosening on rough terrain.
Can I go through a car wash with a bullet antenna installed?
Yes. Bullet antennas made from T-6061 billet aluminum are rigid and car wash proof. Touchless washes are safest, but standard brush washes will not bend or break the antenna like they can with a factory whip.
Key Takeaways for Installing a Bullet Antenna on Your Silverado
Installing a bullet antenna is one of the quickest, most visually impactful upgrades you can make to your Silverado. Start by confirming compatibility with your model year, gather the right tools, and choose between a plug-and-play kit or a modified install based on your base style. Always install the trim before the antenna, secure the mount with a star washer and blue thread locker, and pick the 12-inch version if you regularly drive outside city limits.
Ready to upgrade? Pick a quality T-6061 billet aluminum antenna from a reputable brand, verify the adapter fit, and set aside ten minutes for a transformation that will change the entire profile of your truck.