Adding a winch to your Chevy Silverado turns it into a serious recovery tool for mud, snow, and steep terrain. But installing one on a modern Silverado, especially the ZR2, is not a simple bolt-on project. The factory bumper lacks the structure needed to handle winch loads safely. This guide breaks down the only proven ways to install a winch on a Chevy Silverado, what parts you need, and how to avoid costly mistakes.
Pick the Right Winch Installation Method

Before buying anything, figure out which path matches your Silverado trim and budget. There is no universal winch plate that fits the stock ZR2 bumper. You have two real options: swap the factory bumper for an aftermarket winch-ready unit or upgrade to the Bison trim that comes prepared from the factory.
Identify Your Silverado Trim
Start by checking whether you drive a standard ZR2, a Bison edition, or another off-road trim. The ZR2, often nicknamed “THUNDERSQUATCH,” has unique front-end geometry with integrated skid plates and sensor placements that block standard winch mounting. Universal winch plates will not fit without major modification. If you do not already own a Bison model, plan on replacing the entire front bumper.
Aftermarket Bumper: AEV Front Replacement

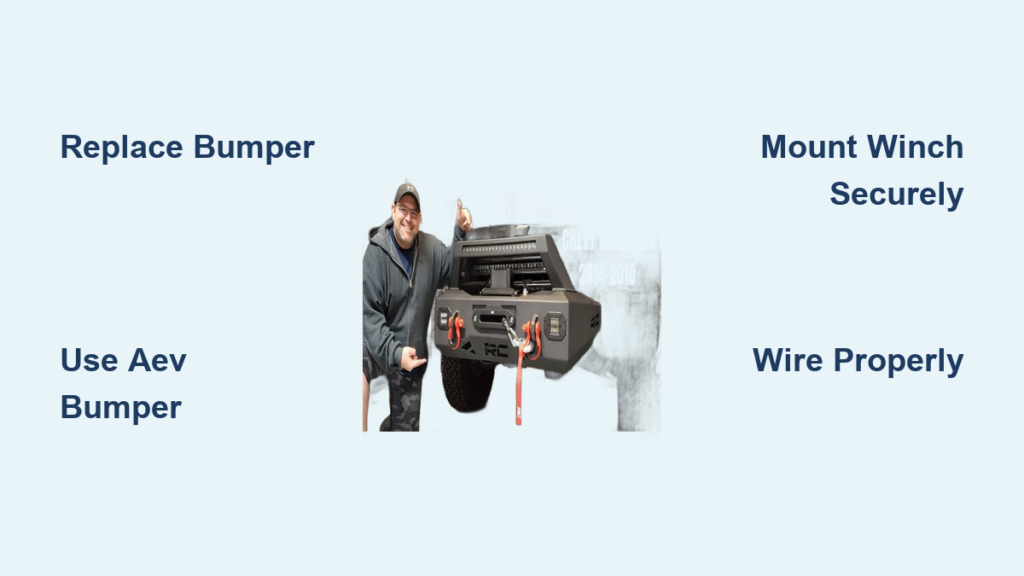
For most ZR2 owners, the only reliable path is installing an American Expedition Vehicles (AEV) front bumper. This is not a bolt-on winch plate but a full bumper replacement engineered specifically for the Silverado ZR2 platform.
Why the AEV Bumper Is Necessary
The stock ZR2 bumper has no internal structure or brackets to safely support winch loads. The AEV design replaces the entire front fascia with a high-strength steel housing built for winch integration. It includes reinforced mounting points, clearance for 8,000 to 12,000 lb winches, relocated fog lights, and compatibility with factory sensors and cameras. Skipping this upgrade risks structural failure that can damage your radiator, frame, or bumper during recovery.
Installation Ease with AEV
Once the AEV bumper is installed, mounting the winch becomes straightforward. The bumper comes pre-drilled and includes all necessary hardware. Most users report that winch installation takes under an hour after the bumper swap is complete.
Factory Option: Upgrade to Silverado Bison Trim
If you prefer an OEM solution, consider the Silverado Bison trim, which shares design cues with the GMC AT4X AEV edition.
What the Bison Trim Provides
The Bison model comes with factory-installed hardware that supports direct winch mounting. It features reinforced front frame mounting points, pre-wired electrical routing for winch solenoids, and a bumper design compatible with winch integration. This option delivers OEM-level reliability and keeps your factory warranty intact on related components.
Verify Bison Winch Compatibility
Contact your local Chevrolet dealer and request specifications for the current-year Bison trim. Confirm whether winch mounting brackets are included, if wiring harnesses are pre-installed, and which winch models are officially supported. This step prevents assumptions that lead to compatibility issues.
Remove the Factory Bumper Safely
If you are going the AEV route, removing the stock bumper is your first major task. Careful disconnection of sensors and fasteners prevents costly damage.
Gather Tools and a Helper
Prepare a socket set with 8mm, 10mm, and 13mm sockets, Torx T30 and T50 bits, a flathead screwdriver, and a trim removal tool. Have a second person ready to help handle the large bumper panel.
Disconnect Electrical Components
The ZR2 bumper houses multiple systems including the forward-facing camera, adaptive cruise control radar, fog lights, and parking sensors. Label each connector as you unplug it and bundle wires with zip ties to keep them from snagging during removal.
Remove Fasteners and Release Clips
Locate and remove all fasteners:
– 10mm bolts along the top edge under the hood
– 13mm bolts inside the wheel well liners
– Torx T30 screws on the inner fender brackets
– Plastic push clips along the bottom edge
Gently pull the bumper forward once all fasteners are removed. Work slowly because the bumper can bind on alignment tabs.
Handle the Bumper with Care
The factory bumper uses composite materials that can crack if dropped or twisted. Have your helper assist in lowering it safely to the ground.
Install the AEV Front Bumper
With the factory bumper removed, you are ready to install the AEV unit. This step restores front-end protection while adding winch capability.
Align Mounting Points
Position the AEV bumper in front of the frame and align the upper and lower mounting brackets with the factory holes. Insert bolts loosely at first to allow for minor adjustments.
Reconnect Wiring
AEV bumpers typically include adapters for fog light relocation, sensor pass-throughs, and winch power feed routing. Route wires through the designated channels to protect them from heat and movement.
Torque Fasteners to Spec
Once aligned, tighten all bolts to manufacturer specifications:
– Upper mounts: 25 to 30 ft-lbs
– Lower frame brackets: 45 to 50 ft-lbs
– Wheel well bolts: 18 to 22 ft-lbs
Over-tightening can strip threads in aluminum components.
Test Sensor Functionality
After installation, start the truck and verify there are no “Service Forward Collision Alert” warnings, backup sensors operate normally, and fog lights turn on. If errors appear, double-check connections and ensure sensors are properly seated.
Mount the Winch Unit

With the AEV bumper in place, mounting the winch is simple and secure.
Select a Compatible Winch Size
Ensure your winch fits within the AEV housing. Common choices include 10,000 lb models like the Warn Zeon 10-S, Smittybilt X2O 10K, or T-Max TR10000. Measure drum width and overall depth before purchasing. Most 10,000 lb winches fit, but larger units may interfere with the grille.
Secure the Winch to the Mounting Plate
Use the included grade 8 bolts to attach the winch to the internal cradle. Tighten diagonally in a crisscross pattern to ensure even pressure.
Connect Control Wires
Run the positive and negative leads from the winch to the solenoid pack. Use rubber grommets where wires pass through metal to prevent chafing.
Wire the Winch System

Proper electrical setup is critical for performance and safety. A poorly wired winch can overheat, drain the battery, or cause electrical fires.
Mount the Solenoid Pack
Install the solenoid away from heat sources and moving parts. Common locations include the inner fender well, frame rail near the battery, or behind the grille with adequate ventilation. Secure it with stainless steel brackets.
Connect Battery Cables
Run heavy-gauge 2-gauge cables from the battery to the solenoid. The positive cable runs directly from the battery terminal to the solenoid input. The negative cable runs from the solenoid to a chassis ground near the engine block. Use heat-shrink terminals and bolt connections instead of crimp-only connectors.
Install an In-Line Fuse
Place a 400A ANL fuse within 18 inches of the battery positive terminal. This protects the entire circuit in case of a short.
Test Winch Operation
Before finalizing, test the winch using these steps:
1. Engage the remote control.
2. Check both spool-in and spool-out functions.
3. Listen for unusual grinding or straining.
If the winch struggles or trips breakers, recheck connections and cable routing.
Reinstall Skid Plate and Trim
Once the winch is mounted and wired, reattach any protective components.
Reattach the Skid Plate
The AEV bumper includes a replaceable skid plate. Bolt it back using stainless hardware. This shields the winch and radiator during off-road use.
Reinstall Grille and Surround Panels
Carefully snap the grille back into place. Ensure no pressure is applied to the winch rope or control box.
Maintain Winch Readiness
A properly installed winch adds long-term value, but only with regular maintenance.
Inspect Monthly
Check for frayed or kinked winch line, corrosion on electrical terminals, loose mounting bolts, and damage to the bumper structure.
Clean After Off-Road Use
Rinse salt, mud, and debris from the winch housing and bumper. Use fresh water and a soft brush. Avoid high-pressure sprayers near seals.
Lubricate Moving Parts
Apply marine-grade grease to the winch drum shaft, gear casing vents, and control lever pivots every 6 months or after heavy use.
Frequently Asked Questions About Installing a Winch on a Chevy Silverado
Can you mount a winch directly to a stock Silverado ZR2 bumper?
No. The factory ZR2 bumper lacks internal mounting points and structural support for winch loads. Direct mounting is not recommended because it risks damage to the bumper, frame, and radiator during recovery use.
What is the best aftermarket bumper for a Silverado ZR2 winch installation?
The AEV front bumper is the most widely accepted solution for the Silverado ZR2. It replaces the entire factory fascia with a high-strength steel housing that includes integrated winch mounting points and compatibility with factory sensors.
Does the Silverado Bison trim come winch-ready from the factory?
The Bison trim includes reinforced front frame mounting points and pre-wired electrical routing for winch installation. However, you should verify with your dealer which winch models are officially supported and whether brackets are included.
What size winch fits on a Silverado ZR2 with an AEV bumper?
Most 10,000 lb winches fit within the AEV housing. Models like the Warn Zeon 10-S and Smittybilt X2O 10K are common choices. Larger 12,000 lb units may interfere with the grille, so measure before purchasing.
How long does it take to install a winch on a Chevy Silverado?
After the AEV bumper is installed, mounting the winch typically takes under an hour. The full process, including bumper removal and replacement, usually takes a full day for a first-time installer.
Do you need to upgrade the battery or alternator for a winch?
Most 10,000 lb winches run on the factory battery and alternator for occasional use. If you plan frequent heavy pulls, consider adding a secondary battery or upgrading to a high-output alternator to prevent electrical system strain.
Key Takeaways for Installing a Winch on Your Chevy Silverado
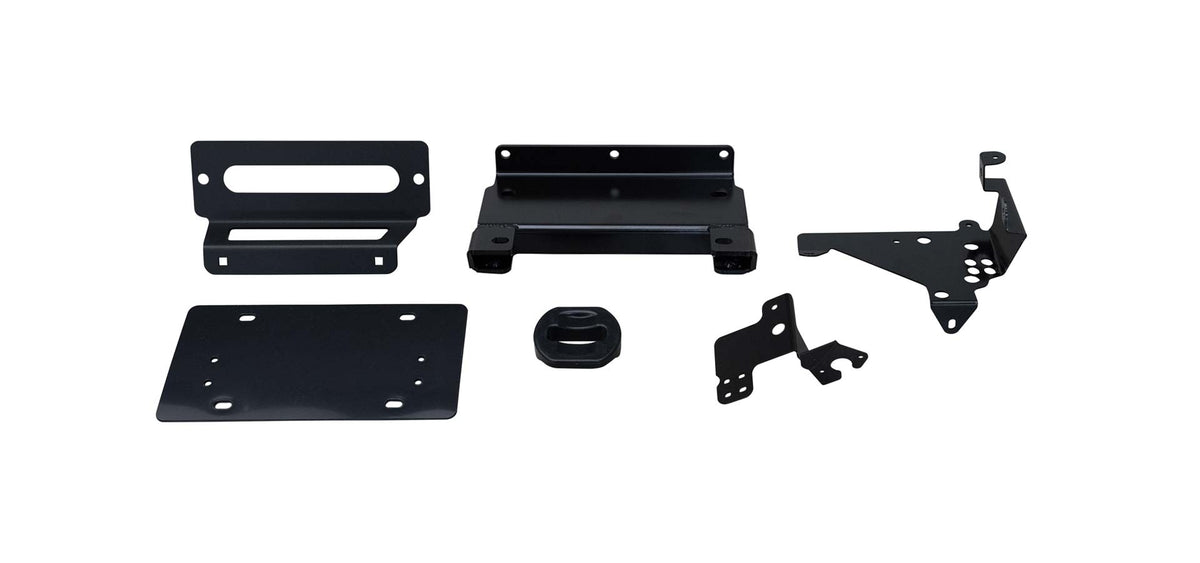
Installing a winch on a Chevy Silverado, especially the ZR2, requires more than just a winch and bolts. The factory bumper cannot support winch loads, so you must choose between an AEV aftermarket bumper or upgrading to the Bison trim. Once the correct bumper is in place, mounting and wiring the winch is straightforward. Follow torque specs carefully, use proper gauge wiring with an in-line fuse, and test all systems before heading off-road. Your next step is to confirm your trim level and decide which installation path fits your budget and recovery needs.