
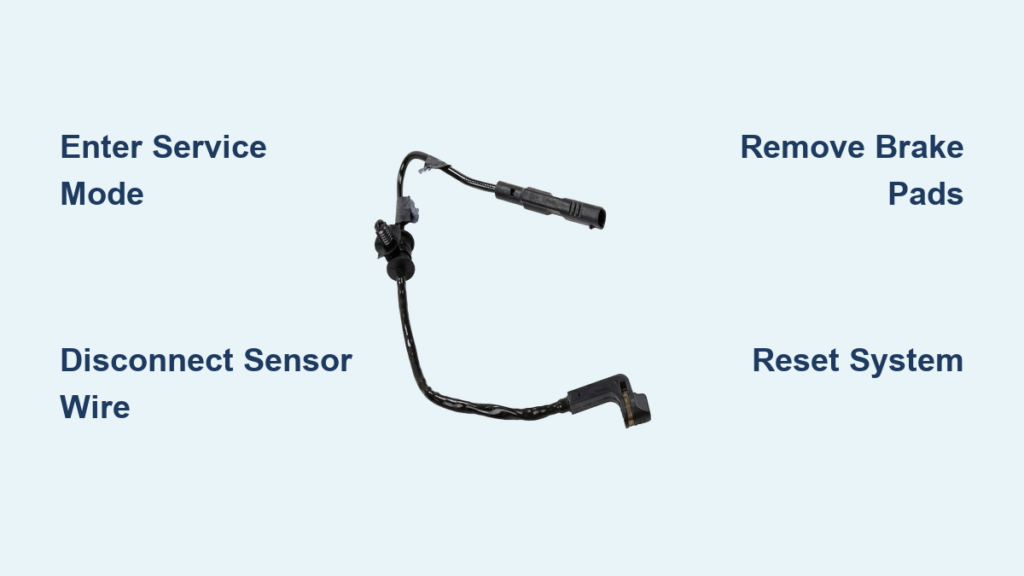
A flashing “Service Brake Pad Monitor” warning on your Chevy Silverado often points to a worn or faulty brake pad sensor. This small electronic component sits inside the inner brake pad and signals when friction material gets too thin. Many drivers rush to dealerships for costly brake jobs, but the actual fix is often simpler: replace the sensor and reset the system. Knowing how to remove the brake pad sensor on a Chevy Silverado, especially on 2012 to 2023 models, can save you hundreds of dollars. Whether you are doing a full pad replacement or chasing down a false warning, this guide covers the exact steps, tools, and reset procedures to do the job right. You will learn how to safely access the sensor, protect the connectors, and confirm your brake system works properly afterward.
Enter Brake Service Mode First

Newer Silverados require special preparation before you touch the brakes.
Activate Service Mode on 2019 to 2023 Models
On 2019 through 2023 Silverados, the electronic parking brake must be disabled before removing pads or sensors. Skipping this step prevents piston retraction and may trigger system errors.
- Turn the ignition to ON with the brake pedal pressed.
- Hold the electronic parking brake button for 10 seconds.
- Watch for a yellow wrench icon flashing on the dash.
- Release the button, then press it once more to fully disengage the parking brake.
- Turn the truck off. The system is now in service mode.
Pro Tip: This step is critical. Skipping it can cause rear caliper pistons to resist compression, leading to damage.
Use an OBD2 Scanner for Older EPB Models (2012 to 2020)
For 2012 through 2020 models with electronic rear parking brakes, a compatible OBD2 scanner is required.
- Plug the scanner into the OBD2 port under the dash.
- Navigate to Brake System, then Rear Parking Brake Service Mode.
- Follow the prompts to electronically retract the rear calipers.
- Confirm the pistons are fully retracted before proceeding.
Warning: Never force rear caliper pistons inward without digital retraction on these models. Doing so can damage the parking brake motor.
Lift and Remove the Wheel
Access starts with safely lifting the truck and removing the wheel.
Secure the Vehicle Properly
- Park on a level surface and engage the parking brake if you have not entered service mode.
- Chock the wheels opposite your work area.
- Use a hydraulic floor jack on the front frame rail or rear differential.
- Place jack stands under solid frame points. Never work under a vehicle supported only by a jack.
Remove the Wheel
- Loosen the 22 mm lug nuts slightly before lifting.
- Raise the vehicle until the tire clears the ground.
- Remove the lug nuts completely and set them aside.
- Pull the wheel straight off. Clean debris around the caliper with compressed air.
Visual Cue: Look for the sensor wire near the inner pad. If the warning light is on, the wire may already be broken at the pad edge.
Disconnect and Remove the Sensor

The sensor lives on the inner brake pad and connects through a small electrical harness.
Locate the Sensor Connector
- Find the white or black electrical connector near the caliper, usually clipped to a bracket.
- Trace the wire to where it attaches to the inner brake pad.
- Inspect for corrosion, melting, or rodent damage.
Unplug the Sensor Safely
- Slide the white locking tab upward to release the connector.
- If a black release tab sits underneath, depress it with a flathead screwdriver.
- Gently pull the two halves apart. Do not yank the wires.
- If stuck, apply electrical contact cleaner and wait 30 seconds before retrying.
Common Mistake: Forcing the connector can break internal tabs. Always release locks first.
Extract the Sensor from the Pad
- The sensor snaps into a groove on the inner pad’s backing plate.
- Use a flathead screwdriver to gently pry the sensor up from the clip.
- Work slowly. If rusted, wiggle it free to avoid breaking the pad’s mounting tab.
- If the sensor is being discarded and is stuck, cut the wire near the connector for easier removal.
Note: Since pads are usually replaced with the sensor, minor damage to the old pad is acceptable.
Disassemble the Caliper and Remove the Pads
To fully access the sensor, you need to remove the brake pads.
Remove Retention Clips
- Use needle-nose pliers to pull out small retaining clips from the pad backing plates.
- Remove the large outer spring clip holding both pads in place.
- Set clips aside and inspect them for cracks or deformation.
Pull Out the Brake Pad Pins
- Two horizontal pins secure the pads in the caliper bracket.
- Use pliers to pull the pin out. If seized:
– Use a punch and hammer to tap it from the opposite side.
– Avoid mushrooming the pin head with excessive force. - Remove the pin keys (small metal tabs) that lock the pins in place.
Take Out the Old Brake Pads
- Pry out the inner pad (with the sensor) first using a screwdriver.
- Remove the outer pad.
- Note the orientation: the sensor side faces the rotor, and the anti-rattle clips face outward.
Pro Tip: Take a photo before removal. It helps with reassembly and clip positioning.
Clean and Inspect Components
A clean caliper ensures smooth operation and prevents premature wear.
Clean Slide Surfaces and Pin Holes
- Use a wire brush or file to remove rust from:
– Caliper slide pins
– Pin bores in the bracket
– Clip mounting areas - Blow out debris with compressed air.
- Wipe with non-oil-based brake cleaner and a microfiber towel.
Check the Rotors for Damage
- Inspect for deep grooves, scoring, or warping.
- Measure thickness if the sensor triggered due to wear.
- Replace rotors if:
– Thickness is below the minimum stamped on the rotor
– Deep grooves from sensor drag are visible
– Warping causes pulsation during braking
Critical: A dragging sensor can gouge the rotor even with 80% pad life remaining.
Retract the Caliper Piston
- Place a microfiber towel behind the piston to protect the bore.
- Use a piston compressor tool or channel lock pliers to slowly push the piston back.
- Apply even pressure to avoid cocking the piston.
- For rear calipers, confirm the electronic parking brake is fully retracted first.
Install the New Sensor and Pads

Reassembly requires precise placement and lubrication.
Snap in the New Sensor
- Align the new sensor with the groove on the inner pad.
- Press firmly until it clicks into place.
- Ensure the wear indicator tip faces the rotor side.
- Verify it sits flush with no bending or tilting.
Sensor Compatibility: Use OEM-spec sensors (such as Bosch, CarQuest, or Duras Gold) that match your model year.
Lubricate the Contact Points
Apply high-temperature brake lubricant (copper or silver paste) to:
– Back edges of pads (metal-to-metal contact)
– Slide pin surfaces
– Clip contact points
– Caliper bracket contact areas
Warning: Never lubricate friction surfaces or rotors. This causes brake fade and noise.
Insert the New Brake Pads
- Install the inner pad first, routing the sensor wire away from moving parts.
- Slide in the outer pad.
- Reinstall the large spring clip with notches facing upward.
- Insert the brake pad pins through the caliper and clips.
- Lock in place with pin keys, ensuring the hole faces outward.
Torque Specs: Caliper bracket bolts (if removed) require 60 ft-lbs.
Reconnect and Reset the System
A new sensor will not clear the warning light without a proper reset.
Plug in the Sensor
- Connect the harness to the new sensor.
- Push until you hear a distinct click.
- Gently tug to confirm it is secure.
- Route the wire safely. Some technicians use the bleeder screw cap to hold it in place.
Avoid Damage: Keep wires clear of rotors, suspension, and sharp edges.
Torque and Reinstall the Wheel
- Mount the wheel and hand-tighten lug nuts.
- Lower the vehicle.
- Torque lug nuts to 140 ft-lbs in a star pattern.
- Perform two passes for accuracy.
- Re-torque after 60 miles (100 km).
Reset the Brake Pad Monitor
This step is non-negotiable, or the warning stays on.
Manual Reset for 2019 to 2023 Models
- Turn the ignition to ON.
- Navigate to Vehicle Settings, then Brakes, then Brake Life.
- Select Reset when prompted.
- Confirm the pad life percentage resets to 100%.
Exit Service Mode
- Press and hold the parking brake button for 6 seconds.
- Watch for blinking wrench and brake icons.
- Release, then press once more to turn them off.
Failure Sign: If icons do not blink, repeat the service mode entry steps.
Use an OBD2 Scanner for a Full Reset
Even on newer models, a scanner ensures complete calibration.
- Connect to the OBD2 port.
- Select Brake System, then Replace Brake Pads.
- Follow prompts to:
– Reset pad life percentage
– Reactivate the electronic parking brake
– Exit service mode - Verify 100% pad life and no warning lights.
Pro Tip: Inexpensive scanners like the Autel Mini DS808 or Foxwell NT510 handle this task reliably.
Test and Verify the Repair
Final checks ensure safety and system accuracy.
Pump the Brakes
- Start the engine.
- Press the brake pedal 5 to 10 times to reseat the pistons.
- Feel for firmness. A spongy pedal may indicate air in the system.
Test the Parking Brake
- Engage and disengage the electronic parking brake.
- Listen for motor operation.
- Confirm it holds on a slight incline.
Perform a Test Drive
- Drive at low speed (15 to 20 mph).
- Make gentle stops to bed in new pads.
- Listen for squeaks, grinding, or dragging noises.
- Verify the “Service Brake Pad Monitor” message does not return.
Red Flag: If the warning returns immediately, check:
– Sensor connection
– System reset
– Correct service mode entry
Troubleshoot Common Issues
Even careful work can hit snags. Here is how to fix them.
Warning Light Stays On
Causes:
– System not reset
– Loose sensor connection
– Faulty OBD2 reset
Fix:
1. Recheck the sensor plug-in.
2. Use an OBD2 scanner to force a reset.
3. Ensure the vehicle was in service mode during installation.
Persistent Issue: Some 2019 to 2020 models need dealership software updates if resets fail.
Sensor Drags on the Rotor
Symptoms:
– Squealing noise
– Grooves in the rotor
– Premature wear
Cause: Sensor not seated flush or defective pad molding.
Solution:
– Remove and reseat the sensor.
– If the problem persists, replace the pad set.
Uneven Pad Wear
Possible Reasons:
– Stuck caliper slide pin
– Missing lubrication
– Seized piston
Action:
– Recheck pin movement and lubrication.
– Inspect for corrosion or binding.
Prevent Future Problems
Keep your brake system reliable with these habits.
Inspect Sensors Every 6 Months
- Remove wheels and check:
– Sensor wire integrity
– Connector corrosion
– Pad thickness - Clean connectors with dielectric grease annually.
Use Quality Replacement Parts
Stick with trusted brands:
– Front pads: CarQuest Platinum PXD 2173H (includes sensor)
– Rear pads: Duras Gold DG2174
– Ceramic option: Bosch QuietCast
Avoid Cheap Kits: Poor sensor fitment leads to false warnings and damage.
Address Corrosion Early
In salt-heavy regions:
– Wash the undercarriage monthly in winter.
– Apply anti-seize on pin threads (not on friction areas).
– Replace seized pins immediately.
Know When to See a Pro
Seek help if you encounter:
– Broken caliper bolts
– Leaking brake fluid
– Warped rotors
– Persistent electronic errors after reset
Dealership Alert: If quoted $1,200 for a sensor fix, get a second opinion. Often, only the sensor and reset are needed.
Frequently Asked Questions About Chevy Silverado Brake Pad Sensors
Why does my Silverado say “Service Brake Pad Monitor” when my pads look fine?
False alerts are common on 2019 to 2023 Silverados. The sensor wire can break prematurely, or the monitoring algorithm can misread pad life. A multimeter continuity test confirms whether the sensor is actually worn out.
Can I drive with the brake pad sensor disconnected?
You can, but you should not. Disconnecting the sensor disables a critical safety alert. Without it, you risk metal-to-metal contact, rotor scoring, and catastrophic braking failure once pads wear through.
Do I need an OBD2 scanner to reset the brake pad monitor?
On 2019 to 2023 models, you can reset through the infotainment screen. However, an OBD2 scanner ensures a complete calibration and is required for 2012 to 2020 models with electronic rear parking brakes.
How much does it cost to replace a brake pad sensor on a Silverado?
DIY sensor replacement typically costs $20 to $50 for the part. Dealerships often quote $350 to $1,200+ because they bundle unnecessary rotor and pad replacements. Knowing how to remove the brake pad sensor on a Chevy Silverado saves significant money.
What happens if I do not reset the brake pad life after replacing the sensor?
The warning light will remain on, and the system will continue to display the old pad life percentage. The truck will still drive normally, but you will lose accurate brake monitoring until the reset is performed.
How long do brake pads last on a Chevy Silverado?
OEM pads typically last 50,000 to 70,000 miles under normal driving. Front pads wear faster because they handle more braking force. Heavy towing, aggressive driving, or stuck calipers can shorten pad life significantly.
Key Takeaways for Replacing Your Silverado’s Brake Pad Sensor
Removing the brake pad sensor on a Chevy Silverado is a manageable DIY task with the right tools and preparation. The most important steps are entering service mode before lifting the truck, using an OBD2 scanner for rear electronic parking brakes, and always resetting the system after installation. Skipping the reset leaves the warning light on and defeats the purpose of the repair. By following this guide, you maintain your truck’s safety alerts, avoid unnecessary dealership repairs, and keep your Silverado stopping reliably. Pick up a quality OEM-spec sensor, set aside an afternoon, and tackle this job yourself.



