
Removing the center console on a Chevy Silverado can feel intimidating, especially when you don’t know what lurks beneath the trim. Whether you’re installing a new infotainment system, running wiring for accessories, or replacing a cracked trim piece, the process changes dramatically between model years. Bolts shift locations, airbag connectors appear, and plastic clips threaten to snap at every turn.
This guide breaks down exactly how to remove the center console Chevy Silverado across four major generations: 1997, 1999–2006, 2014–2019, and 2022+. You’ll get specific tool lists, torque specs, and pro tips to avoid the most common (and costly) mistakes.
Safety First: Disconnect the Battery Before Anything Else
Before touching any interior components, disconnect the negative battery terminal. This step is non-negotiable if your Silverado has airbag connectors under the seats or electrical wiring running through the console.
Tools Needed for Safety Prep
- 10 mm socket and ratchet
- Gloves and eye protection
Loosen the negative terminal bolt and slide the cable away from the post. Tuck it aside where it cannot accidentally spring back into contact. Keep the battery disconnected until reassembly is complete.
⚠️ Pro Tip: If your truck has power seats, leave the battery disconnected until the seat is securely remounted. Live seat motors can shift unexpectedly during reinstallation if power is restored too early.
Clear out the console storage, fold down the armrest, and remove any floor mats. A clean workspace prevents lost screws and scratched trim.
2014–2019 Silverado: Full Console Removal (K2XX Platform)

For 2014–2019 trucks, full console removal requires extracting the front seats. This is the most common scenario for stereo upgrades or aftermarket wiring installations.
Remove the Front Seats
- Slide the seat fully forward to expose the front mounting bolts.
- Remove the two front bolts using a T50 socket and ratchet.
- Slide the seat back to access the rear mounting points and airbag connectors.
- Remove the rear trim cover by sliding it forward to release the retaining clips.
- Unscrew the T30 seatbelt bracket screw and disconnect the seatbelt.
- Locate the airbag connector under the front of the seat:
– Push back the lock tab with a flathead screwdriver.
– Press down the red release tab and slide the lever to disconnect. - Lift the seat out carefully with a helper to avoid scratching door panels.
✅ Visual Cue: The seat should lift freely once all bolts and connectors are released. If it resists, double-check for hidden clips or snagged wiring.
Extract the Center Console
With the seat removed, you have clear access to the console base:
- Locate four 15 mm bolts (two on each side of the console base).
- Use a 15 mm socket with extension to remove all four bolts.
- Disconnect the electrical connectors underneath:
– Depress the lock tab with a flathead screwdriver.
– Gently pull the connectors apart. Do not yank the wires. - Lift the console straight up, then slide it out toward the door.
– Avoid tilting to prevent contact with the dash or door frame.
⏱️ Time Estimate: 15–25 minutes for experienced users.
1999–2006 Silverado: GMT-800 Platform Removal

The older GMT-800 models use a simpler but trickier mounting system. The console attaches to seat studs, and the plastic components are fragile.
Prepare for Removal
- Remove the front seats to access mounting brackets attached to the seat rails.
- Use a quarter-inch drive socket with swivel extension for tight rear bolt access.
Console Disassembly Sequence
- Remove two 7 mm screws under the console’s front trim piece.
– These thread into white plastic inserts that crack easily. Use steady pressure. - Lift the front of the console straight up.
– It mounts on seat studs. Do not twist or pry. - Access two rear 7 mm bolts above the rear section.
– Use a swivel socket and remove bolts carefully. - Remove the top dashboard panel:
– Unscrew the two fasteners.
– Pop off the side clips with a trim tool. - Slide out the inner trim piece behind the panel.
- Pull wiring slack from the dashboard side.
– Unplug the connector by pressing the release tab. Do not force it. - Pull the console straight out.
– Watch for hidden clips along the dash edge.
❗ Warning: The center vent panel is fragile. Apply even pressure when removing trim to avoid cracking.
1997 Silverado: Basic Removal Approach
The 1997 model follows general principles common to early-1990s GM trucks. Specific bolt locations can vary, so thorough inspection is key.
Key Removal Steps
- Disconnect the battery using a 10 mm socket.
- Check for visible fasteners in these locations:
– Inside the storage compartment
– Under the cup holders
– Near the shifter base - Inspect the seat rail area for hidden bolts or brackets.
- Use a plastic trim tool to pry around the edges and release clips.
- Disconnect wiring harnesses for power outlets or auxiliary jacks.
- Lift the console once all fasteners are out.
🔍 Pro Tip: If the console doesn’t budge, recheck under the armrest or behind the shifter boot. Older models often hide screws in these spots.
2022+ Silverado: Partial Disassembly Only
The refreshed 2022 and newer Silverados feature a more complex console design. Full removal is not recommended without factory-level documentation, but partial disassembly works for most upgrades.
Access Without Full Removal
- Remove the side and rear console panels only.
– This exposes the interior cavity for wiring runs. - Fish wires from the passenger firewall:
– Follow the existing Bose subwoofer wire path under the carpet.
– Route the wires up into the console without removing the entire unit. - Drill only if necessary:
– A single hole may be needed for antenna or power cables.
– Use a 1/2″ drill bit and seal with a rubber grommet.
🛠️ Expert Note: Complete console extraction on 2022+ models is considered “involved” due to integrated electronics and hidden clips. Most users opt for partial access to avoid triggering warranty or electrical issues.
Remove the Console Lid (2015–2018 Models)

If you only need to access the charging module or internal storage, you can remove just the lid. No seat extraction or full console work required.
Step-by-Step Lid Removal
- Flip the console open and locate the black trim panel underneath.
- Use a plastic trim tool to release the clips around the panel.
- Remove four Phillips screws (two at the front, two at the rear).
- Press the release button on the charging module:
– Use a flathead to press the center button downward.
– Pull the cable to disconnect. - Lift the lid assembly straight out.
✅ Reassembly Tip: Snap the lid into place before reinstalling screws. Ensure the charging port clicks securely.
Replace the Front Trim Piece (1999–2013)
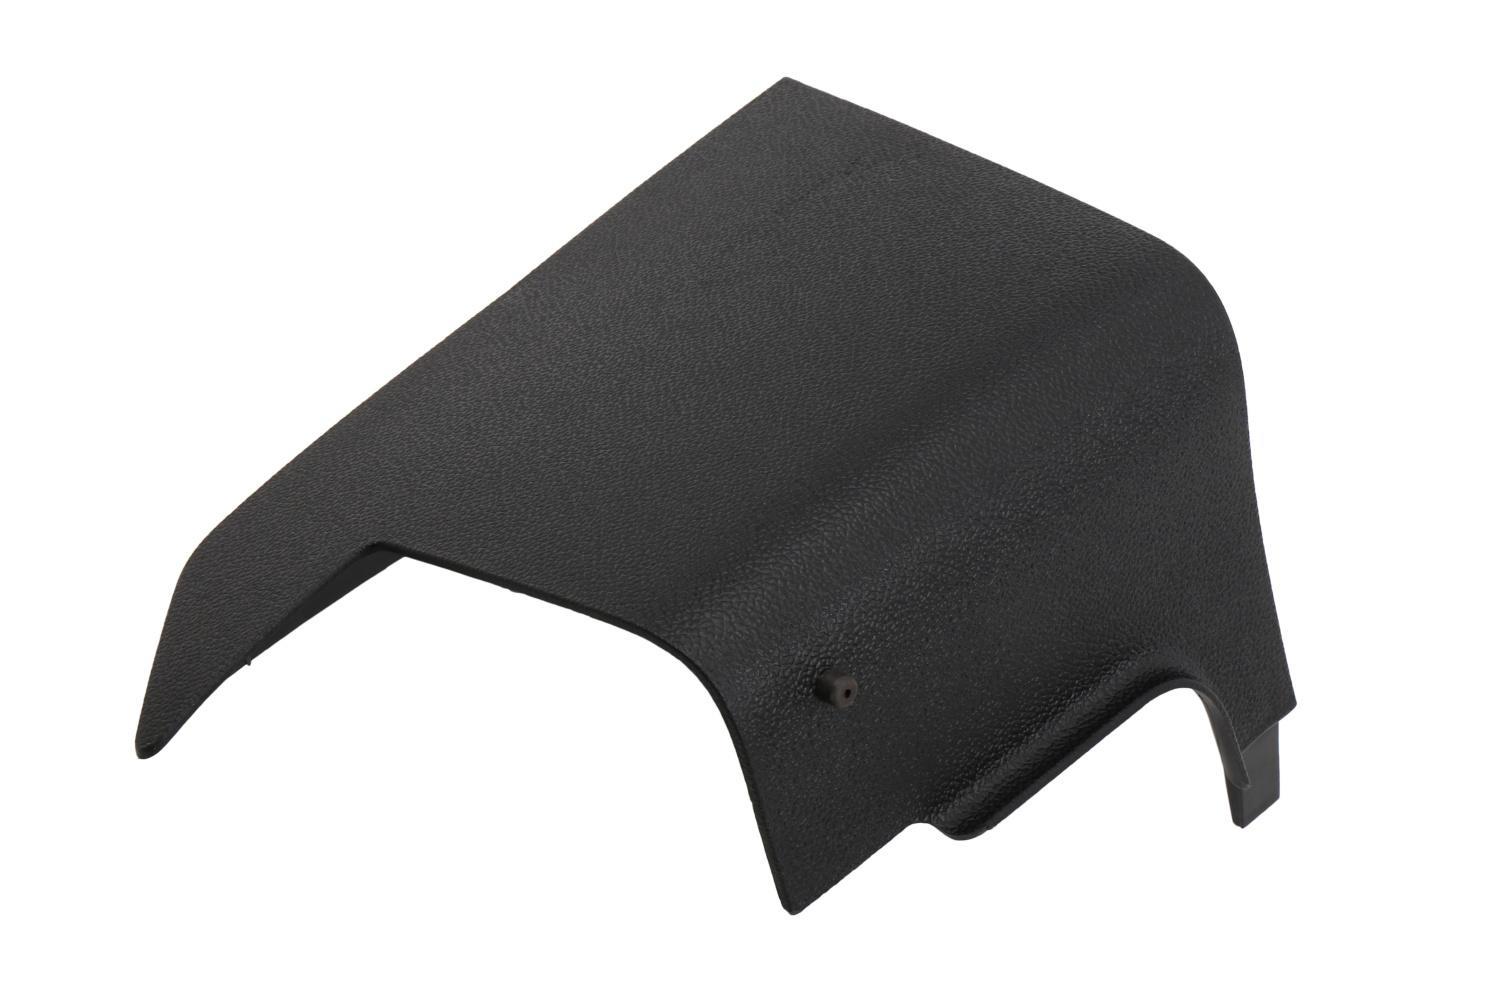
A broken front console trim piece is common, especially on the passenger side. You don’t need to remove the whole console for this fix.
Fix Without Full Disassembly
- Identify the part: GM Part # 15906821 (Passenger Side).
- Check the attachment method: One side slides in; others clip.
- Extract the broken clip remnant:
– Use needle-nose pliers to grip and pull out the stuck plastic. - Pop in the new trim piece once the hole is clear.
🔧 Alternative: If access is blocked, remove the seats and console. It takes about 15 minutes and gives full visibility.
Reinstall With Precision
Reassembly is just as important as removal. Follow this order for 2014–2019 models:
- Slide the console into place, aligning the lower pins with the floor slots.
- Reconnect all electrical connectors until they click.
- Install the four 15 mm bolts (two per side) and tighten securely.
- Reinstall the seats:
– Align the front clips with the floor slots.
– Slide the seat back into position.
– Reconnect the airbag connector.
– Install the T50 front bolts and T30 seatbelt screw. - Torque to 33 ft-lbs using a torque wrench.
- Reconnect the negative battery terminal.
✅ Final Check: Test seat adjustment, console lights, and power outlets before closing everything up.
Common Mistakes to Avoid
- Forcing connectors: Airbag and electrical plugs have release mechanisms. Never yank them.
- Over-tightening 7 mm screws: Plastic inserts in 1999–2006 models strip easily.
- Ignoring torque specs: Seat bolts must be torqued to 33 ft-lbs for safety.
- Skipping the battery disconnect: This risks airbag deployment or electrical shorts.
- Misaligning the console during reinstall: This causes gaps or prevents seat reinstallation.
Tools Summary by Model
| Model Years | Key Tools | Special Notes |
|---|---|---|
| 1997–2006 | 7 mm socket, T30/T50 bits, swivel drive | Plastic inserts fragile |
| 2014–2019 | 15 mm socket, T50, flathead screwdriver | Seat removal required |
| 2022+ | Trim tool, drill (if needed) | Partial removal only |
| All Models | 10 mm socket, plastic trim tool, needle-nose pliers | Safety first |
Frequently Asked Questions About Removing the Center Console
Do I need to remove the seats to remove the center console on a 2014–2019 Silverado?
Yes, for full console removal on 2014–2019 models, you must remove the front seats. The console mounting bolts are located near the seat rails and cannot be accessed otherwise.
What size socket do I need for the console bolts on a 2014–2019 Silverado?
You need a 15 mm socket with extension to remove the four console bolts (two on each side).
Can I remove the console lid without removing the whole console?
Yes, on 2015–2018 models, you can remove just the lid to access the charging module or internal storage. Remove the black trim panel underneath, then take out four Phillips screws.
What torque do I use on the seat bolts?
Torque the front T50 bolts and seatbelt T30 screw to 33 ft-lbs. This is critical for safety.
How do I disconnect the airbag connector under the seat?
Use a flathead screwdriver to push back the lock tab, press down the red release tab, and slide the lever to disconnect. Never force the connector.
Is full console removal possible on a 2022+ Silverado?
Full removal is possible but considered “involved” due to integrated electronics and limited documentation. Most users opt for partial disassembly by removing only the side and rear panels.
Final Tips for a Smooth Center Console Removal
- Use a helper when removing seats to prevent damage and strain.
- Label wires if disconnecting multiple connectors.
- Work slowly around clips and replace broken ones with OEM parts.
- Keep screws organized using a magnetic tray.
- Check for recalls or TSBs (Technical Service Bulletins) before starting.
Knowing how to remove the center console Chevy Silverado across different model years saves you time, money, and frustration. Whether you’re doing a quick trim swap or a full console extraction, following the correct steps for your generation ensures a clean, safe job. Grab your tools, disconnect that battery, and tackle your upgrade with confidence.



