A dead Chevy Silverado key fob can leave you stranded at the worst possible moment, often right when you need your truck the most. The good news is that most key fob problems come down to a simple, dead battery, and swapping it out is easier than you think. This guide shows you exactly how to open a Chevy Silverado key fob safely, identify the right battery, and get everything working again in just a few minutes.
You will learn how to tell which key fob generation you own, which tools to use, and the precise steps for opening fobs from 2007 all the way through 2026. No dealership visit, no reprogramming, and no special tools required.
Identify Your Chevy Silverado Key Fob Type
Before you start prying anything open, you need to know exactly which key fob you are working with. The design, battery size, and opening method all vary based on your truck’s model year.
Pre-2020 vs. 2020+ Models
Older Silverados from 2007 through 2019 typically use standard remotes or flip-key designs that run on CR2032 batteries. Newer Silverados from 2020 through 2026 use smart keyless entry fobs that require a CR2450 battery. These two battery types are not interchangeable. Using the wrong size can damage the internal clips or prevent the battery from making proper contact.
Visual Clues to Tell Them Apart
Flip your fob over and look closely. If you see a small release button that lets you pull out a metal key, you likely have a 2019 or newer model. If the entire key flips open like a switchblade with no removable blade, you have an older style. Either way, that mechanical key doubles as your opening tool, so you will not need a screwdriver in most cases.
Gather Tools and Prepare Your Workspace
What You Need
- Mechanical key blade stored inside the fob
- Clean, flat surface to avoid losing small parts
- Correct replacement battery (CR2032 or CR2450)
You do not need any special tools. The key itself is engineered to unlock the casing. A small flathead screwdriver can help if the seam resists, but avoid metal tools that might scratch or crack the plastic housing.
Battery Cost and Time
A new battery costs under $5 and lasts 3 to 4 years under normal use. The full process takes less than five minutes once you know the correct method for your fob.
Open 2020–2026 Smart Key Fobs
Remove the Mechanical Key
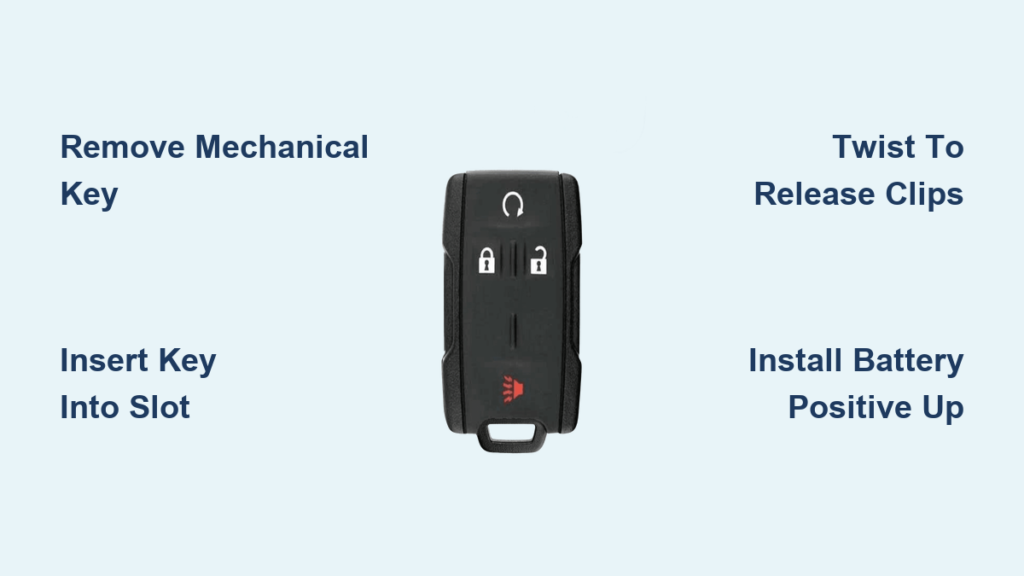
Press the small silver button on the side of the fob and pull the metal key straight out. This reveals a slot where the key was housed, and this slot is your entry point for opening the case.
Insert the Key Into the Release Slot
Take the extracted key and slide its tip into the slot left behind. Angle it slightly and apply gentle pressure.
Twist to Release the Clips
Twist the key sideways, like turning a tiny lever. You will hear a soft “crack” or “click” as the internal clips disengage. That sound means success, not damage. The housing is designed to release this way.
Separate the Two Halves
Once the clips release, carefully pull the two casing halves apart. They should come apart smoothly. Avoid yanking, since prying too hard can break the plastic tabs that hold everything together.
Open 2019–2022 and Older Remotes

Extract the Key Blade
Press the release button and remove the mechanical key, just like with the newer models.
Flip the Fob Button-Side Down
Place the fob on your workspace with the buttons facing down. This exposes the seam along the top or side where the key was inserted.
Use the Key or Screwdriver to Pry
Insert the tip of the mechanical key, or a small flathead screwdriver, into the seam near the key slot. Apply light upward pressure while gently twisting.
Pop Open the Case
The housing will begin to separate. Work slowly around the edge if needed, but one twist is often enough. Older flip-style fobs may require prying along the entire seam to release all the clips.
Open Older Flip-Style Fobs (2007–2013)
Locate the Seam
These models do not have a removable key blade. Instead, the entire key flips open. Look for a visible seam running around the perimeter of the fob.
Slide a Tool Into the Groove
Use the edge of a coin or the flat side of a key to slide into the gap at the base of the fob.
Gently Pry Until It Opens
Apply steady pressure to pop the two halves apart. These models use fewer clips, so they typically open more easily than newer smart fobs.
Replace the Battery Safely

Remove the Old Battery
With the case open, locate the circular battery compartment. Use the mechanical key or a plastic tool to gently lift the battery out. Some 2023–2026 models have small notches at the top of the compartment that are perfect for sliding the key underneath to lever the battery out.
Avoid touching the circuit board contacts with metal tools to reduce the risk of shorting or damaging the electronics.
Check Battery Orientation
This step is critical. The positive (+) side must face up in nearly all Chevy Silverado key fobs. If the plastic housing has a “+” marking or a “GM” label, align the battery accordingly.
One source suggests negative-up for 2019–2022 models, but multiple verified sources confirm positive-up as the standard. When in doubt, check the internal markings or match the orientation of the old battery before removing it.
Insert the New Battery
Slide the CR2032 (pre-2020) or CR2450 (2020+) battery into place with the + side facing the back cover. Press down until it clicks into position. It should sit flush with no wobble.
Reassemble Without Damage

Align the Halves Correctly
Match the front and back halves precisely. The internal guides and clips must line up like puzzle pieces. Misalignment can cause cracks or poor sealing.
Snap Together Firmly
Press around the edges until you hear multiple snaps. The casing should close completely with no gaps. Run your finger along the seam to verify it is flush all the way around.
Reinsert the Mechanical Key
Slide the metal key back into its slot until it clicks and locks. If it does not seat fully, reopen the fob and check for misaligned components inside.
Test All Functions Immediately
No Programming Needed
Once reassembled, your key fob works right away. No reprogramming, syncing, or pairing is required for any model from 2007 to 2026.
Verify Every Button
Test each function on your fob:
- Lock
- Unlock
- Remote start (if equipped)
- Tailgate release (if equipped)
Check Signal Range
Step 10 to 15 feet away and test again. A weak signal may indicate improper battery seating or a defective new battery.
Troubleshoot Common Issues
Fob Doesn’t Work After Replacement
Battery Installed Upside Down
Flip it. The vast majority of post-replacement failures are due to incorrect orientation. Positive (+) must face up.
Battery Not Fully Seated
Remove and reinsert the battery, pressing firmly until it clicks into place.
Damaged Contacts
Inspect for bent terminals or debris. Clean gently with a dry cotton swab if needed.
Intermittent Response
This could indicate a low-quality or old-stock battery. Replace it with a fresh, name-brand CR2032 or CR2450.
Casing Won’t Close Properly
Reopen and check the following:
- No tools left inside
- Circuit board not shifted
- Clips not broken
Apply even pressure when snapping shut. Do not force one corner.
Prevent Future Battery Failure
Typical Lifespan
Expect 3 to 4 years of normal use. Cold climates shorten battery life due to increased electrical resistance.
Signs of a Dying Battery
- Need to press buttons multiple times
- Reduced operating range
- Delayed door lock response
Replace the battery at the first sign of weakness.
Avoid Premature Drain
Accidental button presses in pockets or bags drain batteries fast. Store your fob in a protective case or pouch when not in use.
Dispose of Old Batteries Properly
Lithium coin cells are recyclable. Do not throw them in household trash. Most auto parts stores, pharmacies, and electronics retailers offer free drop-off bins for used batteries.
Know When to Replace the Fob
If a new battery does not restore function and the fob still fails to respond, the circuit board may be damaged. Consider whether the fob has experienced:
- Water exposure
- Physical impact
- Age-related wear
Replacement fobs can be programmed via the vehicle or by a dealer, but battery issues are far more common and far cheaper to fix.
Frequently Asked Questions About Chevy Silverado Key Fobs
What battery does a Chevy Silverado key fob use?
Pre-2020 Silverado key fobs use a CR2032 battery, while 2020 and newer models use a CR2450 battery. These are not interchangeable, so always verify which type your fob requires before purchasing a replacement.
Do I need to reprogram my key fob after changing the battery?
No. Chevy Silverado key fobs do not require reprogramming after a battery swap. Once you reassemble the fob with a fresh battery, it should work immediately with all standard functions.
Which way does the battery go in a Chevy Silverado key fob?
The positive (+) side of the battery must face up toward the back cover in nearly all Chevy Silverado key fobs. Check for a “+” marking or “GM” label inside the battery compartment to confirm orientation before installing the new battery.
Can I open my key fob without tools?
Yes. The mechanical key stored inside the fob is designed to be the primary opening tool. Simply remove the key, insert it into the revealed slot, and twist gently to release the internal clips.
How long does a Chevy Silverado key fob battery last?
A typical key fob battery lasts 3 to 4 years under normal use. Cold climates and frequent accidental button presses can shorten this lifespan significantly.
What should I do if my key fob still doesn’t work after replacing the battery?
First, check that the battery is installed with the positive (+) side facing up. Next, make sure the battery is fully seated and making contact with the terminals. If the fob still does not respond, inspect the contacts for damage or debris and clean them gently with a dry cotton swab.
Key Takeaways for Opening Your Chevy Silverado Key Fob
Opening your Chevy Silverado key fob is a straightforward, tool-free task when you follow the right steps. Match the battery to your model year (CR2032 for pre-2020, CR2450 for 2020+), use the mechanical key to release the internal clips, install the new battery with the positive (+) side facing up, and snap the casing back together firmly.
With this guide, you can save time, save money, and avoid unnecessary service visits. Your next step is simple: grab the correct battery for your model year, set aside five minutes, and handle the replacement yourself before your current battery dies completely.