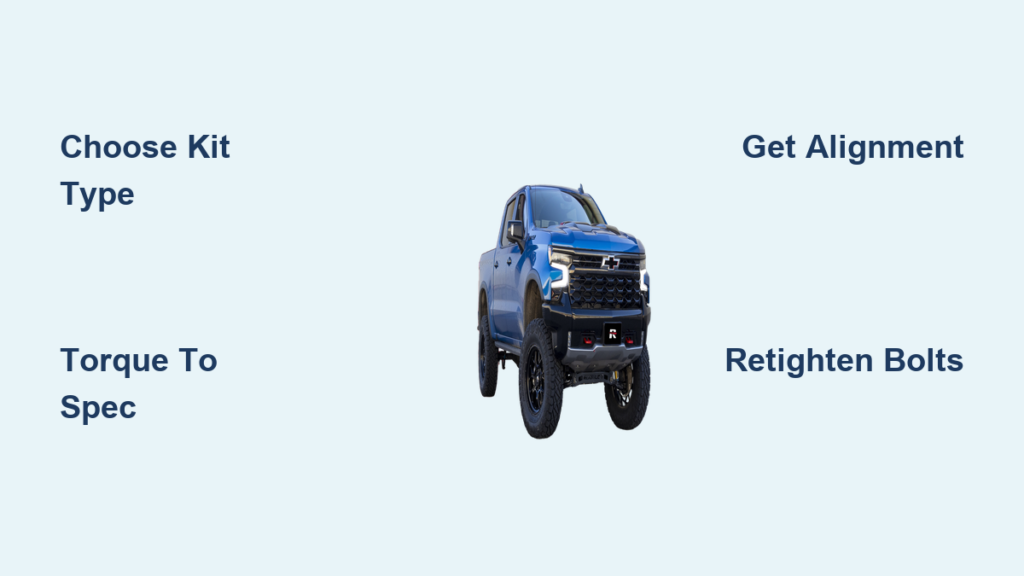
Your Chevy Silverado sits lower in the front than the rear straight from the factory, and that factory rake limits tire size and ground clearance. Installing a lift kit fixes both issues while giving your truck a more aggressive stance. Whether you want a simple 2-inch leveling kit or a full 7-inch suspension overhaul, this guide covers the entire process from planning to final calibration for Silverado models between 1999 and 2023.
You’ll learn exactly which tools to gather, how to handle front and rear installations for different lift heights, and why skipping steps like alignment or torque checks can lead to costly failures or unsafe driving conditions.
Choose the Right Lift Kit Type for Your Silverado

Match Kit Height to Your Driving Goals
Lift kits are not one-size-fits-all. Your Silverado’s generation, drivetrain, and intended use all determine which kit works best. Picking the wrong kit causes driveline vibrations, poor handling, or clearance problems.
- Leveling Kits (0–2 inches): These use front spacers on the strut assembly to eliminate factory rake. They fit up to 33-inch tires and work best on 2007–2018 models.
- Suspension Lifts (3–4 inches): These replace or modify control arms, shocks, and strut mounts. They require geometry corrections like drop brackets and fit 35-inch tires with minor trimming.
- High-Clearance Lifts (7–7.5 inches): These involve cutting frame mounts, dropping the differential, and replacing knuckles. They’re built for extreme off-roading with 35×12.50R20 or larger tires.
- Rear-Only Lifts: These use tapered blocks on leaf springs to level the rear with a lifted front or improve load stance.
Pro Tip: 2014–2018 Denali models have unique suspension geometry. Always verify kit compatibility before purchasing.
Assess Drivetrain Impact Before You Buy
Lifting your Silverado changes more than just ride height. Heavier wheels increase strain on brakes, axles, and fuel economy. A raised center of gravity makes the truck lean more in corners, so drive cautiously until you adjust to the new handling. Altered suspension also affects driveshaft and CV joint angles, and kits over 3 inches often require differential drop brackets to prevent vibrations. Finally, confirm the kit matches your Silverado’s generation (1999–2006, 2007–2013, 2014–2018, or 2019–2023) before ordering.
Gather Tools and Safety Equipment
Essential Tools for Any Lift Installation
No matter which lift height you choose, you need the right equipment to complete the job safely.
- Lifting Gear: Floor jack, high-capacity jack stands, and wheel chocks
- Hand Tools:
- Metric sockets ranging from 8mm to 35mm
- 1/4-inch, 3/8-inch, and 1/2-inch drive ratchets
- Combination wrenches matching your socket sizes
- Specialty Tools:
- Torque wrench (critical for safety)
- Impact wrench (helpful for seized bolts)
- Reciprocating saw or angle grinder (for cutting mounts)
- Pry bar and hammer (for separating joints)
- Allen keys in 5/16-inch and 8mm sizes
- Channel locks and bungee cords
Prepare Consumables and Safety Supplies
You’ll also need penetrating oil for rusted U-bolts and shock mounts, Red Loctite to secure studs in spacers, WD-40 to lubricate ABS and sensor wires, rust inhibitor and paint for cut metal edges, and safety gear including gloves, eye protection, and work clothes.
Warning: Never work under a vehicle supported only by a jack. Always use jack stands rated for your truck’s weight.
Install Front Suspension Components
Add Spacers for 2-Inch Leveling Kits
This method is the fastest way to level your Silverado’s front end and works on most 2007–2018 models.
Remove the Strut Assembly
- Chock the rear wheels, jack up the front, and secure the frame on jack stands.
- Remove the front wheels.
- Disconnect the brake line brackets using 10mm bolts and unclip the ABS sensor.
- Remove the sway bar end link with a 15mm wrench.
- Loosen the tie rod nut (21mm), then strike the knuckle to pop the tie rod free.
- Remove the upper control arm nut (18mm) to separate the ball joint.
- Remove the two lower strut bolts (15mm) and three upper nuts (18mm) in the engine bay.
- Pull out the full strut assembly.
Install the Spacer and Reassemble
- Lay the strut on a bench. Insert the supplied studs into the spacer with Red Loctite.
- Cut excess stud length flush and re-thread nuts to clean the threads.
- Place the spacer on top of the strut with the flat side up. Only one orientation fits.
- Secure with new nuts using a 17mm socket.
- Reinstall the strut by starting the front upper nut loosely, then tightening the rear two.
- Reattach the lower strut to the control arm.
- Reconnect the ball joint and tighten the 18mm nut.
- Reinstall the tie rod and 21mm nut. Hold the stud below if it spins.
- Reconnect the sway bar link and brake lines.
Time Estimate: Plan for about 2 hours if this is your first installation.
Replace Components for 3.5–4 Inch Lifts
These kits modify geometry to maintain ride quality and steering performance at greater heights.
Modify Strut Mounts for Rough Country 3.5-Inch Kits
- Cut the factory upper strut mount halfway through using a reciprocating saw.
- Reinstall the mounting bolts before cutting to protect the threads.
- Remove the old mount and install the new lift spacers from the kit.
- Reattach the strut and ensure the bolt lock tip is fully engaged.
Install New Control Arms
- Remove the factory upper and lower control arms.
- Install new lift-specific arms with upgraded bushings.
- Torque all bolts to spec immediately. Do not wait.
Troubleshoot Belltech 4-Inch Fitment Issues
If the sway bar rubs the frame, check the ring and spacer configuration. Repositioning or swapping spacers may require full disassembly. Measure your lift height to confirm you hit the target of 29 inches in the front (center hub to fender) and 26.25 inches in the rear.
Expert Note: Geometry correction is critical. Skipping drop brackets leads to premature CV joint wear and vibrations.
Perform Frame Modifications for 7+ Inch Lifts
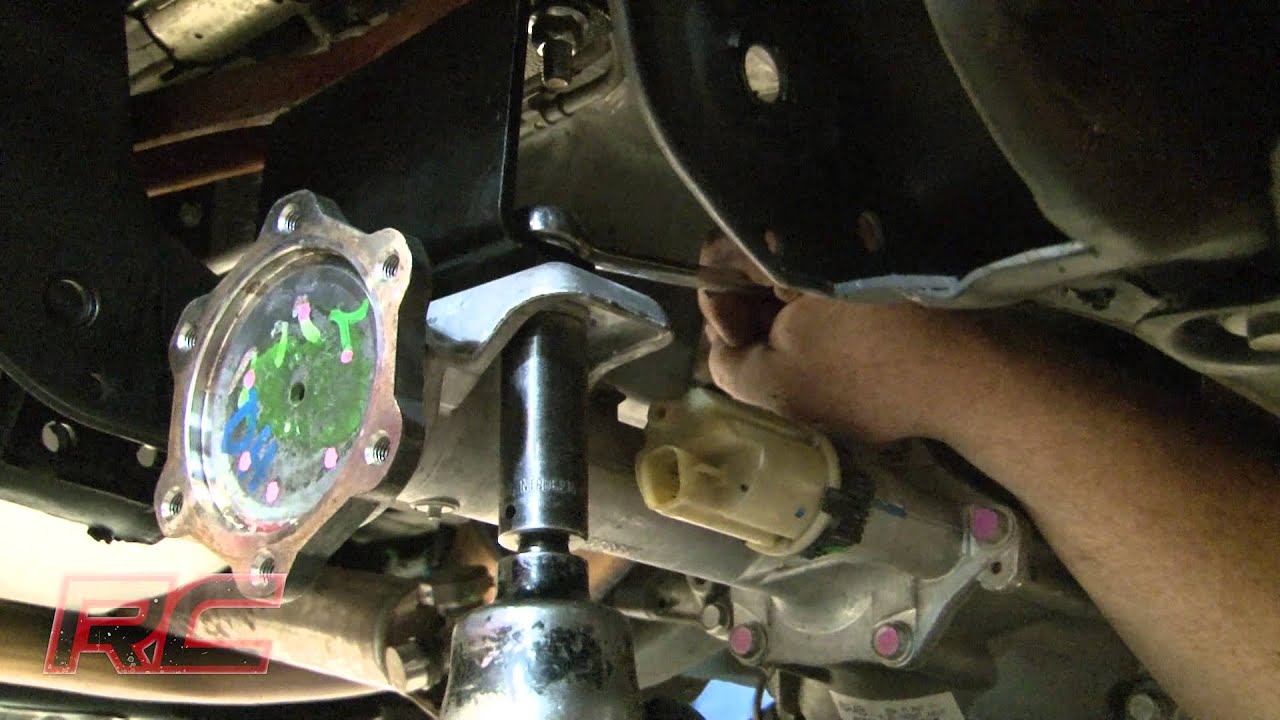
This is advanced work where cutting errors can compromise frame integrity.
Disassemble the Front End
- Remove the wheels, skid plates (15mm), and disconnect the electric power steering harness.
- Unplug the ABS and brake lines, then remove the calipers (18mm) and rotors (30mm).
- Remove the 35mm axle nut and separate the upper (18mm) and lower (24mm) ball joints.
- Pull the knuckle, lower control arms, and sway bar links.
Cut the Frame and Differential
- Mark the steering shaft and pinion for realignment.
- Remove the rack and pinion carefully.
- Disconnect the driveshaft (11mm) and unplug the actuator.
- Lower the differential slowly with a floor jack.
- Remove the factory cross members.
- Cut 3 3/8 inches from the control arm pocket ends.
- Trim the rear lip of the rear pockets flush.
- Cut the front ear off the passenger-side differential.
- On 2007–2013 models, cut 3/4 inch from the driver-side rear control arm pocket.
Reinstall Structural Parts
- Install the differential drop brackets with the open side facing the truck center.
- Mount the new front and rear cross members using 4.5-inch and 5.5-inch bolts.
- Torque cross member bolts to 175 ft-lbs.
- Torque the center differential bracket to 90 ft-lbs.
- Reinstall the differential and rack and pinion using your alignment marks.
Rebuild the Knuckle and Axle
- Transfer the bearing from the factory knuckle to the new lifted knuckle (15mm).
- Trim the brake shroud for caliper clearance.
- Install the knuckle and tighten the ball joints (24mm lower, 18mm upper) plus the axle nut to 155 ft-lbs.
- Install the CV spacer between the axle and differential. Use a pry bar to stop spin.
- Torque CV bolts to 35–45 ft-lbs in a crossing pattern with Loctite.
- Reconnect the driveshaft using your clocking marks.
Warning: Misaligned driveshaft causes severe vibrations. Double-check clocking before torquing.
Upgrade the Rear Suspension

Replace Lift Blocks and Shocks
The rear lift is simpler than the front but still requires precision torque.
Prepare the Axle
- Chock the front wheels.
- Remove the rear brake line brackets (13mm) and loosen the e-brake cables.
- Disconnect VSS wires if they’re tight.
- Jack up the frame, support with stands, and lower the axle slightly.
- Remove the wheels and stock shocks (21mm).
Install Tapered Lift Blocks
- Remove the stock U-bolts and flat laminated block.
- Identify the taper. The narrow end faces the front.
- Align the knurled knob with the hole in the axle housing.
- Use a pry bar to seat the block fully.
- Slide in the new longer U-bolts.
- Install the stock plate (if used), washers, and lock nuts.
Torque U-Bolts Correctly
Hand-tighten initially. Then lower the vehicle or raise the axle to load the suspension. Torque the U-bolts in a cross pattern to 90 ft-lbs for 7-inch kits or 120 ft-lbs for some 4-inch or heavy-duty kits. Always verify with your kit manual.
Mount Extended Rear Shocks
- Install the new lifted shocks and note the orientation. Rough Country N3 shocks run piston-down.
- Tighten to factory specs.
- Lubricate the ABS wires with WD-40.
- Slide the rubber sleeves down, reattach the clips, and reroute for slack.
Common Mistake: Overtightening U-bolts before loading the suspension causes block shift and eventual failure.
Calibrate After Installation

Get a Professional Wheel Alignment
Skipping alignment causes rapid tire wear and unsafe handling. A professional alignment is non-negotiable after any lift installation.
Alignment Specs to Expect
- Caster: 4.5° to -1.0°
- Camber: 0.0° to -0.3°
- Toe In: 0.1° to 0.2°
Trim Tie Rods for High Lifts
On 7-inch and larger lifts, the inner and outer tie rods may need trimming. Cut 3/8 inch from the ends and smooth with a file. This allows the alignment to reach factory range.
Timing: Perform alignment within the first 50 miles of driving.
Follow a Retightening Schedule
Suspension parts settle under load. Missing this schedule leads to loose U-bolts or broken components.
Critical Torque Points to Verify
- Rear U-Bolts: 90–120 ft-lbs
- Cross Members: 175 ft-lbs
- Sway Bar Links: 90 ft-lbs
- Axle Nut: 155 ft-lbs
- CV Spacer Bolts: 35–45 ft-lbs
Retightening Milestones
- Immediately: After lowering the vehicle
- 50 miles: Recheck all suspension bolts, U-bolts, and lug nuts
- 500 miles: Full system re-torque
- Every 3,000 miles: Ongoing inspection
Perform Final Safety Checks
Test Steering and Clearance
- Turn the wheel fully left to right in a lock-to-lock steering test.
- Check that brake hoses don’t rub rotors or suspension components.
- Inspect rear lines at full extension.
- Verify space between tires and fenders, especially with negative offset wheels.
- Trim the front fender liner or lower skirting if needed (the “NorCal mod”).
- Ensure exhaust, fuel, and brake lines have no contact or pinching.
Verify 4WD and Electronics
- Activate 4WD and confirm the front hubs engage.
- Reconnect the differential vent tube without pinching it.
- Reattach all electrical connectors for steering, ABS, and speed sensor.
- Adjust headlights downward since a raised truck blinds oncoming traffic.
- Recalibrate the speedometer if you installed larger tires.
Apply the Warning Decal
Install the “Warning to Driver” decal on your sun visor. This is required by lift kit manufacturers for liability purposes.
Frequently Asked Questions About Installing a Lift Kit on a Chevy Silverado
How long does it take to install a lift kit on a Chevy Silverado?
A 2-inch leveling kit takes about 2 hours for first-time installers. A 3.5 to 4-inch lift requires 4–6 hours. A 7-inch lift with frame cutting and differential work takes 8 or more hours.
Do I need an alignment after installing a lift kit?
Yes, a professional alignment is mandatory after any lift installation. Misalignment causes rapid tire wear, unsafe handling, and steering pull. Schedule your alignment within the first 50 miles.
Will a lift kit affect my Silverado’s ride quality?
High-quality kits from brands like Belltech or Rough Country can maintain a soft, compliant ride similar to stock. Poorly installed kits or those lacking geometry correction cause harshness, bump steer, or vibrations.
What size tires can I run with different lift heights?
A 2-inch leveling kit fits up to 33-inch tires. A 3.5 to 4-inch lift accommodates 33 to 35-inch tires. A 7-inch lift is designed for 35×12.50R20 or larger tires, though minor trimming may still be required.
Can I install a lift kit myself or should I hire a professional?
Leveling kits and 3.5-inch kits are manageable for experienced DIYers with the right tools. Seven-inch lifts involve frame cutting and differential work that most people should leave to professionals.
How much does a lift kit cost for a Chevy Silverado?
Entry-level leveling kits like the MotoFab start around $60. Comprehensive 7-inch systems cost significantly more. Many reputable brands offer limited lifetime warranties.
Key Takeaways for Installing a Lift Kit on Your Chevy Silverado
Installing a lift kit transforms your truck’s capability and appearance, but precision matters at every step. Match your kit to your specific model year and driving goals before purchasing. Use the correct torque specs throughout the installation, especially for U-bolts, cross members, and axle nuts. Never skip the professional alignment or the retightening schedule at 50 and 500 miles.
Your next step is to verify your Silverado’s exact model year and drivetrain, then choose a kit designed for that generation. Gather your tools, set aside a full weekend, and follow each procedure carefully to ensure a safe, reliable lift that performs well on the trail and turns heads on the street.