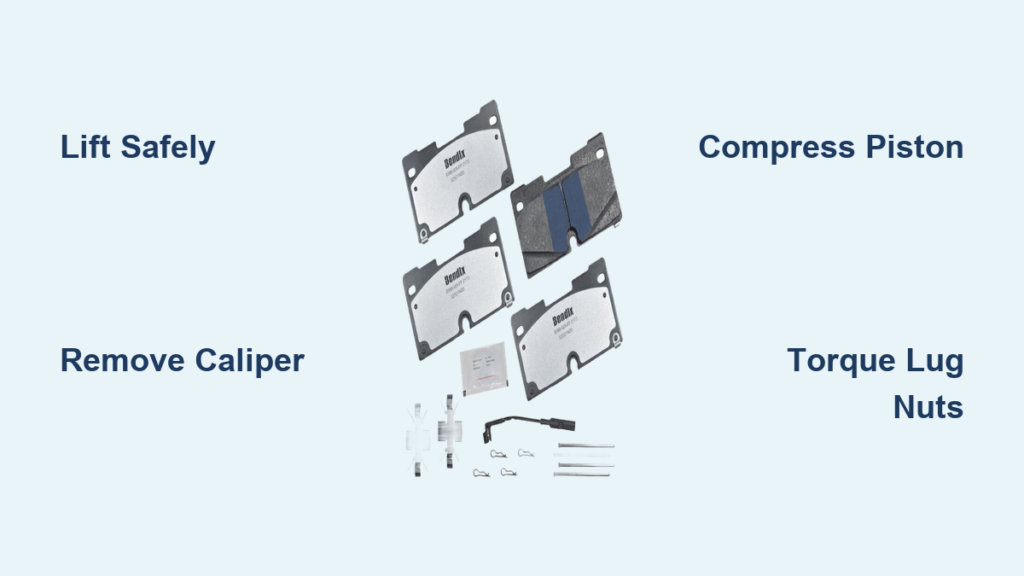
Hearing a high-pitched squeal every time you hit the brakes is your Chevy Silverado’s way of telling you something is wrong. Worn brake pads reduce stopping power, damage rotors, and put your safety at risk on the road. Ignoring the warning signs can lead to costly repairs or, worse, a dangerous driving situation.
This guide covers the full process of how to change brake pads on a Chevy Silverado, including rotor replacement, torque specifications, and pro tips for a long-lasting repair. Whether you drive a 1999 classic or a 2020 model, these steps will help you get the job done right the first time.
Gather Tools and Materials Before You Start
Having everything on hand prevents mid-job interruptions. Most of these tools are common in a home garage.
Essential Tools
You will need a floor jack, jack stands, and wheel chocks for safe lifting. A breaker bar, ratchet, and torque wrench are critical for proper fastener tightening. Sockets in 18mm, 19mm, 21mm, and 22mm sizes cover most Silverado models, and a T55 Torx bit may be required for slide bolts on certain years.
Chemicals and Consumables
Pick up brake cleaner, 100% silicone brake grease, and copper anti-seize. Shop towels, a wire brush, and nitrile gloves round out the list. Safety glasses are non-negotiable, as brake dust is hazardous.
Prepare Your Vehicle Safely
Before touching any tools, safety comes first. Working under a lifted truck is dangerous if proper precautions are not followed.
Park on a flat surface and engage the parking brake. Place wheel chocks behind the rear tires to prevent rolling. Wear safety glasses and nitrile gloves, since brake dust can be harmful and debris often flies during disassembly.
Use a floor jack to lift the front of the Silverado at the manufacturer-recommended lift point, usually the lower control arm or front axle. Once raised, support the vehicle securely on jack stands. Never rely solely on the jack. Only after the truck is stable should you remove the front wheels.
Remove the Wheel and Inspect Components
Loosen Lug Nuts Before Lifting
With the truck still on the ground, break loose the lug nuts using a 21mm or 22mm socket and breaker bar. Some models, like 2014–2018 trucks, may require a 19mm socket. Remove the center cap first if equipped.
After lifting and securing the truck, finish removing the lug nuts and pull the wheel straight off. Set it aside where it will not roll.
Inspect for Visible Wear
Now that the brake assembly is exposed, look for obvious problems:
– Thin pads with less than 1/8 inch of friction material
– Deep grooves or cracks in the rotor surface
– Brake fluid leaks near the caliper
These signs confirm it is time for a full pad and rotor replacement.
Remove the Caliper and Old Brake Pads

Unbolt the Caliper Slide Bolts
Locate the two caliper slide bolts at the back of the caliper. These are typically 18mm or require a T55 Torx bit. Use a breaker bar if they are rusted or tight.
Remove both bolts completely and set them aside in a safe place. They are small but critical for proper caliper function.
Hang the Caliper Properly
Lift the caliper straight off the bracket. Do not let it dangle by the brake hose. This can damage internal seals and lead to costly hose failure.
Use a caliper hanger or a sturdy bungee cord to suspend it from the suspension. Keep tension off the brake line at all times.
Extract the Old Brake Pads
With the caliper out of the way, slide the old brake pads out of the mounting bracket. Most Silverados use spring clips or metal shims, so keep them if they are in good condition.
Inspect the pad wear indicator. If it is making contact, that explains any squealing you heard while driving.
Take Off the Caliper Bracket and Rotor
Remove the Mounting Bracket Bolts
The caliper mounting bracket is held by two large bolts, usually 21mm for 1999–2007 models. Remove both with a socket and ratchet.
Once loose, slide the bracket off the hub. You may need to wiggle it free if rust has built up over time.
Pull Off the Old Rotor
Grasp the rotor and pull it straight off the hub. If it is stuck due to corrosion, tap around the edge with a rubber mallet. You can also thread two M10x1.25 bolts into the small holes on the rotor face and tighten them evenly to push the rotor off.
Never strike the rotor with a metal hammer if you plan to reuse it.
Clean and Prep the Hub for the New Rotor
Wire Brush the Hub Surface
Rust buildup between the hub and rotor causes vibrations and uneven wear. Use a wire brush to clean the entire hub face until you see bright metal.
Pay attention to the lug bolt studs and wipe them clean as well.
Apply Anti-Seize to Prevent Future Sticking
Coat the hub surface with a thin layer of copper anti-seize or silicone brake grease. This prevents the new rotor from fusing to the hub over time.
Important: Keep lubricant off the rotor’s braking surface. Wipe any overspray immediately to avoid contamination.
Install the New Rotor and Reattach the Bracket

Mount the New Rotor
Place the new rotor onto the hub. It should slide on smoothly. To keep it from falling off during reassembly, thread one lug nut onto a stud and snug it by hand.
Pro Tip: New rotors come coated with oil for rust protection. Wipe both sides thoroughly with brake cleaner and a shop towel before installation. Overspray can damage paint, so shield nearby areas.
Reinstall the Caliper Bracket
Position the mounting bracket back over the rotor and hub. Insert the two large bolts and hand-tighten them.
Use a torque wrench to tighten to 120 ft-lbs. This ensures even clamping force and prevents warping.
Lubricate and Install New Brake Pads
Grease Contact Points for Smooth Operation
Apply 100% silicone brake grease to the back of the pad ears where they contact the bracket, the metal shims or clips, and the caliper slide pin bores.
Do not lubricate the friction surface or the piston side unless specified by the pad manufacturer.
Insert the New Pads
Slide the new pads into the bracket with the correct orientation. Usually the wear sensor faces inward toward the rotor. Reinstall any clips or anti-rattle hardware you removed earlier.
Compress the Caliper Piston
Why Piston Compression Is Critical
Brake pads wear down over time, causing the caliper piston to extend. New pads are thicker, so you must push the piston back into the caliper to fit.
Failure to do this means the caliper will not seat over the new rotor and pads.
Best Method: Open the Bleeder Valve
For high-mileage trucks, the safest way is to open the bleeder valve:
1. Attach a one-man bleeder tool or clear tube to the caliper bleeder valve
2. Open the valve slightly by turning counter-clockwise
3. Use a C-clamp or brake caliper compressor with an old pad to push the piston in
4. Close the bleeder valve once the piston is flush
This prevents pushing dirty brake fluid back into the ABS module.
Alternative: If you choose not to open the valve, compress slowly while monitoring the master cylinder fluid level. Do not let it overflow.
Reinstall the Caliper and Final Assembly
Slide the Caliper Back Into Place
Position the caliper over the new pads and rotor. Align the holes with the bracket.
Insert the two slide bolts and hand-start them to avoid cross-threading.
Torque Slide Bolts to 90 ft-lbs
Use a torque wrench to tighten the caliper slide bolts to 90 ft-lbs. Over-tightening can strip threads or seize the pins.
Grease the bolts before installation to prevent corrosion and ensure even torque.
Reattach the Wheel and Lower the Truck
Hand-Tighten Lug Nuts
Put the wheel back on and snug the lug nuts by hand. Make sure the wheel sits flush against the rotor.
Lower Vehicle to Ground
Carefully raise the truck slightly to remove the jack stands. Then lower it completely.
Never torque lug nuts while the truck is in the air. This can misalign the rotor and cause wobble.
Final Lug Torque in Star Pattern
Use a torque wrench and tighten the lug nuts to 120 ft-lbs in a star pattern. This ensures even pressure and prevents warping.
Use a 22mm socket for final tightening if your model requires it.
Test and Verify Braking Performance
Pump the Brake Pedal
Before starting the engine, press the brake pedal several times. It will feel soft at first. Keep pumping until it becomes firm.
This rebuilds hydraulic pressure in the brake lines.
Check for Sponginess
If the pedal stays spongy, air is in the system. You will need to bleed the brakes using a one-man bleeder tool or with a helper.
Look for any fluid leaks around the caliper or bleeder valve.
Repeat on the Other Side
Always Replace in Pairs
Change both front brake pads and rotors at the same time. Even if one side looks better, uneven wear leads to pulling and reduced braking efficiency.
Follow the same steps on the opposite wheel.
Use this opportunity to inspect rear brakes, suspension components, and brake lines for wear.
Bed-In New Brake Pads and Rotors
Why Bedding-In Matters
New pads and rotors need to form a consistent transfer layer for optimal performance. Skipping this step can lead to glazing, noise, and reduced stopping power.
Proper Break-In Procedure
- Drive at 35 mph and apply moderate brake pressure to slow to 5 mph. Repeat 5–7 times.
- Allow 10–15 minutes of cooling with no hard stops.
- Perform 3–5 aggressive stops from 50 mph to 20 mph.
- Let brakes cool completely for 30+ minutes before heavy use.
Avoid hard stops or parking on a hill during the first 200 miles.
Troubleshooting Common Issues

Brake Pulsation After Replacement
Likely causes include a dirty hub surface, uneven lug nut torque, or a warped rotor. Recheck hub cleanliness and retorque lugs in a star pattern.
Squealing Brakes with New Pads
Possible reasons include missing anti-rattle clips, no lubrication on contact points, or pads that need bedding-in. Apply grease to all metal-to-metal contact areas except friction surfaces.
Soft or Spongy Pedal
This means air is in the brake lines. Bleed the front calipers starting with the passenger side, which is farthest from the master cylinder.
Pro Tips for Long-Lasting Brakes
Prevent Common Failures
Lubricate slide pins every time you change pads, since seized pins cause uneven wear and brake drag. Inspect caliper boots for cracks, and replace the caliper if rubber is damaged. Replace worn brackets if pad contact points are pitted or rusted.
Extend Brake Life
Avoid riding the brake on downhill drives and use engine braking on long descents. Clean brake dust regularly to reduce corrosion on components.
Frequently Asked Questions About Changing Brake Pads on a Chevy Silverado
How often should brake pads be replaced on a Chevy Silverado?
Brake pads typically last between 25,000 and 50,000 miles, depending on driving habits and conditions. Frequent towing, heavy loads, or city driving will shorten pad life. Inspect pads annually or whenever you notice warning signs.
Can I change just the brake pads without replacing the rotors?
You can, but it is not recommended for 1999–2007 Silverados since pads and rotors wear at similar rates. Installing new pads on worn rotors reduces braking performance and shortens pad life. Replacing both together ensures balanced braking.
What size socket do I need for Silverado lug nuts?
Most Silverado models use a 21mm or 22mm socket for lug nuts. However, 2014–2018 models may require a 19mm socket. Always verify with your owner’s manual before starting.
Why does my brake pedal feel soft after replacing pads?
A soft pedal usually means the caliper piston was not fully compressed or air entered the brake lines. Pump the pedal several times to restore pressure. If it remains spongy, bleed the brakes to remove trapped air.
Do I need to replace brake pads on both sides at the same time?
Yes, always replace pads and rotors in pairs on the same axle. Uneven braking between sides causes the truck to pull during stops and reduces overall safety. Match components for consistent performance.
What torque should I use for caliper bolts on a Silverado?
Tighten caliper mounting bracket bolts to 120 ft-lbs and caliper slide bolts to 90 ft-lbs. Lug nuts should also be torqued to 120 ft-lbs in a star pattern. These specs apply to most 1999–2007 models, though you should verify for your specific year.
Key Takeaways for Changing Brake Pads on Your Chevy Silverado
Changing brake pads on a Chevy Silverado is a manageable DIY job when you follow the right steps. Focus on safety by using jack stands, never hanging the caliper by the brake hose, and torquing all fasteners to spec. Replace pads and rotors in pairs to maintain balanced braking, and always bed-in new components for optimal performance.
Your next step is to gather your tools, order quality pads and rotors, and set aside a few hours for the job. Test your brakes at low speed in a parking lot before heading onto the road, and enjoy the confidence of knowing your Silverado will stop safely when you need it most.