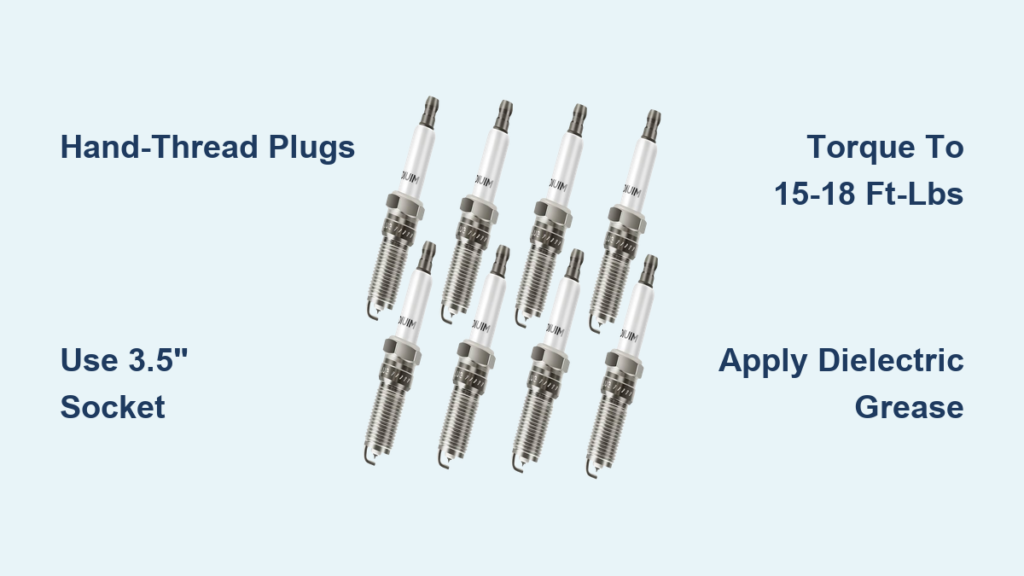
Changing spark plugs in your Chevy Silverado is one of the smartest maintenance moves you can make, especially as your truck approaches 100,000 miles. For 2014–2025 models with EcoTec3 V8 engines (5.3L, 6.2L, and 6.0L), the job uses a Coil-On-Plug (COP) system where individual coils sit directly over each plug. The front cylinders are easy to reach, but the rear two, especially cylinder #8 on the passenger side, demand special tools and technique due to tight firewall clearance.
The good news? With the right approach, most Silverado owners finish this job in 1.5 to 3 hours and save $200 to $400 in labor costs. This guide covers every step, from selecting ACDelco 41-114 plugs to torquing them correctly, so you can restore smooth idling, eliminate misfires, and keep your truck running strong.
Essential Tools and Setup
The K2XX engine bay is tight, so precision tools matter more than brute force. Before touching anything, gather your equipment.
Must-Have Tools
You need a 3/8″ or 1/2″ ratchet paired with magnetic swivel spark plug sockets. A 6″ magnetic swivel socket handles cylinders 1–6, while a 3.5″ magnetic swivel socket is mandatory for cylinder #8 because longer sockets won’t clear the firewall. Add a 1″ or 1.5″ extension and a U-joint for angled access in confined spots.
A torque wrench is non-negotiable. Aluminum cylinder heads strip easily if you over-tighten, and most Silverados require 15–18 ft-lbs. Other essentials include a T15 Torx bit for engine covers, a breaker bar for stubborn plugs, a boot puller tool to avoid damaging coil wires, and dielectric grease to seal out moisture.
Safety and Prep Steps
- Disconnect the negative battery terminal to prevent accidental starts or electrical shorts.
- Put on safety glasses and gloves. Debris and sharp edges are common under the hood.
- Remove the engine cover with the T15 Torx driver to expose the coils.
- Clean around each coil with compressed air or a brush so dirt doesn’t fall into the cylinder when you remove the plugs.
Accessing Rear Spark Plugs

The biggest challenge in changing Silverado spark plugs is reaching cylinders 7 and 8, especially #8 on the rear passenger side. Top-down access simply won’t work.
Fender Well Access Method
The best approach is to access cylinder #8 through the driver’s side fender well. Start by removing the front fender liner on the passenger side using a screwdriver or trim tool to release the plastic clips. Pull back the liner to expose the spark plug area from the side. Then use the 3.5″ swivel socket with a short extension and U-joint to angle into the plug hole. This side approach gives you critical extra inches of clearance that top-down access cannot.
Lifted Truck Advantage
If your Silverado has a suspension lift, remove the exhaust manifold heat shield on the passenger side. This opens a direct path to the rear plugs and makes the job dramatically easier. Many DIYers describe it as a “night and day” difference. Even without a lift, removing the fender liner fully can help, so don’t skip this step for cylinder #8.
Removing Ignition Coils

Each spark plug sits beneath an ignition coil held down by a single bolt.
Step-by-Step Coil Removal
- Unplug the electrical connector on each coil by pressing the release tab and pulling straight out.
- Remove the 10mm bolt securing the coil using a ratchet or cordless impact driver.
- Use a boot puller or grip only the rubber boot. Never yank the wire, since pulling the wire can break internal conductors and cause misfires.
- Set coils aside in order if reusing them, though COP systems don’t require specific routing like old wire sets.
Wire-Based Systems (6.0L and Older)
Some 6.0L engines or older configurations use spark plug wires. Twist and pull the boot gently, and never pull on the wire. Inspect wires for cracks, burns, or brittleness. Replace them if the truck has over 80,000 miles or shows signs of wear. ACDelco 748UU is the correct wire set for 6.0L engines.
Extracting Old Spark Plugs
With the coils removed, it’s time to pull the old plugs.
Tool Setup for Each Cylinder
Use the 6″ magnetic swivel socket with a standard extension for cylinders 1–6. For cylinder #8, switch to the 3.5″ swivel socket with a 1″ extension, and add a U-joint if you need a better angle.
Safe Removal Technique
- Place the socket over the plug and gently rock it to ensure full engagement.
- Use steady pressure with a ratchet or impact driver to break the plug loose.
- If the plug is stuck, apply penetrating oil around the base when the engine is cold. Wait 10–15 minutes before trying again, and use a breaker bar for extra leverage.
- Once loose, unscrew completely by hand or with the ratchet.
- Inspect each removed plug. Sooty black deposits suggest a rich fuel mixture, while wet oily residue points to valve seal or piston ring issues. Excessive gap or erosion means replacement was overdue.
Gapping and Prepping New Plugs

Even pre-gapped plugs should be checked because factory settings can shift during shipping.
Correct Plug Gaps
For 5.3L and 6.2L engines, the gap is typically .040″ or .060″. For 6.0L engines, confirm in the owner’s manual, often .045″. Always verify with your vehicle’s manual or the emissions label under the hood.
How to Gap Spark Plugs
- Use a wire-style feeler gauge or gap tool.
- Insert the correct thickness into the electrode gap.
- If the gap needs adjustment, gently bend the L-shaped ground electrode. Never touch the center electrode, since damage to the porcelain insulator can cause misfires.
- Recheck after adjustment.
Applying Dielectric Grease
Apply a small dab of dielectric grease inside the rubber boot of the coil or wire. This prevents moisture intrusion and makes future removal easier. Do not over-apply, since excess grease can attract dirt.
Anti-Seize: Use With Caution
Only apply anti-seize if the plugs don’t have a factory coating. Use a tiny amount on the threads, not the electrode or tip. Overuse can affect heat dissipation and lead to pre-ignition.
Installing New Spark Plugs
This is where most DIYers risk costly damage, so hand-threading is critical.
Hand-Thread Every Plug
- Place the plug in the socket.
- Insert it into the cylinder head and turn by hand using the extension as a handle.
- The plug should spin freely for at least 2–3 full turns.
- If you feel resistance, stop. You may be cross-threading.
- Back out and try again, and never force it.
Torquing to Spec
Once hand-tight, use a torque wrench to tighten to 15–18 ft-lbs. If you don’t have a torque wrench, tighten until the washer seats, then give 1/8 to 1/4 turn more. Use only one hand on the ratchet head, not the full handle. Over-torquing can strip aluminum threads and require expensive repairs.
Reinstalling Coils and Final Checks
With the plugs in place, reassembly is straightforward.
Reattaching Coils
- Push each coil boot firmly onto the new plug until it clicks or snaps.
- Reinstall the 10mm bolt and tighten securely without over-torquing.
- Reconnect the electrical connector until it locks in place.
- Repeat for all eight cylinders.
Reinstall Removed Components
Replace any heat shields or brackets removed for access. Reinstall the fender liner, ensuring the front tabs snap into place before screwing. Reattach the engine cover using the T15 Torx bit, then reconnect the negative battery terminal.
Starting and Testing the Engine
After reassembly, verify your work.
Initial Start-Up
Turn the key and start the engine. Listen for smooth idling with no hesitation, shaking, or misfiring. If the engine runs rough, shut it off immediately and recheck connections, plug gaps, and coil seating.
Post-Installation Checks
Confirm no warning lights appear, especially check engine codes like P0300 series misfires. Inspect for exhaust leaks if you disturbed heat shields. Take a short test drive to assess throttle response and acceleration.
Troubleshooting Common Issues
Even careful work can go wrong, so here’s how to fix problems fast.
Plug Won’t Come Out
Carbon buildup or previous over-torquing is usually the cause. Use a breaker bar with steady pressure and apply penetrating oil if the engine is cold. Avoid using heat, since nearby plastic can melt.
Misfire After Replacement
Common causes include incorrect gap, loose coil connection, or a damaged boot or wire. Recheck the gap on all plugs, ensure coils are fully snapped on, and inspect for cracked boots or frayed wires.
Water in Fender Well
Clogged windshield drain tubes often empty into the fender pocket. Clear the drains with a wire or air compressor, remove wet sound-deadening material, and check drainage annually to prevent future issues.
Cross-Threaded Spark Plug
If you feel sudden resistance during hand-threading, stop immediately. Do not force the plug. Repair may require a thread chaser or professional helicoil repair.
Maintenance Tips and Longevity
Keep your Silverado running strong with these proactive steps.
Follow the 100,000-Mile Rule
OEM ACDelco Iridium plugs (41-114 for 5.3L/6.2L) are designed to last 100,000 miles. Delaying replacement increases the risk of plug seizure in aluminum heads. After 100k miles, removal becomes exponentially harder.
Replace Wires with Plugs
Even in COP systems, some engines use wires for certain cylinders. Replacing wires at the same time is a low-cost preventive measure. Use ACDelco 758EE for 5.3L/6.2L or 748UU for 6.0L.
Prevent Corrosion
Clean the fender well debris pocket every 12–18 months. Remove leaves, acorns, and pine needles that trap moisture. This prevents rust on the firewall, engine mounts, and coil connectors.
Cost Breakdown and DIY Savings
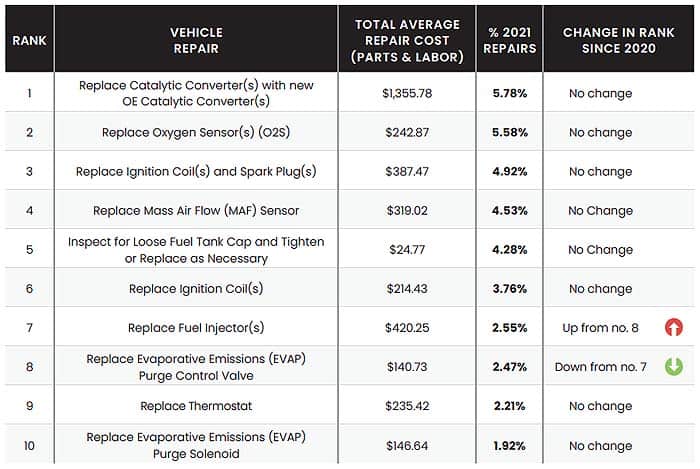
Doing this job yourself pays off significantly.
Parts Cost
| Item | Price Range |
|---|---|
| ACDelco 41-114 (per plug) | $8–$15 |
| Full set (8 plugs) | $64–$120 |
| Dielectric grease | $5–$10 |
| 3.5″ swivel socket | $15–$25 |
| Total (one-time tools + parts) | ~$100–$170 |
Labor Savings
Dealership or shop labor runs $200–$400. DIY cost is only your time and tools. First-timers should allow 2–3 hours, while future changes take under 90 minutes.
Frequently Asked Questions About Changing Spark Plugs in a Chevy Silverado
What tools do I need to change spark plugs on a Chevy Silverado?
You need a 3/8″ or 1/2″ ratchet, magnetic swivel spark plug sockets (6″ for front cylinders, 3.5″ for cylinder #8), extensions, a U-joint, a torque wrench, a T15 Torx bit, a breaker bar, dielectric grease, and safety glasses.
How often should I change spark plugs in a Silverado?
GM recommends replacing spark plugs every 100,000 miles for EcoTec3 engines. Delaying replacement increases the risk of plug seizure in aluminum cylinder heads.
What happens if I over-torque a spark plug?
Over-torquing can strip the aluminum threads in the cylinder head, which requires expensive repair or head replacement. Always torque to 15–18 ft-lbs or use the hand-tight plus quarter-turn method.
Why is cylinder #8 so hard to reach on a Silverado?
Cylinder #8 sits on the rear passenger side near the firewall with minimal clearance. Standard sockets won’t fit, so you need a 3.5″ magnetic swivel socket and side access through the fender well.
Can I use aftermarket spark plugs instead of ACDelco?
Aftermarket brands like Denso and NGK are viable alternatives, but they must match the OEM heat range and thread reach. ACDelco 41-114 remains the benchmark for fitment in GM trucks.
Do I need to replace spark plug wires on a Silverado?
COP systems on most 5.3L and 6.2L engines don’t use wires, but some 6.0L configurations do. Inspect any existing wires for cracks or brittleness, especially over 80,000 miles, and replace if needed.
Key Takeaways for Changing Silverado Spark Plugs Successfully
Changing spark plugs on a Chevy Silverado is a high-impact maintenance task that restores power, efficiency, and reliability. The front six cylinders are straightforward, but reaching cylinder #8 requires a 3.5″ swivel socket and fender well access. Always hand-thread new plugs to avoid cross-threading aluminum heads, torque to 15–18 ft-lbs, and apply dielectric grease inside the coil boots. Stick to OEM-spec ACDelco 41-114 plugs, gap them correctly, and follow the 100,000-mile interval to keep your Silverado running strong for years to come.