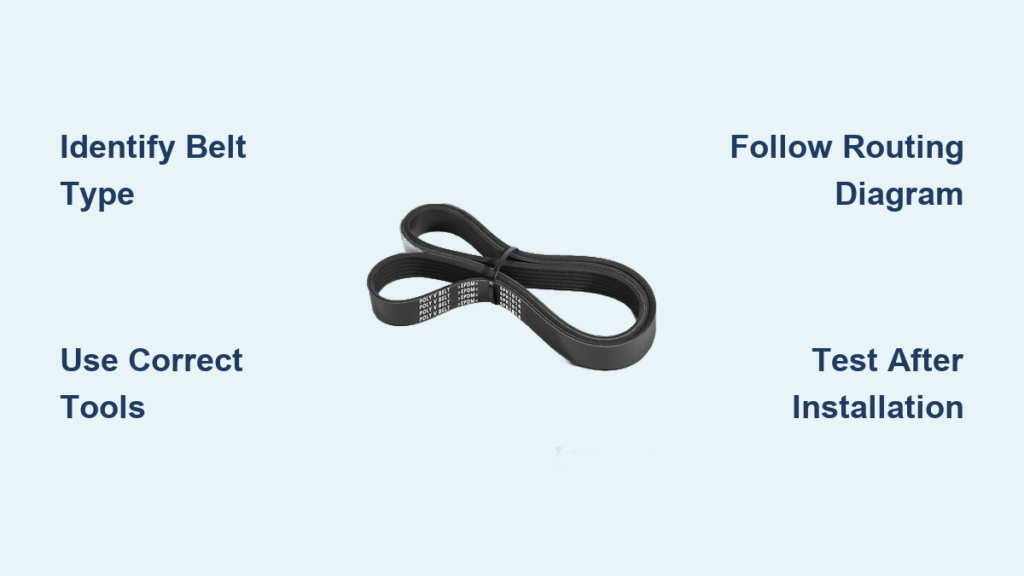
A failed serpentine belt can leave your Chevy Silverado stranded with no charging, no power steering, and no engine cooling. This single belt drives the alternator, water pump, power steering pump, and other critical accessories. Knowing how to replace it yourself saves money and prevents roadside emergencies. This guide covers every major Silverado generation from 1999 to 2020+, including the correct tools, routing sequences, and model-specific tips to get the job done right.
Identify Your Silverado’s Belt System
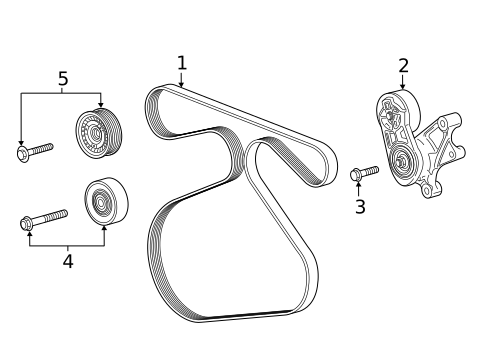
Before touching any tools, determine which belt system your truck uses. The replacement method changes dramatically between model years.
1999–2019 Models With Standard Tensioner
These trucks use a spring-loaded automatic tensioner pulley. You release tension with a breaker bar, slip off the old belt, and route the new one using leverage.
2020+ 5.3L Models With Stretch Belt System
This generation lacks a traditional tensioner entirely. The belt stretches onto the pulleys using a special GM tool. Standard socket sets will not work on this system.
Quick Identification Steps
Look under the hood near the alternator or water pump for a tensioner pulley. If you see one, your truck uses the standard system. If not, you likely have a 2020+ model with a stretch belt. Always verify the routing diagram, usually located on the radiator support, hood latch, or engine cover.
Gather Required Tools and Parts
Having the right equipment on hand prevents mid-job delays and mistakes.
Tools for 1999–2019 Models
You will need an 8 mm socket and ratchet for intake components, a 15 mm socket or wrench for the tensioner bolt, a breaker bar or half-inch drive ratchet to release tension, a torque wrench for final tightening, a flathead screwdriver for hose clamps, and a flashlight for visibility.
Tools for 2020+ Stretch Belt Models
You need the GM EN-51767-2 Universal Stretchy Belt Installer and the EN-51767-5 webbing strap. As an alternative, heavy-duty zip ties can work in emergencies, though some may break during installation. A socket set is still required to remove the splash shield.
Replacement Parts
Match the new belt to your engine using the OEM part number. Common options include Gates or NAPA FleetRunner Micro V belts. For 2014–2019 models, a new tensioner pulley is highly recommended to prevent premature belt wear.
Disconnect the Battery and Prepare the Engine
Safety comes first when working around the alternator and electrical components.
Pre-Work Safety Steps
Park on level ground and engage the parking brake. Turn off the engine and let it cool completely. Disconnect the negative battery terminal to prevent accidental shorts or starter engagement.
Locate the serpentine belt routing diagram before removing anything. If the diagram is faded or missing, photograph the current belt path with your phone. Compare the old and new belts to confirm matching length and rib count.
Remove the Air Intake for Access
Clearing the intake components gives you room to work on the belt and tensioner.
1999–2007 Models
Loosen two 8 mm clamps securing the intake hose to the throttle body and air box. Remove the 8 mm bolt holding the intake bracket, then wiggle the hose and bracket aside.
2007–2014 Models
Loosen three 8 mm clamps on the air intake tube: one at the front, one near the MAF sensor, and one at the rear. Disconnect the PCV hose from the flat section of the tube, then pull the tube straight out carefully.
2014–2019 Models
Disconnect air hoses by pressing the quick-connect tabs. Loosen retaining clips with a flathead screwdriver, then remove the entire duct and hose assembly. Inspect the throttle body for debris before reassembly.
Release Tension and Remove the Old Belt
With access cleared, you can now remove the worn belt.
1999–2019 Models
Locate the 15 mm tensioner pivot bolt, usually near the alternator or water pump. Attach a breaker bar or ratchet and pull downward (or turn counterclockwise on 2014+ models) to release tension. The tensioner should move one to two inches, creating slack.
Slide the old belt off the idler pulley first, then work it off the remaining pulleys. Let the tensioner return slowly to avoid damage. Inspect every pulley for wobble, cracks, glazing, or misalignment before installing the new belt.
Install the New Serpentine Belt

Correct routing is critical. A misrouted belt destroys itself within minutes.
1999–2007 5.3L V8 Routing
Start at the water pump on the passenger side. Wrap around the crankshaft pulley at the bottom, up to the tensioner pulley, down to the driver’s side water pump, under the power steering pump, and over the alternator.
2007–2014 5.3L V8 Routing
Start at the harmonic balancer. Route up over the water pump, down under the power steering pump, over the alternator, under the idler pulley, and finally over the tensioner pulley.
2001–2006 2500 HD 8.1L V8 Routing
Start at the crank pulley. Pull up over the engine fan pulley, down to the power steering pump, up to the idler pulley, around the alternator, and over the tensioner last.
2014–2019 5.3L Models
Replace the tensioner first by removing the 15 mm bolt, aligning the new tensioner’s pin with the engine block hole, and torquing to 70–80 ft-lbs. Route the belt clockwise, ending at the tensioner pulley. Use the breaker bar to lift the tensioner, slide the belt on, and release slowly.
Install the Belt on 2020+ Stretch Belt Models
This system requires specialized tools and a different technique.
Removal Steps
Remove the underbody splash shield. Insert the EN-51767-5 webbing strap between the belt and crankshaft pulley. Rotate the crankshaft clockwise to wrap the webbing around the pulley, then pull outward to peel the belt off. Remove the belt from the generator pulley.
Installation Steps
Attach the EN-51767-2 belt installer to the crankshaft pulley. Place the new belt onto the tool. Rotate the crankshaft clockwise slowly until the belt seats on all pulleys. Continue rotating 360 degrees more to confirm full alignment. Remove the tool and reinstall the splash shield.
Zip Tie Workaround
If you lack the official tool, use seven or more heavy-duty zip ties at least 12 inches long. Loop them through the belt and around the pulley, pulling the belt into place. Expect one or two ties to break during the process. Cold weather makes this method less reliable.
Reassemble Components and Test the Installation
Putting everything back together correctly ensures long-term reliability.
Reinstall the Air Intake
Reconnect the intake hose to the throttle body with full seating. Tighten all clamps firmly but avoid overtightening, which can crack plastic components. Reconnect the PCV hose and any quick-connect air lines.
Reconnect the Battery
Reattach the negative battery terminal and confirm the connection is tight and corrosion-free.
Pre-Start Inspection
Verify all belt ribs are seated in the pulley grooves. Check that the belt is not twisted or pinched anywhere. Confirm routing matches the diagram exactly.
Manual Rotation Test
Rotate the crankshaft pulley by hand using a 15 mm socket. It should turn smoothly with no binding or scraping.
Engine Run Test
Start the engine and let it run for 10 to 15 seconds. Listen for squealing, chirping, or grinding noises. Shut off the engine and recheck belt seating, since initial tension can shift the belt slightly. A successful install shows no noise, smooth operation, and proper charging voltage between 13.8 and 14.4 volts.
Troubleshoot Common Issues
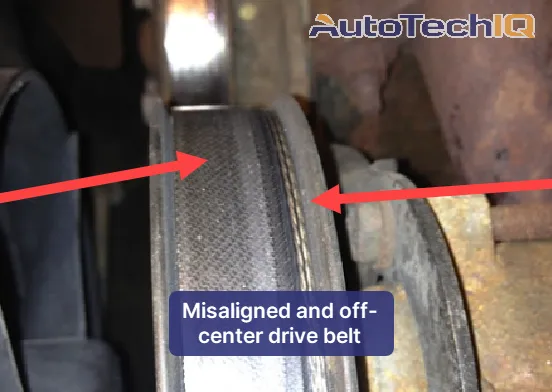
Even careful installations sometimes produce problems.
Belt Squeals After Installation
Misrouting, debris, or incorrect tension usually causes this. Shut off the engine, recheck the routing diagram, clean the pulleys, and confirm full seating.
Belt Slips or Jumps Grooves
Wrong belt size or a worn tensioner is the likely culprit. Compare old and new belt lengths and replace the tensioner if needed.
Tensioner Makes Noise
A worn bearing or weak spring requires tensioner replacement. Do not reuse a noisy tensioner on 2014+ models.
2020+ Belt Will Not Seat
Improper tool use or insufficient rotation causes this. Use the EN-51767-2 tool and rotate the balancer a full 360 degrees past initial seating.
Maintenance Tips and Best Practices
Preventive care extends belt life and avoids breakdowns.
When to Replace the Belt
Replace every 60,000 to 100,000 miles or at the first signs of cracks, glazing, fraying, or startup squealing.
Tensioner Replacement Guidelines
On 1999–2013 models, replace the tensioner only if noisy or weak. On 2014–2019 models, replace the tensioner with every belt change as industry best practice. On 2020+ models, no tensioner exists, but inspect pulleys for wear.
Preventing Future Failures
Clean pulley grooves during every replacement. Never force a belt onto a pulley. Use OEM-spec or NAPA FleetRunner belts for maximum durability.
Frequently Asked Questions About Chevy Silverado Serpentine Belt Replacement
How often should I replace the serpentine belt on a Chevy Silverado?
Replace the belt every 60,000 to 100,000 miles. Inspect it regularly for cracks, glazing, fraying, or squealing during startup, and replace sooner if these signs appear.
Can I replace the serpentine belt without removing the air intake?
On 1999–2007 models, you can often loosen the intake hose and bracket without full removal. On 2007–2019 models, removing the intake tube or duct is necessary to access the tensioner underneath.
Do 2020+ Silverado models have a serpentine belt tensioner?
No. The 2020+ 5.3L Silverado uses a stretch-fit belt system without a traditional tensioner. You need the GM EN-51767-2 tool for installation and the EN-51767-5 webbing for removal.
Should I replace the tensioner when changing the belt?
On 2014–2019 models, yes. Industry consensus recommends replacing the tensioner pulley with every belt change to prevent premature wear. On older models, replace only if the tensioner is noisy or weak.
What torque should I use on the tensioner bolt?
Torque the tensioner retaining bolt to 70–80 ft-lbs on 2014–2019 models. Always verify with your specific service manual for your engine.
Why does my new belt squeal after installation?
Squealing usually indicates misrouting, debris in the pulley grooves, or improper seating. Shut off the engine immediately, recheck the routing diagram, clean the pulleys, and confirm the belt is fully seated in all grooves.
Key Takeaways for Changing Your Silverado’s Serpentine Belt

Changing a serpentine belt on a Chevy Silverado is a manageable DIY job when you have the right tools and know your model year. Trucks from 1999–2019 use a standard tensioner system and require only basic socket tools. Trucks from 2020+ require the GM EN-51767-2 stretch belt tool, and no reliable long-term workaround exists.
Always follow the routing diagram exactly, replace the tensioner on 2014–2019 models, and test thoroughly before driving. Inspect the old belt for wear patterns that might indicate pulley problems. With this knowledge, you can complete the job in under an hour and keep your Silverado running strong for thousands of miles to come.