
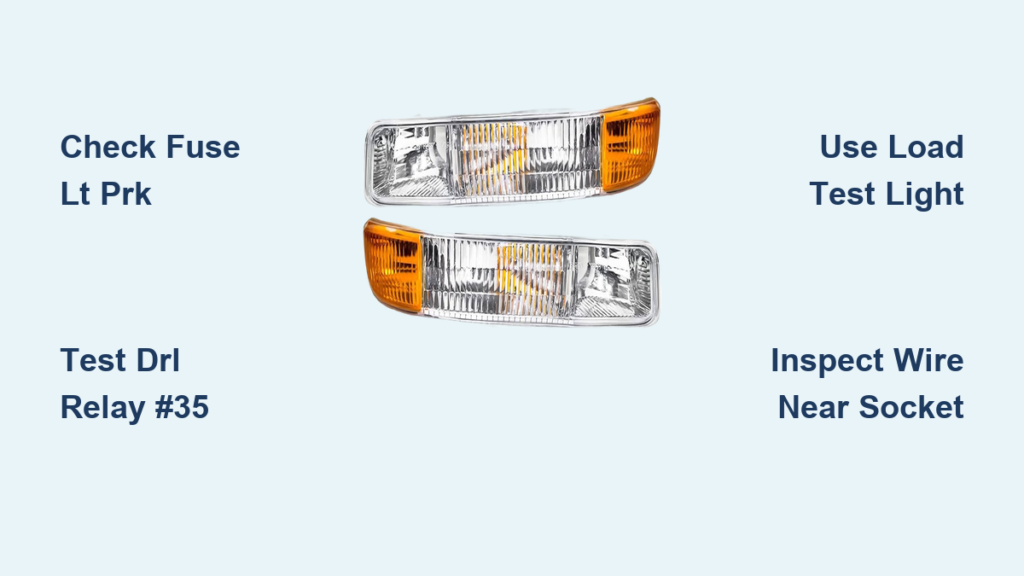
If your Silverado parking lights not working, you’re not alone. From 1996 to 2024 models across 1500, 2500HD, and LS trims, owners consistently report front and rear parking, running, and DRL failures. The good news is that most causes are simple to diagnose and fix with basic tools. This guide delivers a step-by-step troubleshooting roadmap based on real-world repair data and model-specific failures.
The root cause is rarely bulb failure. Instead, the issue usually traces to a blown fuse, faulty relay, wiring break near the socket, or a failed diode in the DRL circuit. What makes these problems tricky is that voltage may appear present during testing but disappear under load. Using a load test light, not just a multimeter, is critical for accurate diagnosis. You will learn how to test like a pro, avoid common misdiagnoses, and get your lights back fast, often in under 30 minutes.
Check the Fuse First: LT PRK and Park Lamp Fuses

Remove and Inspect the Fuse Bridge
A blown fuse is the most common reason for one-side or total parking light failure. Never rely on visual inspection alone, because many fuses look intact but have microscopic internal breaks.
- Locate the under-hood fuse box on the driver’s side of the engine bay
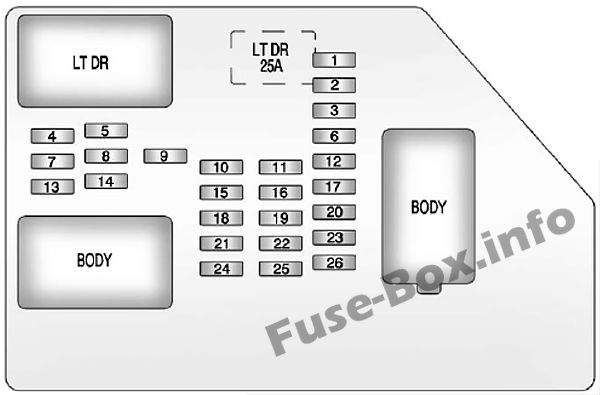
- Find the LT PRK fuse (Left Park Lamp), typically Fuse #25 or #27
- Locate the RT PRK fuse (Right Park Lamp), often adjacent
- Pull each fuse and inspect the metal bridge with a flashlight
🔍 Pro Tip: If only the driver side is out, start with LT PRK. If both sides fail, check both fuses before moving to relay testing.
Even if the fuse looks fine, replace it with an identical amperage (usually 10A or 15A) as a diagnostic step. Some users report success after replacing “good-looking” fuses that had hidden breaks.
Test the DRL Relay: Swap Relay #35
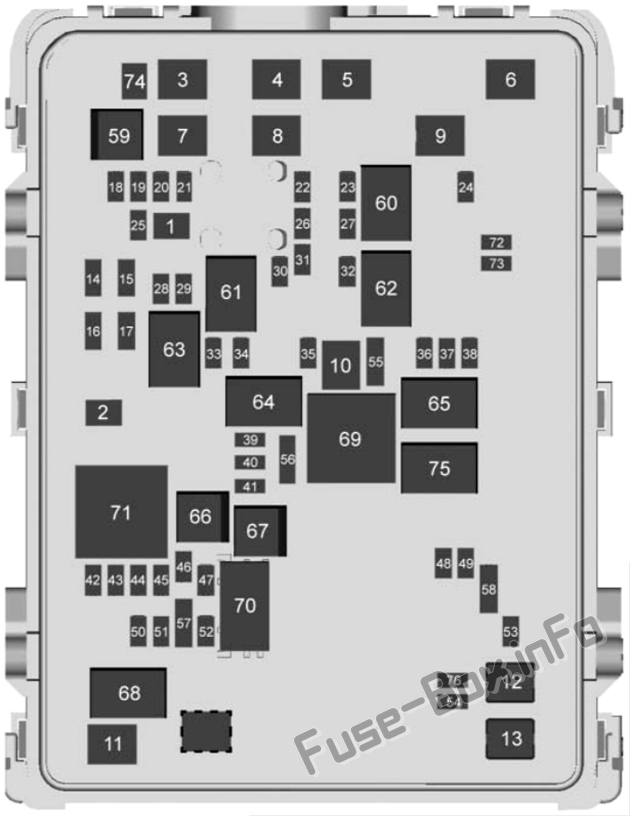
Locate and Replace the Critical Relay
Relay #35 controls the Daytime Running Lights circuit, which also powers parking and running lights on many Silverado models. A failed relay kills all running lights, even when headlights, brake lights, and turn signals still work.
- Find Relay #35 in the engine bay fuse box
- Pull it out and check for burn marks or melting
- Swap it with a known good relay of the same type (like the horn or A/C relay)
⚠️ Warning: Some 2014+ models may have no physical Relay #35, with the function integrated into the Body Control Module (BCM). If the slot is empty, skip to the DRL Diode Test or circuit tracing.
In one verified case, a mechanic replaced the headlight switch and fuses twice before discovering the relay was dead. The fix took under 5 minutes once the relay was swapped.
Use a Load Test Light for Accurate Diagnosis
Why Multimeters Can Lie
Standard multimeters show voltage even when a circuit cannot carry current. A diode, corroded wire, or failing connection might read 12V with no load but drop to 0V when powering a bulb.
- Use a load test light instead of a multimeter
- Clip the ground lead and probe the power wire at the socket
- If the test light does not illuminate, the circuit fails under load
This method catches hidden faults like failed DRL diodes, corroded crimps inside connectors, and high-resistance breaks in wiring. Multiple case studies confirm that load testing prevents unnecessary part replacements.
Inspect Wiring Near the Socket

Find Broken Wires Before the Bulb
On high-mileage Silverados (especially 2001–2007), the wire 2–3 inches before the bulb socket is a known failure point. Vibration and heat cause fatigue cracks that aren’t visible without close inspection.
Front DRL Wire Failure
- Symptom: One side out, other side works
- Test: Gently wiggle the wire near the headlight assembly
- Look for cracks, stiffness, or discoloration in the insulation
- Fix: Cut out the damaged section, splice in new wire, and seal with adhesive-lined heat shrink
Rear Running Light Harness
- Common in trucks over 200,000 miles
- Wire breaks where it flexes near the tailgate hinge or frame
- Solution: Replace the pigtail or the entire harness section
🔧 Time Saver: Run a jumper from the working side to the dead side at the socket. If lights come on, you have confirmed a wiring break.
Diagnose DRL Diode Failure

Replace an Inexpensive but Critical Component
The DRL diode prevents backfeed in the lighting circuit. When it fails, it often shows voltage with no load but cannot power the bulb.
- Location: Inline in the DRL harness, often near the headlight switch or under the dash
- Failure sign: No front or rear running lights, but brake and turn signals work
- Test: Use a load test light at the socket. If no light, test upstream at the diode output
- Fix: Replace the diode. Junkyard units cost around $5
💡 Expert Note: On some models, the diode is part of the DRL module assembly. If replacement isn’t feasible, bypassing the diode (with proper polarity) can confirm the fault, but it isn’t a long-term fix.
Clean the Ambient Light Sensor
Unblock the Top-of-Dash Sensor
The ambient light sensor, located on top of the dash near the defroster grille, tells the truck when to activate DRLs. If covered by a mat, debris, or tint film, it can disable running lights or cause erratic behavior.
- Check the center of the dash facing the windshield
- Ensure the surface is clean and uncovered
- Never place floor mats or accessories over the sensor
GM confirms that covering the sensor disrupts automatic lighting logic. Some owners report lights working only at night after cleaning or uncovering the sensor.
Examine Ground Connections
Fix Corroded or Loose Grounds
Poor grounding causes intermittent or complete light failure, especially when multiple lights go out together.
- Trace ground wires from headlight and taillight assemblies
- Check connection points at the chassis or frame
- Look for green corrosion, loose screws, or rusted terminals
Quick Ground Test:
- Use a jumper wire from the bulb housing to battery negative
- If lights turn on, the ground is faulty
Clean the ground point with a wire brush, apply dielectric grease, and reattach securely for a lasting fix.
Address LED Conversion Issues
Prevent False “Burnt Out” Signals
After switching to LED bulbs, many Silverados disable parking lights because the low power draw mimics a blown bulb.
- Symptoms: Lights don’t turn on after LED install
- Test: Reinstall factory incandescent bulbs
- If lights work, the issue is LED or resistor related
- If still dead, the problem is electrical (fuse, relay, or wiring)
Solutions:
- Install load resistors (also called anti-flicker modules)
- Use CANBUS-compatible LEDs designed for GM trucks
- Avoid mixing LED and incandescent bulbs on the same circuit
⚠️ Warning: Skipping resistors can trigger error messages or damage the BCM over time.
Verify Bulb and Socket Condition
Replace Burnt Sockets and Upgrade Bulbs
Blackened or melted sockets indicate excessive heat, usually from high resistance or incorrect bulbs.
Check for:
- Charred plastic around the bulb base
- Bent or corroded socket contacts
- Bulbs that burn out repeatedly
Fixes:
- Replace damaged sockets with new pigtails ($10–$20)
- Upgrade to 4114 bulbs, recommended for 1999+ models to reduce heat
- Apply dielectric grease to new bulb bases to prevent corrosion
🔥 Danger: Running bulbs in overheated sockets risks melting harnesses or fire. Replace immediately.
Model-Specific Fixes That Work
2007 Silverado LS: Driver Side Out
- Symptom: No driver-side parking lights (front and rear)
- Common mistake: Replacing the rear circuit board
- Real cause: Blown LT PRK fuse (#25 or #27)
- Fix: Remove and inspect the fuse bridge, and replace even if it looks fine
2001 Silverado (200k+ Miles): One Front DRL Dead
- Check the wire just before the socket
- Likely cause: Break due to vibration and heat
- Repair: Splice in fresh wire and secure with strain relief
2008 Silverado: All Running Lights Failed
- After replacing the switch, fuses, and bulbs with no success
- Missed relay: Relay #35 was faulty
- Lesson: Always test the relay before replacing expensive switches
Post-Modification Failures: Tuners and LEDs
Rule Out Aftermarket Devices
Installing performance tuners or LED lighting can trigger unexpected electrical issues.
Troubleshooting Steps:
- Revert to factory incandescent bulbs
- Remove the tuner or reflash the ECU
- Reset the BCM by disconnecting the battery for 15 minutes
- Scan for codes using an OBD2 scanner
🔄 Key Insight: If lights don’t return after reverting mods, the issue is not the modification. It is a coinciding electrical fault like a fuse, relay, or wire.
Prevent Future Failures
Maintain Wiring and Connections
- Apply dielectric grease to all bulb connectors during changes
- Seal splices with adhesive-lined heat shrink tubing
- Reroute wires slightly if they rub against sharp edges
- Inspect every 6 months if you drive in wet or salty conditions
🛡️ Pro Tip: For older trucks, replace both front and rear parking light pigtails preemptively. They are cheap and prevent roadside breakdowns.
Frequently Asked Questions About Silverado Parking Lights
Why are my Silverado parking lights not working but headlights are?
When parking lights fail but headlights work, the issue is usually isolated to the parking light circuit. Check the LT PRK or RT PRK fuse first, then test Relay #35 and inspect the wiring near the bulb socket.
Where is the parking light fuse on a Silverado?
The parking light fuses (LT PRK and RT PRK) are located in the under-hood fuse box on the driver’s side. The LT PRK fuse is typically Fuse #25 or #27, depending on your model year.
Can a bad ground cause parking lights to not work?
Yes. Poor grounding is a common cause of parking light failure, especially when multiple lights go out simultaneously. Trace the ground wires from the headlight and taillight assemblies and clean any corroded connections.
How do I test parking lights with a load test light?
Clip the test light’s ground lead to a known good ground, then probe the power wire at the bulb socket. If the test light does not illuminate, the circuit cannot carry the load needed to power the bulb, indicating a fault.
Do LED bulbs cause Silverado parking lights to stop working?
Yes. LED bulbs draw less power than incandescent bulbs, and the truck’s computer may interpret this as a blown bulb and disable the circuit. Install load resistors or CANBUS-compatible LEDs to fix the issue.
What is Relay #35 on a Silverado?
Relay #35 controls the DRL and parking light circuit on many Silverado models. It is located in the engine bay fuse box. Swapping it with a known good relay is a fast way to diagnose lighting failures.
Key Takeaways for Fixing Silverado Parking Lights
When your Silverado parking lights not working, start simple: check the fuse, then the relay, then the wiring near the socket. Use a load test light, not just a multimeter, to catch hidden faults that voltage readings miss. Avoid replacing switches or modules first, because over 80% of cases are solved with a $5 fuse or relay swap. Grab a load test light, inspect your fuses, and run through the diagnostic steps in this guide. Your parking lights will be back on before you finish your coffee.



