
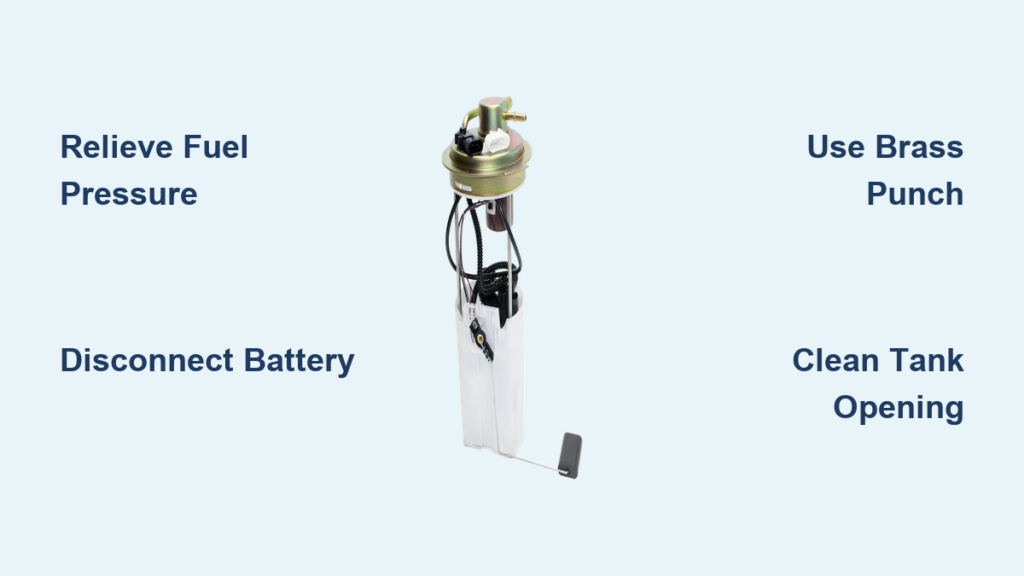
If your Chevrolet Silverado stalls unexpectedly, struggles to start, or sputters at highway speeds, a failing fuel pump is often the root cause. Because this component lives inside the gas tank, accessing it requires careful removal of the assembly from the tank itself. Whether you drive a 1999–2006, 2007–2013, or 2014–2018 Silverado, the process demands precision, the right tools, and strict safety habits.
The exact method depends on your truck’s generation and the access approach you choose. Some models allow bed removal for clean top-down access, while others require dropping the tank entirely. Regardless of year, you must relieve fuel system pressure, disconnect the battery, and use non-sparking tools near the tank. This guide gives you everything needed to complete the job efficiently and avoid costly shop fees.
Relieve Fuel System Pressure Before Anything Else
Before touching any fuel lines, you must release system pressure to prevent dangerous fuel spray and fire hazards.
Use the Fuse Removal Method (Preferred)
Locate the fuel pump fuse or relay in the under-hood fuse box near the brake master cylinder. Remove the 25-amp fuel pump fuse, then start the engine and let it run until it stalls. This drains pressure from the fuel rail. Once the engine stops, turn the key off.
Depress the Schrader Valve if the Engine Won’t Start
Locate the fuel test port under the engine cover. Remove the black cap with an 8 mm socket, then press the Schrader valve inside using a flathead screwdriver wrapped in a shop rag. Catch escaping fuel and replace the cap immediately after pressure drops.
Pro Tip: Drive the truck until the fuel gauge reads well below empty before starting. This reduces weight and spill risk during tank work.
Disconnect the Battery to Prevent Sparks
Electrical safety is critical when working around fuel components.
Single Battery Models
Use a 10 mm socket to loosen the negative terminal. Pull it aside and secure it so it cannot contact the post.
Dual Battery HD Models (2007–2014 2500 HD)
Disconnect both batteries:
– Passenger side: Behind the coolant overflow tank. Loosen the 10 mm nut and pull the terminal off.
– Driver side: Behind the headlight. Repeat the same step.
When reconnecting later, snug the nut and turn an extra 1/8 turn. Do not overtighten.
Choose Your Access Method by Silverado Generation

The best way to remove the fuel pump depends on your truck’s model year and your available tools.
1999–2006 Silverado: Remove the Truck Bed (Recommended)
Removing the bed gives top-down access without draining the tank or fighting rusty straps.
Disconnect the Filler Neck and Wiring
Access the filler neck area in the bed. Remove the plastic cover by lifting the clip and unscrewing two T30 Torx bolts. Set the bracket aside.
Unplug two electrical connectors on the bed frame:
– Press the white lock tab down on each connector.
– Push the release tab and pull the connector straight back.
– Tuck wires safely away to prevent damage during lifting.
Remove the Tailgate and Bed Bolts
Take off the tailgate:
– Lift slightly and pull the retaining clip on the driver’s side.
– On the passenger side, remove the interior panel and pull the clip out.
Remove eight 18 mm bolts securing the bed to the frame:
– Two at the rear corners
– Two about 1.5 feet forward
– Two near the front corners
– Two in between
Lift the Bed Safely
For manual lifting, use four people, one at each corner.
For mechanical lifts:
– Attach straps to the bed’s anchor points (two front, two rear).
– Use a mini excavator or lift to raise and slide the bed backward.
Once clear, the fuel tank top is fully exposed.
Disconnect Fuel Lines and Pump Wires
At the tank:
– Electrical: Press the lock tab down and pull the fuel pump connector off.
– Fuel lines: Push tabs on clear clips and pull lines off. For the center line, squeeze both outer edges to release.
– Remove two retaining clips from the old pump by flipping them backward.
Remove the Lock Ring and Pump
Use a flathead screwdriver to lift the small anti-rotation tab on the lock ring.
Critical step: Blow debris from the tank opening using compressed air. This prevents contamination of the new pump.
Tap the ring counterclockwise with a brass punch until loose. Pull the ring up and out, then lift the fuel pump assembly straight out. Drain any remaining fuel back into the tank.
1999–2006 Silverado: Drop the Tank (Alternative)
If you cannot remove the bed, lower the tank instead.
Disconnect the Filler Neck and EVAP Canister
Remove the fuel cap. Unscrew three 8 mm bolts around the filler neck and push it into the tank opening.
Disconnect the EVAP canister hoses by squeezing plastic tabs on two small and one large hose. The canister can often remain mounted.
Unhook the ground strap from the frame using a wrench.
Support and Lower the Tank
Place a transmission jack with a fuel tank adapter under the tank.
Remove the front and rear straps:
– Front strap: The bolt passes through a frame tab. Hold the bolt steady while loosening the nut.
– Rear strap: Easier access. Just unscrew the bolt.
Lower the tank slowly. As it drops, disconnect the fuel pump wiring harness, fuel level sender connector, and all fuel lines from the top.
Remove the Pump
Clean the tank top thoroughly. Disconnect the three fuel lines using quick-release clips by squeezing and pulling. Turn the locking ring counterclockwise until it pops up, then lift the pump module out carefully.
2007–2013 Silverado 2500 HD: Drop the Tank with EVAP Access
Heavy-duty models require tank lowering, ideally with a lift for optimal access.
Remove the Wheel Well Cover and EVAP Canister
Take off the rear wheel well cover:
– Remove three 13 mm bolts (front, middle, rear).
– Slide the cover backward to clear the lift arm.
Remove the EVAP canister by unscrewing the 13 mm bracket bolt and setting it aside.
Disconnect Fuel Lines Using the Correct Technique
Each line has a specific release method:
– Lower line: Squeeze the release tab or use a pick.
– Middle line: Compress both ends with pliers.
– Top line: Has a red locking clip. Pry it out first, then pull the line.
– Main fuel line: Pry out the red clip, press the top tab, and pull.
– Filler neck and vent hoses: Loosen 8 mm clamps, twist to break the seal, and use rust penetrant if stuck.
Remove the Tank Straps
Support the tank with a jack and adapter. Each strap has a 15 mm bolt and J-hook:
– Rear strap: The J-nut often spins. Hold it with a 14 mm wrench while removing the bolt.
– Front strap: The bolt is hidden. Follow the strap upward to locate it.
Release straps by tilting down, then up and out.
Disconnect Electrical and Remove the Pump
Lower the tank carefully. Unplug the main fuel pump connector (press the tab; use a pick if dirty) and the sensor connector.
Disconnect the lines:
– Top dual-line: Depress the green tab underneath and pull as a unit.
– Second line: Press down, twist, and pull.
– Third (small) line: Use a tool to depress the tab, then pull.
Use a brass punch to tap the lock ring counterclockwise. Never use steel tools here. Remove the old pump. If stuck, apply rust penetrant and rock gently.
2014–2018 Silverado 1500: Drop Tank with Precision Line Handling
Newer models have improved connectors but require careful line management.
Remove the Cover and Filler Neck
Unscrew three 13 mm bolts to remove the fuel tank cover. Tilt down and lift to release the metal tabs.
Loosen the 8 mm clamp on the filler neck. Slide it down and remove the hose. Use a pick behind the rubber seal if corrosion blocks removal.
Lower the Tank in Sequence
Place a floor jack under the tank, avoiding the straps.
Follow these steps:
1. Remove the 15 mm bolt on the rear strap and pull the strap down and off.
2. Lift the tank rear slightly.
3. Disconnect the front connections by pushing two tabs and lifting to unlock the charcoal canister hose.
4. Disconnect the blue vent hose on top by pushing two tabs and lifting. Catch fuel with a rag.
5. Remove the clamp and cut the zip tie holding hoses together. Save the clamp.
6. Lower the tank slowly.
Disconnect Connectors and Remove the Pump
On top of the pump, unplug all electrical connectors. If a large white connector has a lock, pull it up to unlock it before pressing the release tab.
Clean the top with compressed air.
Remove fuel lines:
– Top dual-line: Pull back two tabs and push down to release the blue lock. Repeat for the green connector.
– Back of pump: Lift two side tabs, pull the green lock out. Press the white button and pull the line. Reinsert the lock to avoid losing it.
Use a brass punch to tap one corner of the lock ring until it pops open. Remove the ring and old O-ring. Clean the seal seat thoroughly.
Install the New Fuel Pump Correctly

Now that the old pump is out, install the new one with care.
Use a New O-Ring and Lubricate
Always install a new O-ring or gasket. Never reuse the old one. Apply light lubricant to help it slide in.
Align and Seat the Pump
Insert the new pump:
– Ensure the float arm clicks into place. Do not bend it.
– Align the small tab on the pump with the slot in the tank.
– The pump is fully seated only when the tab locks in.
Secure the Lock Ring
Thread the new lock ring clockwise until all tabs engage. Use the brass punch in reverse to tap gently until the tabs seat fully against the stops. Push the anti-rotation tab back into place to lock the ring.
Reconnect Fuel Lines and Electrical Components

Match Line Sizes Correctly
- 3/8-inch line: Main fuel feed (connect first)
- 5/16-inch lines: Return lines
Push each line into its slot until you hear a distinct click. Tug gently to confirm. Flip retaining clips forward and slide into place.
Reconnect Wiring Safely
Plug in all connectors. If upgrading to a new harness:
– Match wire gauges: thick black to thick black, thin to thin.
– Splice individually with butt connectors and heat shrink tubing.
– Stagger cuts to avoid wire bundle bulk.
– Tuck wires back into protective sheathing.
Reassemble and Torque to Specification
Reinstall the Tank or Bed
For tank-dropped models:
– Raise the tank slowly.
– Reconnect all lines and wiring before securing straps.
– Torque front and rear strap bolts to 30 ft-lbs.
For bed-removed models:
– Align the bed carefully.
– Reinstall all eight 18 mm bolts.
– Torque to 63 ft-lb.
Replace the tank cover (2014–2018) and torque three 13 mm bolts to 13 ft-lbs.
Reconnect the battery and reinstall the fuel pump fuse or relay.
Test the System After Reassembly
Prime the Fuel Pump
Turn the key to “ON” without starting. Listen for a 2–3 second hum from the fuel pump. Cycle the key 2–3 times to build pressure and purge air.
Check for Leaks
Inspect all fuel line connections, the lock ring seal, and electrical connectors. Start the engine. It should start smoothly and idle evenly.
Let it run for several minutes while monitoring for leaks or stalling. Take a short test drive to verify performance under load.
Avoid These Common Mistakes
Spinning J-Nuts on Rear Straps
On 2007–2014 models, rear strap J-nuts often spin. Always hold the nut with a 14 mm wrench before removing the bolt.
Debris in the Tank
Skip the compressed air cleaning step and debris can clog your new pump instantly. Always blow out the opening before removing the lock ring.
Bent Fuel Sender Arm
Never force the pump in or out. A bent float arm causes inaccurate fuel gauge readings.
Cutting the Wrong Wires
When upgrading pumps, avoid cutting fuel pressure sensor wires. Match wire thickness and function before splicing.
Frequently Asked Questions About Removing a Silverado Fuel Pump
How long does it take to remove a fuel pump from a Silverado gas tank?
The job typically takes 2–4 hours depending on the generation and access method. Bed removal on 1999–2006 models is often faster than dropping the tank on newer models.
Can I remove the fuel pump without dropping the tank?
On 1999–2006 Silverados, you can remove the truck bed for top-down access without dropping the tank. On 2007+ models, dropping the tank is the standard approach. Cutting an access hole in the bed floor is discouraged due to corrosion and structural risks.
What tools do I need to remove a Silverado fuel pump?
Essential tools include a ratchet set with extensions, sockets (8mm, 10mm, 13mm, 14mm, 15mm, 18mm, T30), a brass punch, compressed air, a transmission jack with fuel tank adapter, safety goggles, and shop rags.
Why must I use a brass punch on the lock ring?
A brass punch prevents sparks that could ignite fuel vapors. Steel tools can create sparks upon impact, creating a serious fire hazard near an open fuel system.
Should I replace the fuel filter when changing the pump?
Yes. Replacing the fuel filter during pump service is recommended because it is often accessible during this procedure and prone to clogging. A new filter protects your new pump from debris.
How do I know if my Silverado fuel pump is bad?
Common symptoms include engine sputtering at high speeds, sudden stalling, difficulty starting, loss of power under load, and a whining noise from the fuel tank. If you experience these signs, test fuel pressure before replacing the pump.
Key Takeaways for a Successful Silverado Fuel Pump Removal
You now have a complete roadmap for how to remove fuel pump from gas tank Silverado trucks across all major generations. The three most important points are: always relieve fuel system pressure and disconnect the battery before starting, use a brass punch and compressed air to prevent sparks and contamination, and follow generation-specific steps for line disconnections and tank lowering.
Your next step is to gather the correct tools and replacement parts, then set aside a full afternoon to complete the job safely. With patience and attention to detail, you can save hundreds in shop fees and restore your Silverado’s reliability for the long haul.



