
A cracked dash on your Chevrolet Silverado is more than an eyesore. It is a symptom of a well-documented manufacturing flaw that hit 2007 to 2013 models especially hard. Years of sun exposure cause the plastic to dry out, crack, and in some cases crumble into pieces. General Motors never issued a recall, and a class-action lawsuit over the defect was dismissed, leaving owners to handle repairs on their own.
The good news is that you have several solid options. Whether you choose a molded dash cap, a DIY filler repair, or professional replacement, you can restore your truck’s interior without breaking the bank. This guide breaks down every method so you can pick the right fix for your situation.
Assess the Damage Before Choosing a Fix
Jumping straight into repairs without assessing the damage is the fastest path to a failed fix. The severity of the crack determines which method actually works.
Identify the Type of Crack
- Hairline Cracks: Thin, surface-level fissures that look cosmetic. These respond well to filler-based repairs.
- Deep or Wide Cracks: Gaps you can see into or feel with your fingernail. These usually need reinforcement with fiberglass or epoxy.
- Crumbling Dashboard: Plastic that flakes, disintegrates, or feels soft. This is the classic 2007 to 2013 GM flaw, and a hard plastic dash cap is your best long-term answer.
Check for Hidden Issues
- Press gently around the crack. If the surface feels spongy, the foam backing has broken down.
- Look for chalky, faded areas that signal heavy UV damage.
- Inspect under the dash for loose clips or broken mounting points before you start any work.
Taking 10 minutes to assess saves hours of rework later.
Install a Dash Skin Cap for Crumbling Dashboards
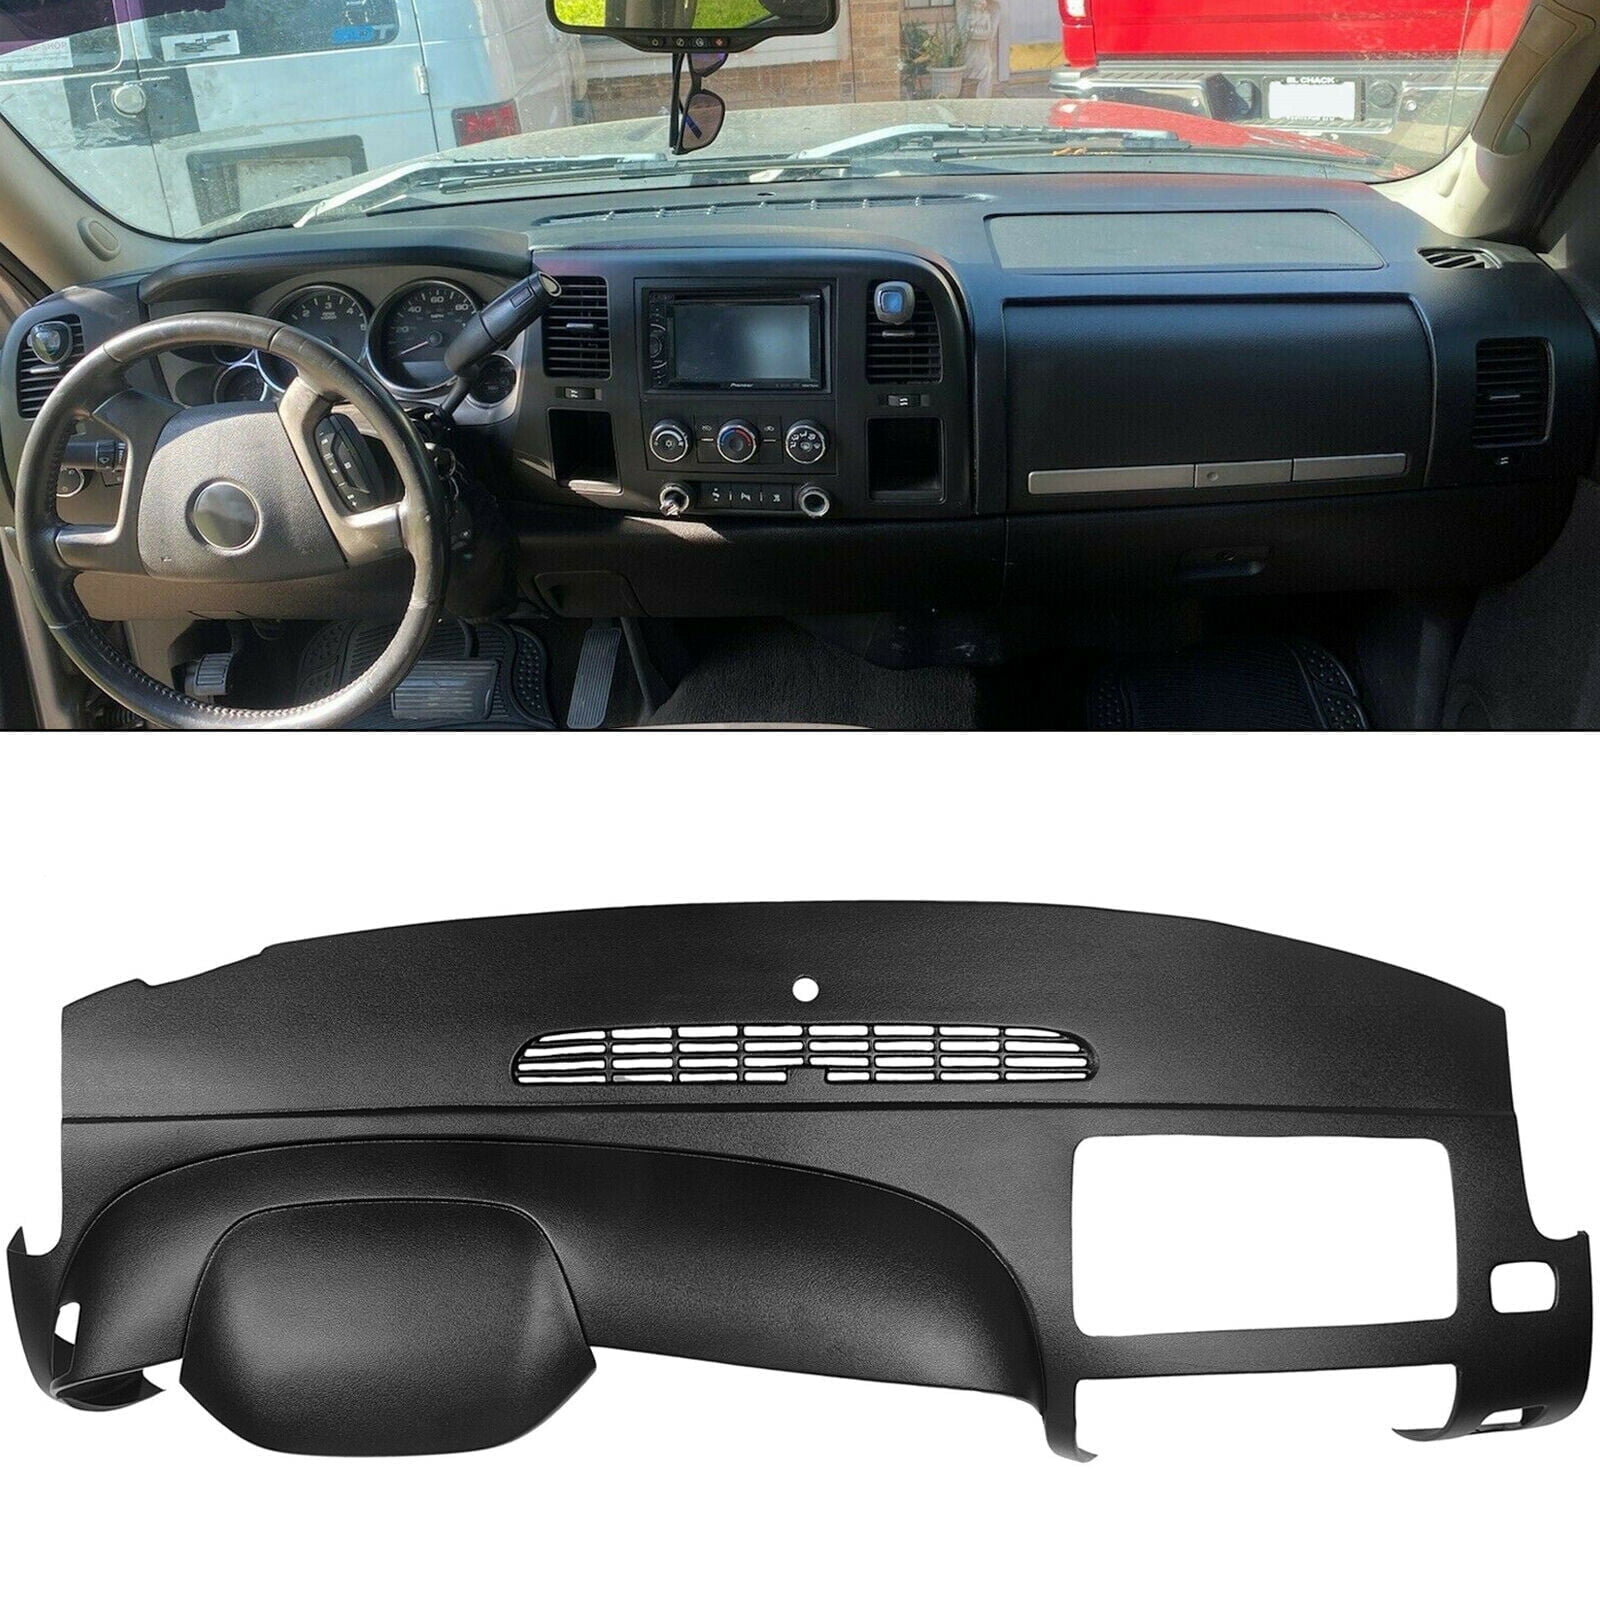
For Silverados from 2007 to 2013 with crumbling plastic, a hard plastic dash skin is the most reliable fix. Premium caps are precision-molded, UV-resistant, and backed by lifetime warranties.
Why a Dash Skin Works Best
- Covers every crack permanently
- Won’t warp, fade, or crack from sun exposure
- Matches factory texture and color
- DIY installation with basic prep
These caps snap over your existing dash and bond with automotive adhesive.
Prepare the Surface
- Clean the entire dash with a mild interior cleaner and microfiber cloth. Remove all dust and oils.
- Let the surface dry completely before moving on.
- Pry off the A-pillar trim using a plastic trim tool. These pieces snap back in later.
- Lightly scuff glossy areas with 220-grit sandpaper to help the adhesive grip.
Keep adhesive away from window glass and HVAC vents to avoid a messy cleanup.
Apply Adhesive and Mount the Cap
- Apply high-strength automotive adhesive in zig-zag lines across the dash. Stay half an inch from all edges to prevent squeeze-out.
- Align the cap at the windshield edge first, then press it down toward the instrument cluster.
- Hold the cap in place during curing using:
– Telescoping curtain rods for vertical pressure
– Foam blocks along outer edges
– Books in socks or other weights on flat sections - Crack your windows open. The adhesive fumes are strong.
Let everything cure for 24 hours before reinstalling trim.
Do a Final Fit Check
- Confirm vents, sensors, and gauges are fully exposed
- Wipe down with a dry microfiber cloth
- Snap the A-pillar trim back into place
A properly installed cap looks factory-fresh and stops further degradation.
Repair Minor Cracks with Filler

For hairline cracks on a structurally sound dash, a filler repair saves money and works well.
Gather Your Supplies
You will need:
- 220 and 320-grit sandpaper
- Utility knife
- Microfiber cloths
- Dashboard filler, epoxy, or Bondo
- Color-matched spray paint
- Clear UV-protectant sealant
All of these are available on Amazon or at any auto parts store.
Clean and Prep the Area
- Wipe the cracked area with dash cleaner to remove dust and grease.
- Wait 10 to 15 minutes for the surface to dry completely.
- Trim any jagged edges around the crack with a utility knife.
Contaminants are the number one cause of failed repairs, so do not skip this step.
Fill the Crack
- Use the knife tip to slightly widen the crack. This helps filler penetrate deeper.
- Apply filler based on crack size:
– Small cracks: Press filler in with a toothpick
– Larger cracks: Layer epoxy or Bondo, pressing firmly
– Quick patch: Mix baking soda and super glue for a fast-setting fix (not long-term) - Overfill slightly since the compound shrinks as it cures.
Allow the filler to cure fully (usually 2 to 6 hours).
Sand and Smooth
- Start with 220-grit sandpaper to level the filler.
- Switch to 320-grit for a smooth, flush finish.
- Wipe away dust with a damp cloth.
Sand gently. Aggressive sanding can gouge the surrounding plastic.
Paint and Seal
- Mask off vents and gauges with painter’s tape.
- Spray 2 to 3 light coats of color-matched paint from 10 to 12 inches away.
- Add texture if your dash has a grain. Use a texture spray or flocking compound.
- Finish with a clear UV-protectant to block future sun damage.
Done right, the repair is nearly invisible.
Reinforce Deep Cracks for Long-Lasting Results

Wide cracks or cracks in high-stress zones like near the windshield need reinforcement to keep them from coming back.
Cut and Fit Fiberglass Mesh
- Remove lower dash panels if you need access to the back of the crack.
- Cut a fiberglass patch 1 inch larger than the crack on all sides.
- Mix epoxy resin according to the kit instructions.
- Brush epoxy onto the back of the dash, lay the fiberglass patch over it, and saturate with more resin until translucent.
- Let it cure for 4 to 6 hours.
This creates a structural bridge that stops flexing and prevents the crack from reopening.
Add Flexibility with Silicone
- Apply a thin layer of clear silicone over the epoxy before final filling.
- Silicone absorbs heat expansion and contraction, which matters in hot climates.
Then continue with filler, sanding, and painting as described above.
Know When to Call a Professional
DIY covers most cases, but some situations call for expert help.
Signs You Need a Pro
- The entire dash is warped or collapsed
- Previous repairs have failed
- You want a warranty-backed result
- Your truck is a high-trim model like LTZ or Z71
What Professionals Offer
- Full dash pad replacement with OEM or aftermarket parts
- Industrial-grade materials and vacuum-forming tools
- Custom finishes including leather-wrapped dash tops
- Warranties ranging from 1 to 3 years
Typical Cost Ranges
- Minor professional repair: $100 to $200
- Full dash replacement: $400 to $800+
- Custom upholstery: $1,000+
Look for local auto interior shops with 4.8+ star reviews on Google or Yelp.
Prevent Future Cracking
Once your dash is fixed, protect it from the same sun damage that caused the original problem.
Block UV Exposure
- Use a windshield sunshade every time you park
- Park in shade or a garage whenever possible
- Consider tinting the upper 4 to 6 inches of your windshield (check local laws)
Condition the Dashboard Regularly
- Apply a UV-protective interior detailer every 4 to 6 weeks
- Avoid silicone-heavy shine products that attract dust and dry out plastic
- Recommended products: Meguiar’s D108, 303 Aerospace Protectant, or Chemical Guys VRP
Install a Permanent Cover
- Hard plastic caps offer the best long-term protection
- Dash carpets are cheaper but less durable
- Custom-fit covers with Velcro or clips work for any Silverado year
Think of it as sunscreen for your dashboard.
Compare Your Repair Options

| Solution | Best For | Skill Level | Cost | Longevity |
|---|---|---|---|---|
| Dash Skin Cap | Crumbling 2007–2013 dashes | Moderate DIY | $$$ | 10+ years (lifetime warranty) |
| DIY Filler Repair | Hairline cracks on sound base | Beginner to Intermediate | $ to $$ | 1 to 3 years |
| Fiberglass Reinforcement | Deep, structural cracks | Intermediate | $$ | 3 to 5 years |
| Professional Replacement | Severe damage, warranty needed | Pro service | $$$$ | Like-new, long-lasting |
Frequently Asked Questions About Fixing a Cracked Silverado Dash
Will GM repair my cracked dash under warranty?
No. General Motors does not cover this defect under warranty, and a class-action lawsuit over the issue was dismissed. Owners are responsible for repair costs.
What years of Silverado are affected by the dash cracking flaw?
The manufacturing flaw primarily affects 2007 to 2013 Chevrolet Silverado and GMC Sierra models. Trucks in hot climates like Texas and Arizona tend to see the worst damage.
Can I use duct tape or glue sticks for a quick fix?
Avoid these. Temporary fixes trap heat and moisture, which makes the underlying damage worse. Use proper filler or a dash cap instead.
How long does a dash cap installation take?
Plan on about 1 to 2 hours for active work, plus a 24-hour curing time before you reinstall trim or drive aggressively.
What is the cheapest way to fix a cracked dash?
A DIY filler repair using epoxy or Bondo costs roughly $20 to $50 in materials and works well for hairline cracks on a structurally sound dash.
Will a dash cap fit if my original dash is already crumbling?
Yes, but the underlying surface should be as stable as possible. Caps bond best to a solid base. If your dash is severely disintegrated, professional replacement may be a better choice.
Key Takeaways for Fixing Your Silverado’s Cracked Dash

A cracked Silverado dash is a fixable problem, not a death sentence for your truck’s interior. The most important step is assessing your damage level honestly before choosing a method. Hairline cracks respond well to affordable filler repairs, while the 2007 to 2013 crumbling flaw almost always calls for a hard plastic dash cap.
Once the repair is done, commit to prevention. A windshield sunshade, regular UV-protectant conditioning, and smart parking habits will keep your fix looking good for years. If you want a guaranteed result or your damage is severe, a professional interior shop can replace the entire dash pad with warranty-backed work.
Start by inspecting your dash today and deciding which method matches your damage and budget.



