
A broken Chevy Silverado door handle can leave you stranded outside your truck or unable to open the door from inside. Most handle failures happen at the worst possible moment, and dealership repairs often cost hundreds in labor alone. The good news is that fixing a Silverado door handle is a DIY-friendly job that usually takes under an hour with basic tools.
This guide walks you through repair procedures for Silverado models from 1999 to 2021 and beyond. You will learn how to identify your truck’s generation, replace exterior and interior handles, avoid common mistakes, and handle emergency situations where the door is stuck shut.
Identify Your Silverado’s Generation
Before touching a single tool, you need to know which generation your truck belongs to. Fastener types, access points, and internal mechanisms differ significantly between model years.
1999–2007 (GMT800)
Exterior handles attach with three 10mm nuts accessed from inside the door. The interior panel removes easily with basic hand tools. No electronic components are involved in the handle mechanism.
2007–2013 (GMT900)
Handles secure with 10mm bolts. This generation includes a vapor barrier sealed with butyl tape that tears easily if handled roughly. Some trim levels have electrical switches integrated into the door panel.
2014–2021+ (T1XX)
Uses a T20 Torx screw and an internal clip mechanism. Removing the handle disengages a safety lock, so you must not close the door until reinstallation is complete. Misalignment is the most common cause of failure on these models.
Knowing your generation ensures you follow the correct steps and avoid damaging trim or locking yourself out.
Fix Exterior Handle on 1999–2007 Models
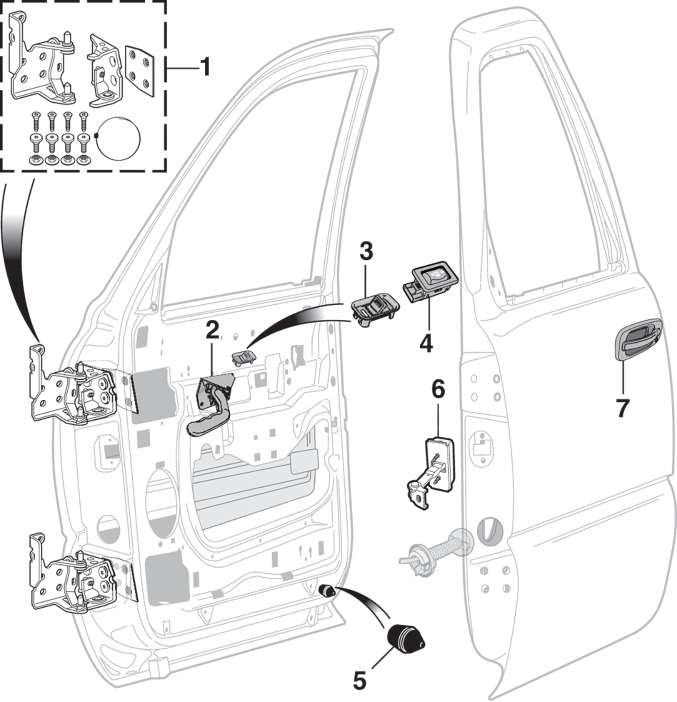
These older Silverados use straightforward mechanical systems. The most common failure is a snapped plastic lever or a loose linkage rod.
Remove the Door Panel Safely
Start with the window rolled all the way down. Use a flathead screwdriver to gently pry off three trim pieces: the corner panel near the mirror, the panel next to the door lock, and the trim around the interior handle.
Unplug the window and lock switch connector. Remove two 7mm screws holding the door panel. Lift the panel straight up to clear the window channel, then disconnect any remaining wiring harnesses before setting it aside.
Access and Remove the Handle Nuts
With the panel off, locate the three 10mm nuts securing the exterior handle. One nut sits at the front, one toward the rear, and one hides behind the door frame.
Use a socket wrench with an extension. If visibility is poor, hold the new handle in place to align the bolt holes and mark their positions with a marker.
Transfer the Linkage and Lock Cylinder
Pull the old handle outward slightly. Use pliers to slide off the plastic clip connecting the link rod. Disconnect the lock rod by pulling the center clip and pushing the cylinder out.
Install the lock into the new handle first, then reconnect the link rod. Snap the plastic clip back securely until you hear a click.
Reinstall and Test
Position the new handle and reinstall all three nuts. Reattach the door panel, making sure all clips snap fully. Reconnect the wiring and test both the lock and open functions from outside and inside.
Pro Tip: If the handle feels stiff after installation, check that the link rod is not binding. A slight bend in the rod can prevent smooth operation.
Replace Exterior Handle on 2007–2013 Models

This generation adds complexity with sealed vapor barriers and electrical components. A common symptom is a handle that moves but does not open the door, often due to disconnected rods.
Remove Trim and Lock Knob
Use a trim tool to pry off the small plastic cover behind the exterior handle. Slide a pick up through the slot under the lock knob to release its retaining clip, then pull the knob off.
Remove two 10mm bolts securing the handle. Keep a magnet nearby because bolts often fall into the door cavity.
Peel Back the Vapor Barrier Carefully
The black butyl tape seal must be lifted slowly to avoid tearing. Use your fingers or a plastic tool. If it tears, reseal it later with butyl tape or rubberized undercoating.
Remove the lower door cover using a trim tool. Locate the latch rod connected to the exterior handle. Open the small access door on the outer edge of the door and pull the rod out.
Extract the Handle and Transfer Components
Locate the lock rod near the handle. Push it outward (away from the cab) until it releases. A trim tool can provide leverage if needed.
Remove three 10mm bolts: two through the handle mounting holes and one at the front. Wiggle the handle out gently, bringing the lock rod with it.
Transfer the lock cylinder by pushing out the side clip and sliding it into the new handle. Rotate it to lock it in place.
Reinstall With Proper Alignment
Slide the new handle down into position, open it slightly, push inward, then slide toward the outside until flush. From inside, install two 10mm bolts and tighten just enough to hold without crushing the plastic.
Reconnect the lock rod and latch rod through the access door. Reattach the lower cover, vapor barrier, and door panel. Match wiring connectors by color (white to white, black to black). Press all clips firmly.
Warning: Never force the panel back on. Broken clips lead to rattles and water leaks inside the cab.
Repair 2020–2021+ Models Without Getting Locked Out
Newer Silverados have a critical safety interlock. Remove the handle incorrectly and the door cannot be reopened from the outside, even with a key. This is a design feature, not a glitch.
Prepare Before Starting
Roll all windows down. Have a hook tool and T20 Torx socket ready. Do not close the door once the handle is removed.
Remove the T20 Torx Screw Correctly
Locate the rubber grommet near the inner door handle. Pull it out with a hook tool to expose the T20 screw.
While pulling the exterior handle outward, begin loosening the Torx screw. This keeps the internal mechanism engaged. Stop when you feel resistance, which means the handle is ready to come out.
Remove the Outer Handle Panel
Use a plastic pry bar to separate the outer panel from the door. Work slowly around the edges. Once loose, slide the handle assembly out.
Avoid the Most Common Mistake: Misaligned Engagement
Many users report the handle slides in but will not catch when tightening the Torx screw. This happens because the plastic lever is not aligned with the internal metal linkage. The Torx screw only secures the keyhole cover, not the handle mechanism itself.
To fix this:
1. Fully remove the handle
2. Loosen the Torx screw completely
3. Use a hook tool to pull the center mechanism toward you
4. Hold it taut while sliding the handle in
5. Apply steady pressure until you feel a distinct click or grab
This tension confirms the internal clip has re-engaged.
Reinstall the Grommet and Test
Once secure, reinstall the outer panel and rubber grommet. Test the door from both sides. The handle should open smoothly and return with spring tension.
Expert Note: If the plastic lever is cracked or the linkage is damaged, replacement is required. No repair will hold long-term.
Fix Interior Door Handle on 2007–2013 Models

Interior handles fail due to broken plastic rivets or worn cables. The fix requires drilling but results in a stronger, long-term solution.
Remove Trim and Door Panel
Pry off the panel behind the handle, the door pull handle cover, and the triangular trim at the top of the door.
Remove three 10mm bolts (one behind the handle, two below). Disconnect the switch panel by pressing the tab and pulling the plug. Unhook the lock cable using a flathead to pry the clip.
Lift the door panel upward after releasing all clips. Disconnect the handle cable using needle-nose pliers to push the clip and slide the cable out.
Drill Out Factory Rivets
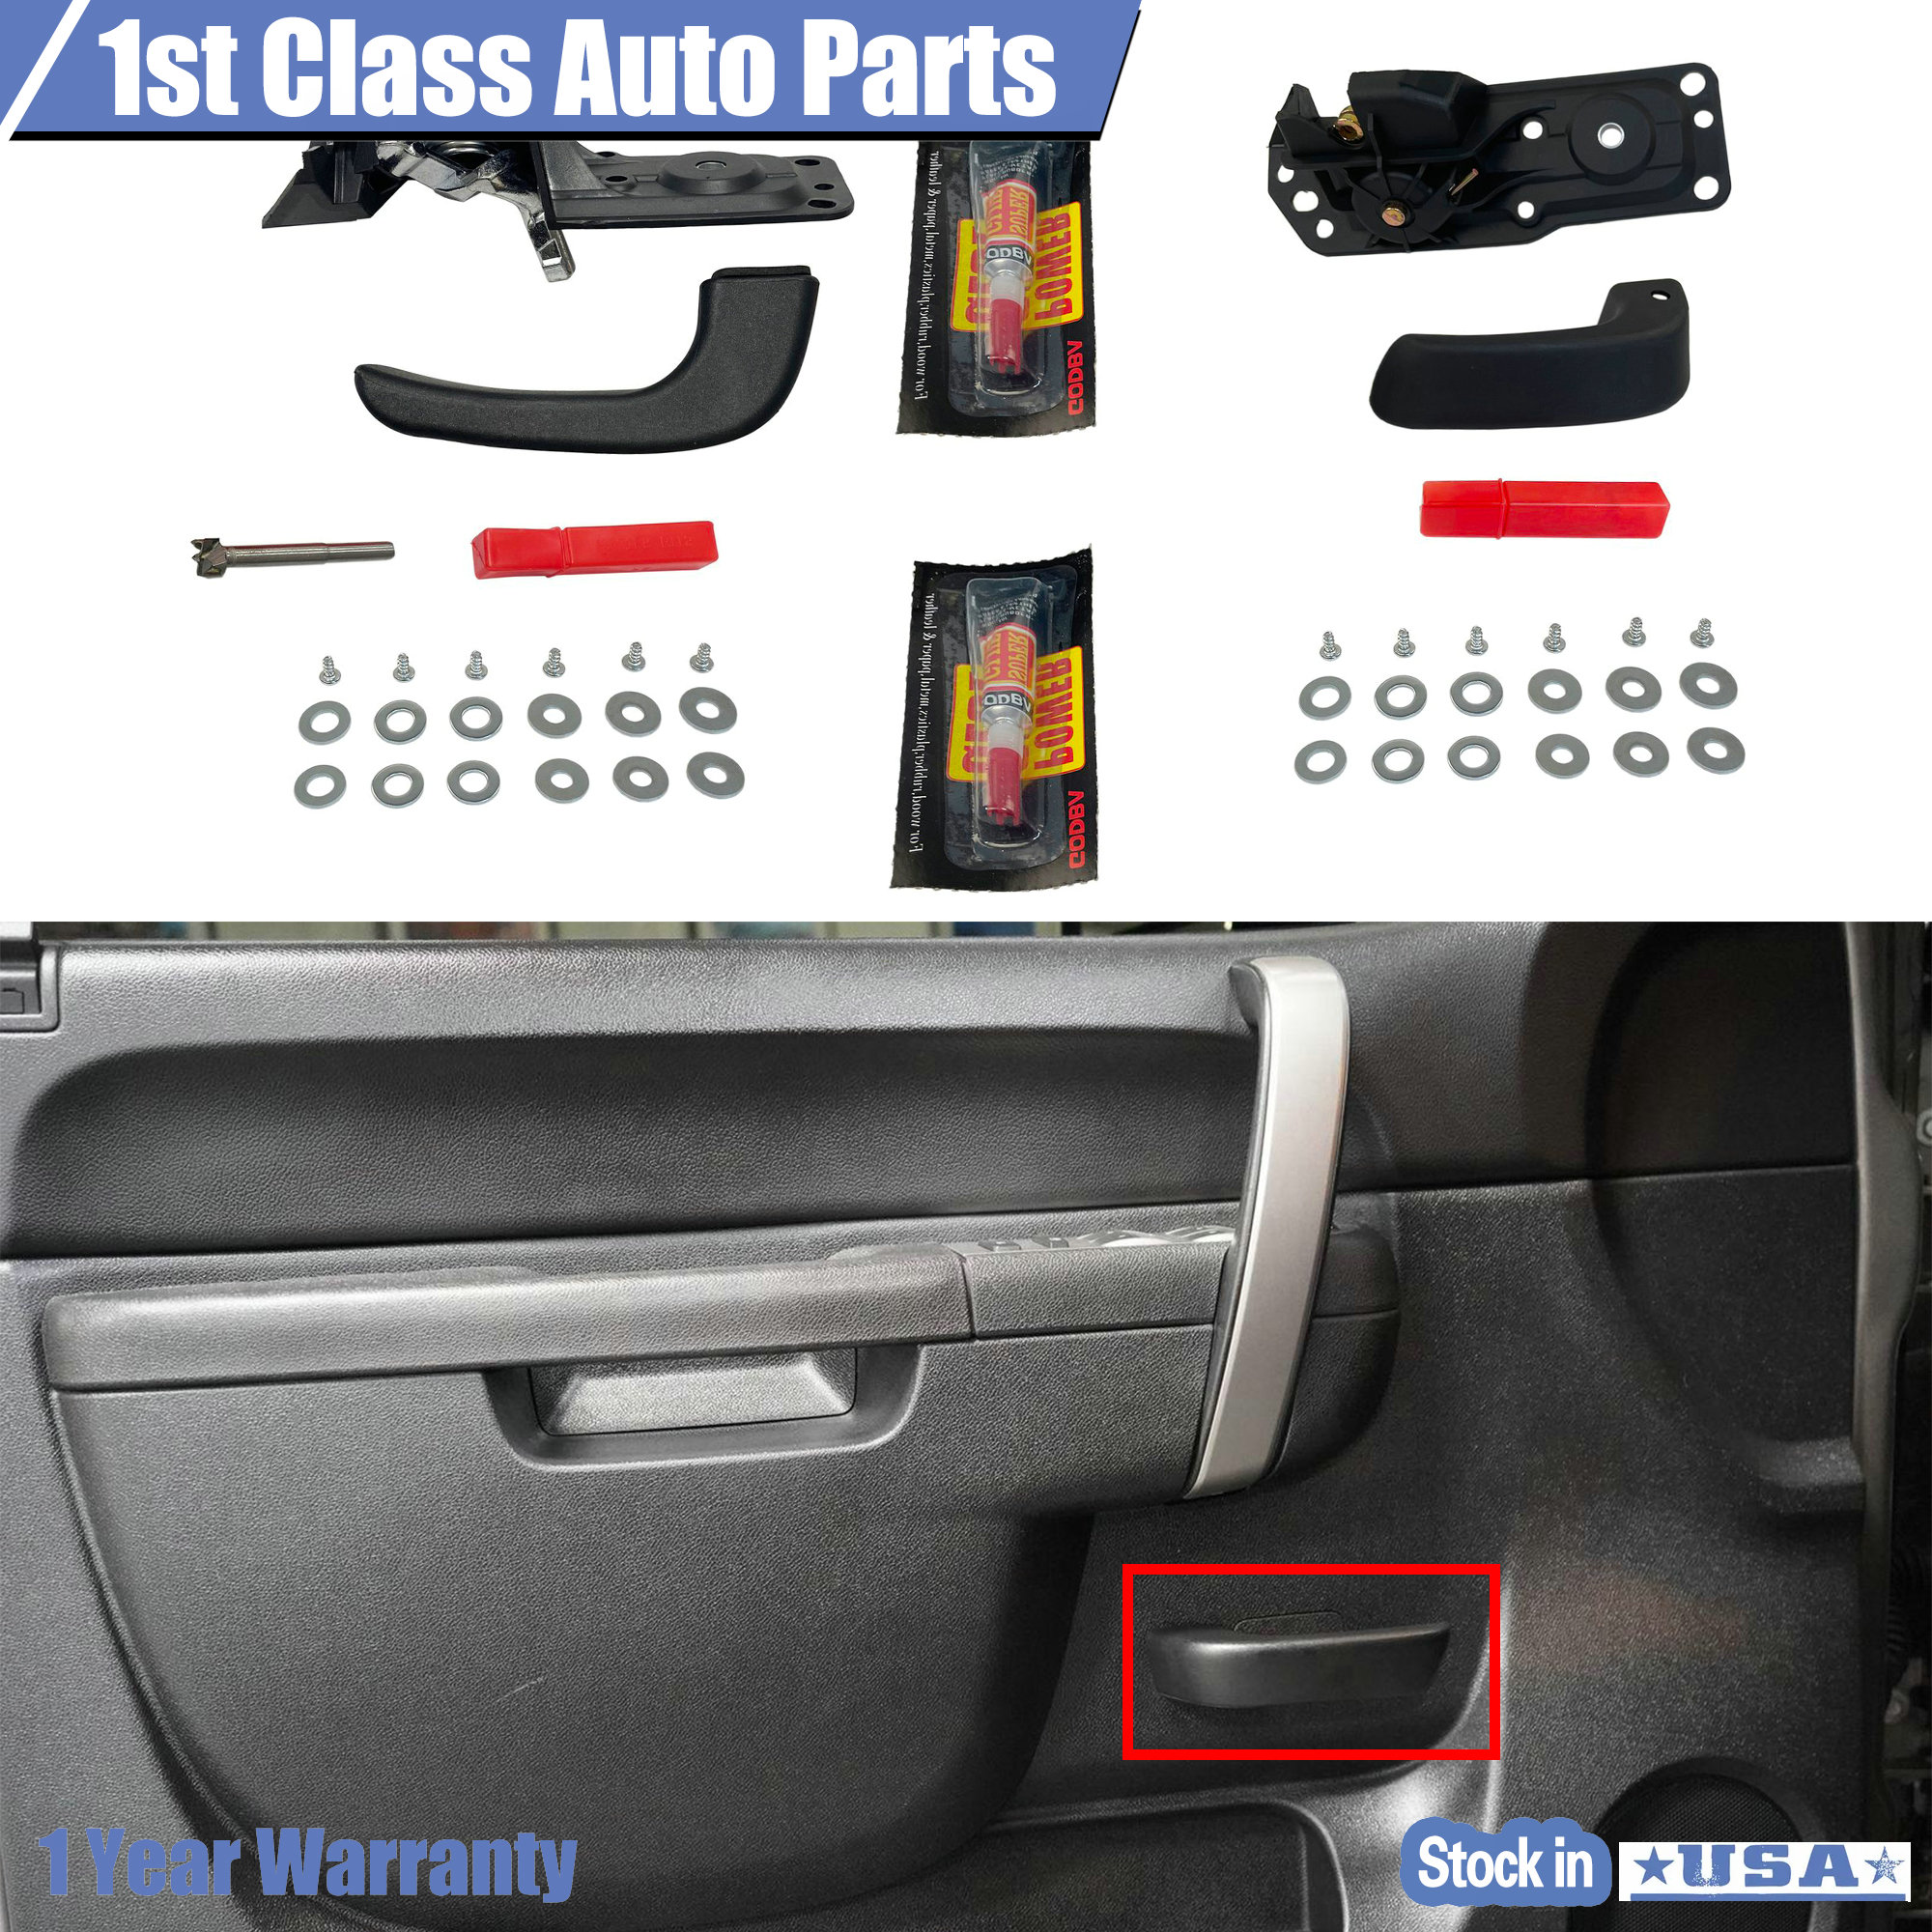
Use the drill bit included in most replacement kits to remove the plastic rivets securing the handle bezel. Drill until the heads are gone, then pry out the clips.
Remove the old handle and extract the metal rod through the door.
Upgrade With Bolts and Glue
Instead of replacing with weak rivets, apply super glue to the back of the new bezel. Insert the provided washers and bolts at each corner. Tighten carefully because over-tightening cracks the plastic.
This creates a far more durable mount than the factory rivets.
Reconnect and Reassemble
Route the handle cable into the new unit and secure with the clip. Reconnect the lock cable and electrical harnesses. Align the door panel and press all clips firmly. Reinstall trim and bolts.
Time-Saving Tip: Label connectors before disconnecting if you are working in a dark area or dealing with a complex harness.
Emergency Fix When the Door Will Not Open
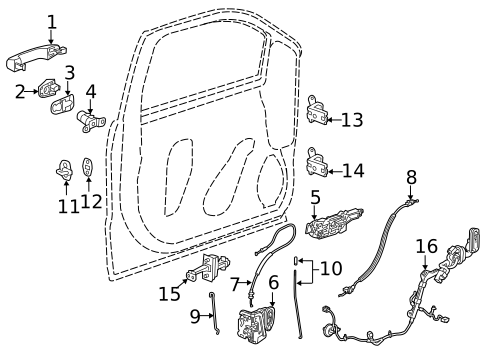
If both handles are broken and the door is stuck shut, do not cut it open. Try these non-destructive methods first.
Break the Exterior Handle as a Last Resort
Since the plastic handle is already broken, carefully break it off to expose the internal rods. Use pliers to pull the latch rod directly and pop the door open.
Once open, follow the replacement steps for your generation.
Access From Inside if the Panel Is Partially Free
If you can reach behind the door panel, locate the latch mechanism. Use a screwdriver or pick to manually trigger the release lever.
This often works when the interior cable has detached.
Warning: Never use excessive force. You risk damaging the latch, which costs more to replace than the handle.
Prevent Future Handle Failures
A repaired handle does not have to fail again. Follow these maintenance tips to extend its life.
Lubricate Linkage Periodically
Use white lithium grease on metal rods and pivot points. Avoid oil because it attracts dirt and causes sticky operation.
Check for Loose Bolts
Every six months, inspect exterior handle tightness. Vibration from rough roads can loosen 10mm bolts over time.
Replace Rivets With Upgraded Hardware
For interior handles, bolts combined with super glue outlast factory rivets. It is a simple upgrade with major durability benefits.
Handle With Care
Do not yank the door open. A smooth pull extends the life of plastic levers and clips.
When to Replace the Entire Latch
If the handle and linkage are intact but the door still will not open, the latch mechanism itself may be faulty. Symptoms include rods that move but do not release the latch, grinding or stiff resistance, and doors that lock but will not unlock manually.
In this case, remove the door panel and inspect the latch. Replacement takes 30 to 45 minutes and requires a 10mm socket.
Frequently Asked Questions About Chevy Silverado Door Handle Repair
How long does it take to replace a Silverado door handle?
For 1999 to 2007 models, exterior handle replacement takes under one hour. Newer 2020+ models may take slightly longer due to the precision alignment required for the internal clip mechanism.
What tools do I need to fix a Chevy Silverado door handle?
Basic tools include a flathead screwdriver, Phillips screwdriver, 10mm socket, 7mm socket, pliers, and needle-nose pliers. For 2007 to 2013 models, add a trim tool and magnet. For 2020+ models, you need a T20 Torx socket and a hook tool.
Can I replace just the handle without removing the door panel?
On 1999 to 2007 models, you must remove the door panel to access the mounting nuts. On 2020+ models, you can access the Torx screw through a small grommet without full panel removal, but the panel still needs to come off for proper alignment.
Why does my new handle not catch or lock into place?
On 2020+ models, this usually means the internal mechanism is misaligned. The Torx screw only secures the keyhole cover, not the handle itself. You need to use a hook tool to pull the center mechanism taut before sliding the handle in.
Will I lock myself out if I remove the handle on a 2020+ Silverado?
Yes, if you close the door after removing the handle, you will not be able to reopen it from the outside. Keep all windows down and leave the door open until reinstallation is complete.
Is it worth replacing the handle myself or going to a dealer?
DIY replacement typically costs under $50 for parts and takes less than an hour. Dealer labor often runs several hundred dollars for the same job. The repair is straightforward for anyone comfortable with basic hand tools.
Key Takeaways for Fixing Your Chevy Silverado Door Handle
Fixing a Chevy Silverado door handle is a manageable DIY project across all generations, with one major exception. On 2020 and newer models, strict adherence to the Torx screw and internal clip procedure is essential. Get it wrong and you will be locked out permanently until the handle is reinstalled.
For older trucks from 1999 to 2013, the repair is largely mechanical and forgiving. Basic sockets, screwdrivers, and pliers are all you need. For newer ones, precision alignment is everything, and having the right hook tool makes the difference between success and frustration.
With the right tools and preparation, this fix costs under $50 and takes less than an hour. You will save hundreds compared to dealer labor and gain the confidence to handle future door repairs on any GM truck. Start by identifying your generation, gather the correct tools, and follow the steps specific to your model year.



