
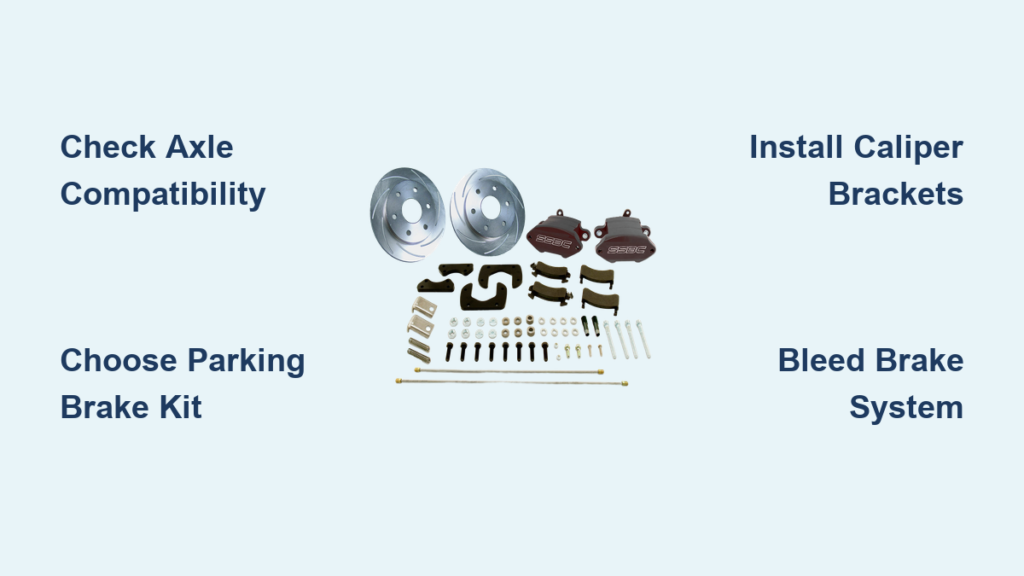
If your Chevrolet Silverado still rolls on factory rear drum brakes, you are leaving real performance and safety on the table. Drum systems trap heat, wear unevenly, and fade fast when you tow, haul, or run larger tires. A rear disc brake conversion for your Silverado swaps that outdated hardware for the same modern rotor and caliper technology already on your front axle, giving you stronger stops, better cooling, and far easier maintenance.
This guide walks you through every stage of a Silverado drum to disc brake conversion. You will learn how to confirm axle compatibility, choose the right kit, remove the old drums, install brackets and rotors, integrate the parking brake, and finish with a proper break-in. Whether you drive a GMT800 or GMT900 truck, the process is achievable with basic tools and careful preparation.
Confirm Axle Compatibility Before You Buy

The most common mistake owners make is ordering a kit without verifying fitment. Silverado axles vary by generation and configuration, and the wrong kit means wasted money and time.
Identify Your Truck’s Platform
Your model year determines which conversion kits apply. GMT800 trucks (1999–2006) include early Silverado 1500 and 2500 models, often with 10- or 11-inch drums and GM 10- or 12-bolt rear axles. GMT900 trucks (2007–2014) cover most Silverado 1500s in that range, though some kits extend back to 2002 or forward to 2018.
Check your RPO code on the driver’s door sticker for axle codes like “GT4” or “GU6.” This code confirms whether your axle matches conversion kit requirements.
Measure the Brake Flange
Even within compatible years, flange dimensions vary. Use a caliper to measure the diameter and thickness of the drum brake mounting surface at the back of the hub. Compare your numbers to the manufacturer’s specs before purchasing any kit.
Verify Wheel Clearance
Most disc conversion kits fit inside 15-inch wheels, but larger billet calipers may rub the inner barrel. Remove a wheel and dry-fit the rotor and caliper to check clearance. Rotate by hand to simulate full suspension travel. If contact occurs, light sanding of the caliper or 5–10mm wheel spacers usually solves the problem.
Choose the Right Conversion Kit
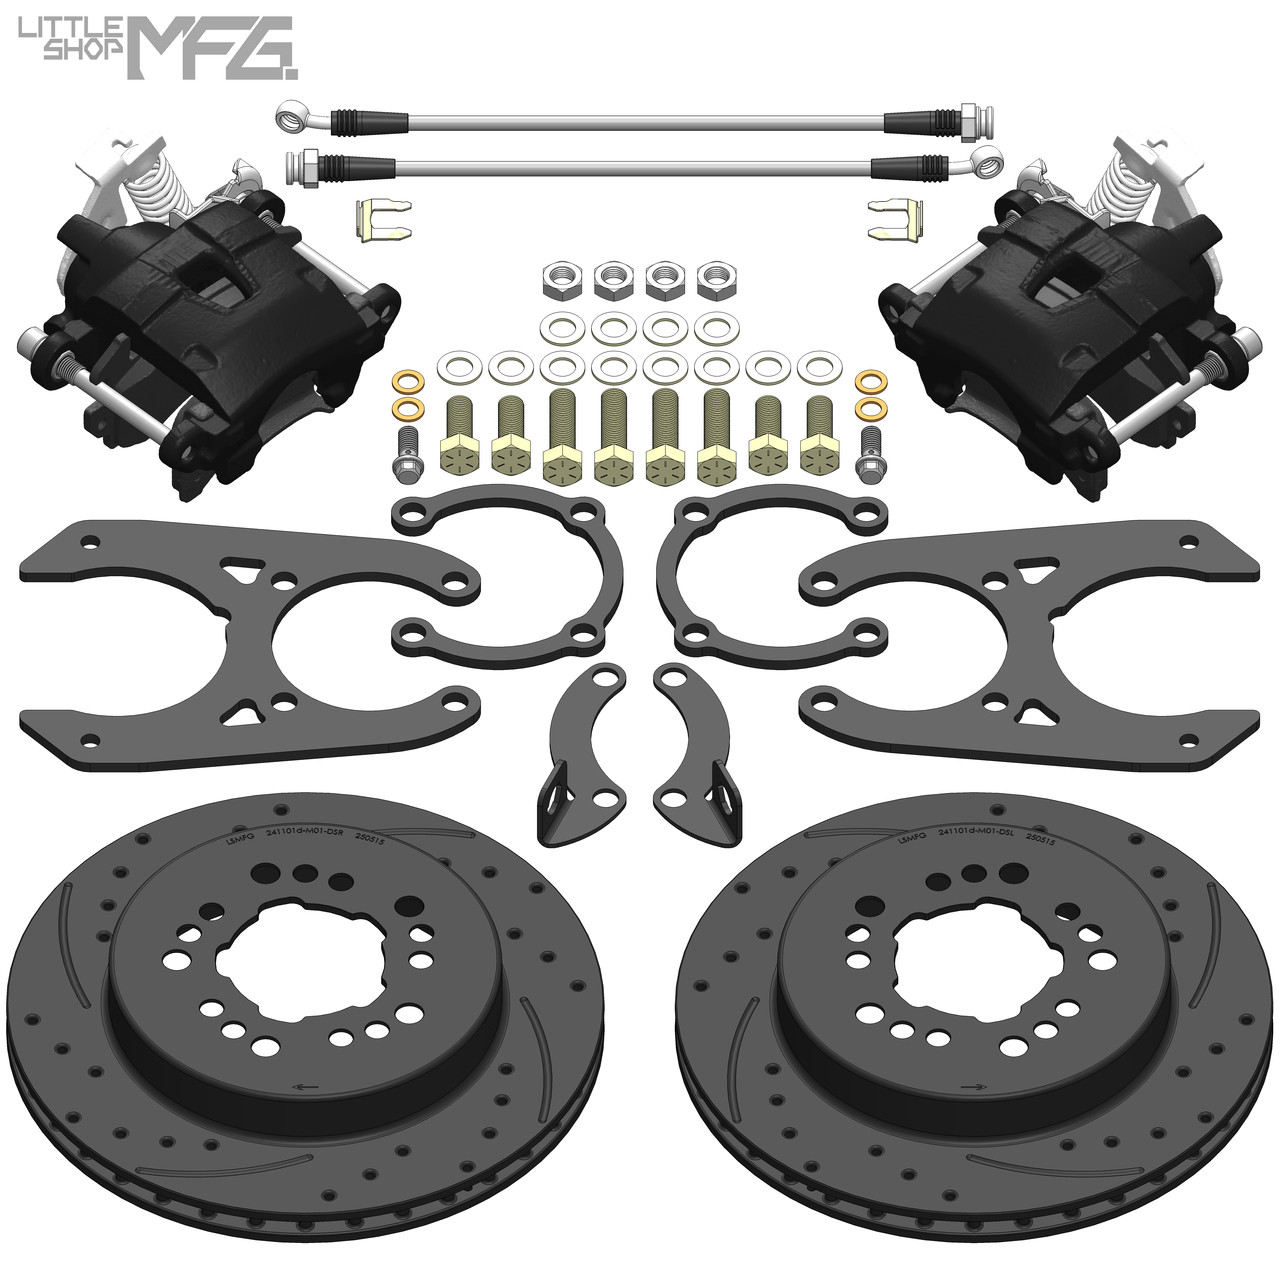
A quality kit ensures a true bolt-on install with no fabrication. Kits vary widely in price, performance, and parking brake support.
Core Components in a Complete Kit
A standard rear disc brake conversion kit for Silverado includes:
- Caliper brackets that mount directly to the axle flange
- 12-inch rotors in smooth, drilled, slotted, or combo designs
- Disc calipers in cast iron or billet aluminum
- All bolts, spacers, shims, and crush washers
High-quality kits use two-piece bracket designs or direct-flange mounts, so no welding is required.
Parking Brake: A Critical Decision
You must decide how to handle the parking brake before ordering. Internal parking brake calipers include a small drum inside the rotor hat and work like an OEM setup. Non-parking brake calipers require a separate electronic or mechanical e-brake system.
Many budget kits do not include parking brake capability. If you want your foot or hand brake to keep working, select a kit that specifically lists “Parking Brake Caliper.”
Kit Price Tiers
| Tier | Price Range | What You Get |
|---|---|---|
| Budget | ~$539 | Basic calipers, rotors, brackets; e-brake often +$149 |
| Mid-Range | $750–$990 | Zinc-plated calipers, MaxGrip rotors, full hardware |
| High-Performance | $1,100–$1,877 | Billet calipers, drilled/slotted rotors, internal e-brakes |
For most Silverado owners, a mid-range kit delivers the best balance of cost, durability, and ease of installation.
Remove the Factory Drum Brakes
Start by lifting the truck and securing it on jack stands. Remove the rear wheels to access the drums.
Free a Seized Brake Drum
If the drum refuses to budge, do not hammer it aggressively. Instead, thread a torque converter bolt (M10x1.5) into one of the drum’s threaded holes and tighten evenly. The bolt acts as a puller and forces the drum off the hub without damaging the axle seal.
Disassemble the Drum Hardware
With the drum off, follow these steps:
- Use a brake adjuster tool to back off the star wheel and release spring tension.
- Remove the return springs with a brake spring tool.
- Unbolt the backing plate (usually 6–8 bolts). A dead blow hammer helps break these loose.
- Disconnect the emergency brake cable and brake hard line.
Inspect the brake shoes. If the friction material is worn down to metal, your drums were severely worn.
Pull the Axle Shaft If Needed
Some kits require axle removal for clean backing plate access:
- Drain the differential fluid.
- Remove the 8mm cross-pin bolt from the differential carrier.
- Push the axle inward about a quarter-inch to expose the C-clip.
- Remove the C-clip and slide the axle out.
- Remove the old backing plate from the hub end.
Reinstall the axle after conversion, making sure the C-clip re-engages fully.
Install Brackets and Rotors
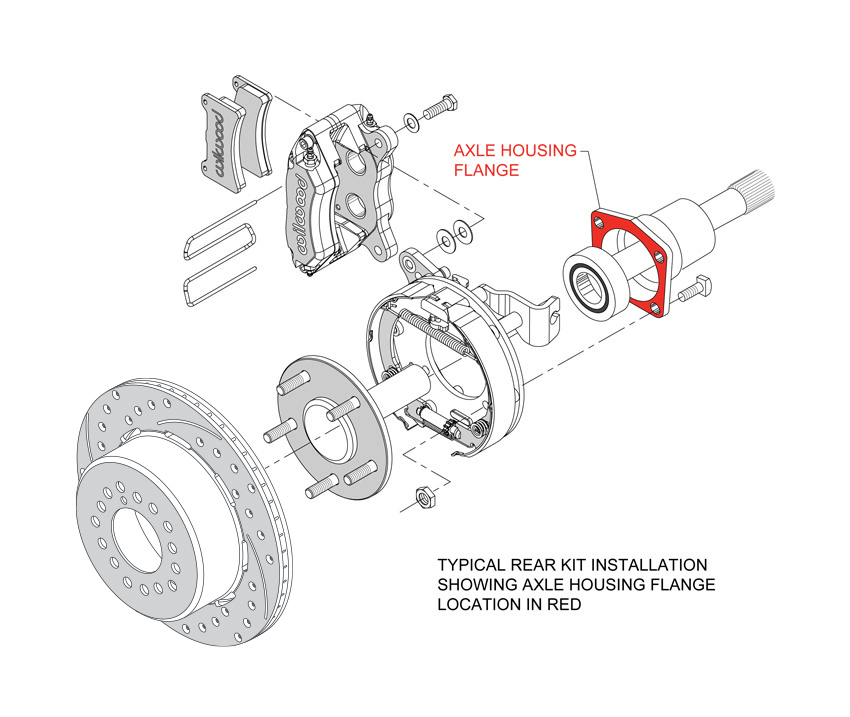
Now mount the new disc brake system directly to the axle housing.
Mount the Caliper Bracket
- Attach the adapter plate and spacer to the caliper bracket.
- Orient the top notch forward toward the differential.
- Secure with small bolts torqued to 20 ft-lbs.
- Bolt the full assembly to the axle flange at 65 ft-lbs.
Some bolts have a dented head for anti-loosening. Use two wrenches to tighten without stripping. Apply Loctite 242 to all threads unless the kit specifies otherwise.
Slide On the Rotor
Fit the new 12-inch rotor onto the hub and confirm it clears the dust shield and suspension components. Rotate it manually to check for rubbing.
Mount the Caliper
- Position the caliper over the rotor.
- Bolt it to the bracket and confirm smooth movement with no binding.
- Install the banjo bolt at the caliper inlet using new copper crush washers on both sides.
- Torque the banjo bolt to roughly 25–30 ft-lbs. Do not use Loctite here.
If the kit includes new dust shields, slide them over the axle before final flange attachment.
Integrate the Parking Brake System
This is the trickiest part of any Silverado drum to disc conversion. Factory cables rarely fit aftermarket calipers.
Source the Parking Brake Lever
Most kits do not include the e-brake lever. You will need to salvage one from a donor GM truck with a matching disc setup. The lever connects to an internal shoe via a small pill that fits into an adjuster cup. Both sides must engage with minimal travel.
Modify or Replace the Cables
Passenger side: Cut the factory cable end and splice on a new hook from a Dorman replacement cable. Crimp securely and test movement.
Driver side: If the cable is too short, create a custom frame anchor by drilling a hole in a sturdy frame ear, bending it slightly for angle, and securing with a bolt and lock nut.
Central splitter: The parking brake splits at a central equalizer. Upgrade this connection by joining both cables with an aluminum sleeve and crimping three times (center and both ends) using a 1/8-inch crimping tool with the #3 die.
Test by pulling the e-brake lever. Engagement should be firm with less than 4–5 clicks.
Route New Brake Lines
Factory hard lines usually do not match disc caliper threads.
Modify the Hard Line
- Use a tube cutter to make a clean cut just past the original hose path.
- Drill out the fitting slightly if the inner diameter is too small.
- Use a double-flaring tool to create a perfect flare on the cut end.
- Attach a braided stainless steel hose with proper threads.
- Install new copper crush washers and torque to spec.
Never reuse old crush washers. They will not seal and will leak.
Optimize Line Routing
Follow the factory path but confirm there is no contact with wheels, rotors, or suspension. Allow slack for full articulation. Braided stainless hoses resist expansion under pressure, which improves pedal feel.
Final Assembly and Bleeding
Reassemble everything and prepare to bleed the system.
Reinstall Wheels and Calipers
Double-check all torque values:
- Bracket mounts: 65 ft-lbs
- Small hardware: 20 ft-lbs
Confirm the caliper slides freely and parking brake shoes are fully seated.
Bleed the Brakes
Air in the lines causes a spongy pedal. Bleed in this order:
- Rear passenger
- Rear driver
- Front passenger
- Front driver
Use a vacuum bleeder or have a helper pump the pedal. Keep the master cylinder topped off with DOT 3 or DOT 4 fluid. Pump the pedal 10–15 times after bleeding to build pressure.
Break-In Procedure
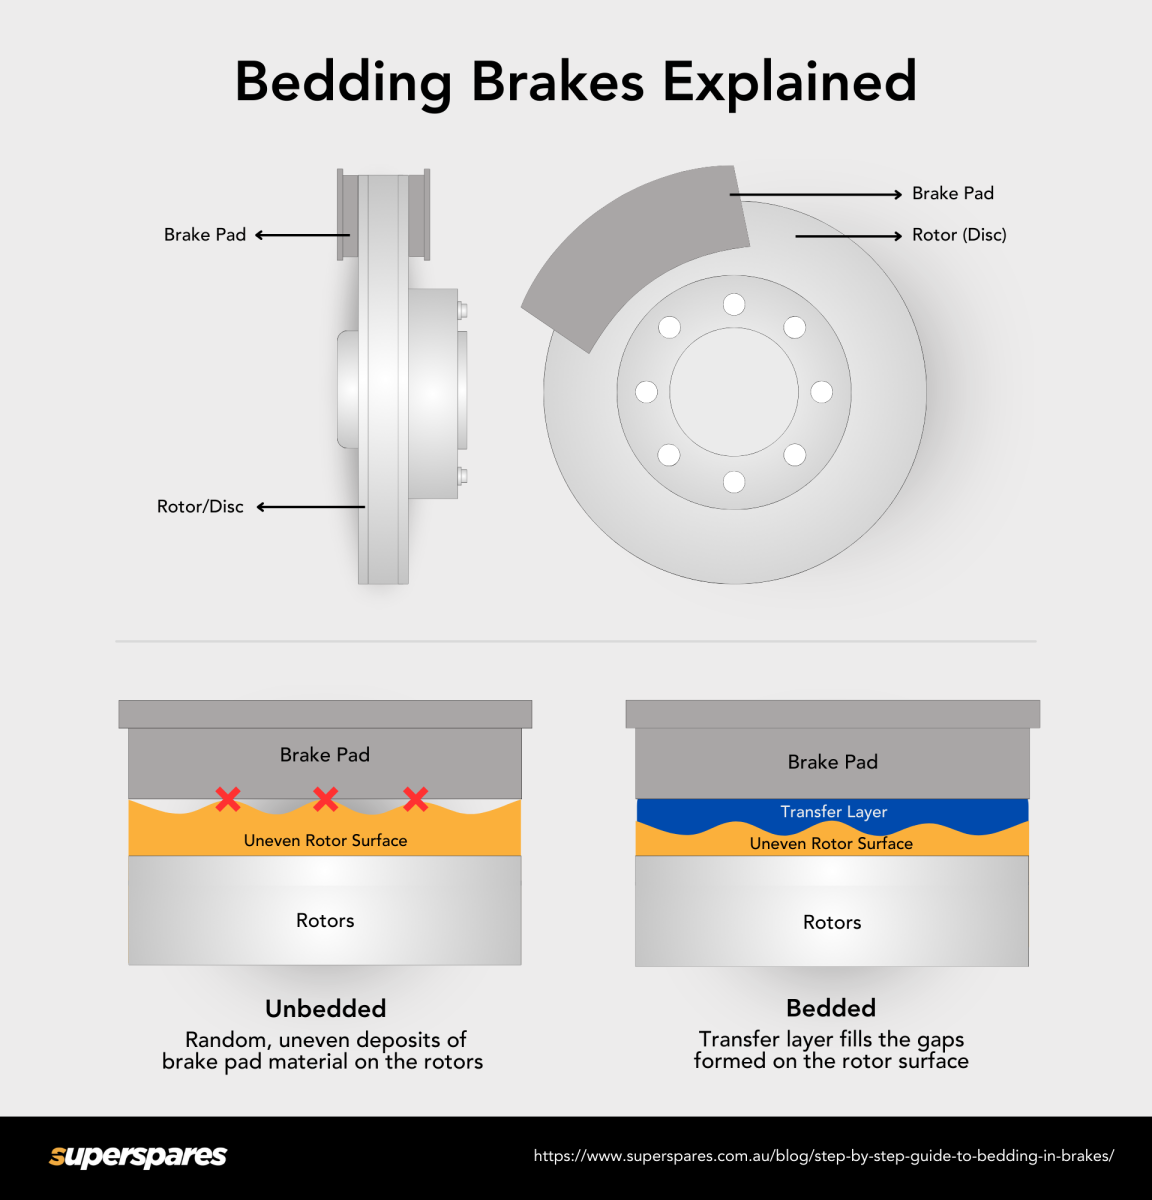
Skip this step and you risk glazing pads or warping rotors.
Bed-In the Brakes
For the first 200 miles:
- Drive at 45–55 mph.
- Apply moderate brake pressure to slow to 15–20 mph.
- Repeat 8–10 times without coming to a full stop.
- Allow 30 seconds between applications for cooling.
Avoid hard stops or sustained braking during this period. The process transfers pad material evenly to the rotor for maximum grip and longevity.
Troubleshoot Common Issues
Even a clean install can have hiccups. Here is how to fix them.
Soft or Spongy Pedal
- Air in the lines: Re-bleed thoroughly.
- Master cylinder pushrod misalignment: Check the length. Too long prevents full stroke.
- Leaking banjo bolt: Replace crush washers and re-torque.
ABS Light On
- Confirm the rotor does not block the wheel speed sensor.
- Install any included sensor brackets.
- Verify rotor tooth count matches factory if using a non-OEM rotor.
Caliper Rubs Wheel
- Sand the outer edge of the caliper lightly with a die grinder.
- Or install 5–10mm wheel spacers with longer studs.
- Never force the wheel on.
Leaking Brake Fluid
Check the banjo bolt, hard line flare, and hose connections. A single drip can compromise the entire system.
Maintain Your New Disc Brakes
Disc brakes are easier to service than drums. Here is how to keep them in top shape.
Inspection Schedule
Every 12,000 miles or annually:
- Check pad thickness (replace under 3mm)
- Inspect rotor condition for cracks, deep grooves, or warping
- Examine flex hoses for bulging or cracking
- Verify caliper slide pins move freely
Prevent Corrosion
- Use zinc-plated or anodized calipers in wet climates.
- Spray components with silicone lube to repel water.
- Clean rotors with brake cleaner every few months.
Unlike drums, discs do not trap moisture, which reduces rust and extends component life.
Re-Torque Mounting Bolts
After 500 miles, re-check bracket bolts at 65 ft-lbs. Vibration can loosen them over time. Also inspect custom e-brake splices for stretching or fatigue.
Frequently Asked Questions About Silverado Drum to Disc Conversion
How much does it cost to convert drum brakes to disc on a Silverado?
Conversion kits range from about $539 for budget options to $1,877 for high-performance billet setups. Mid-range kits typically cost $750–$990 and offer the best balance of price and quality.
Do I need to pull the axle shaft to convert rear drums to discs?
Some kits require axle removal for clean backing plate access. If your kit does not, you can leave the axle in place. Pulling the axle simply makes backing plate removal easier and avoids damaging the axle seal.
Will a disc brake conversion work with my factory parking brake?
Only if you choose a kit with an internal parking brake caliper. Many budget kits do not include this feature. You can also source a parking brake lever from a donor GM truck with factory rear discs.
Do I need to upgrade my master cylinder for a rear disc conversion?
Most conversions work with the stock master cylinder. However, if you notice a soft pedal after bleeding, check the brake booster pushrod length. A mismatch can prevent full pressure generation.
How long does the break-in period last after installing new disc brakes?
Plan for about 200 miles of gentle bedding-in. Drive at 45–55 mph, apply moderate brake pressure to slow down, and repeat 8–10 times with cooling periods between applications.
Can I install a disc brake conversion kit without welding?
Yes. Most modern kits are direct bolt-on installations using caliper brackets that mount to the factory axle flange. No welding, cutting, or axle machining is required for standard applications.
Key Takeaways for Your Silverado Disc Brake Conversion
Converting your Silverado’s rear drum brakes to discs is one of the most impactful upgrades you can make. You will gain stronger stopping power, reduced fade under load, and far easier maintenance. The job is achievable with basic tools and careful preparation, especially when you verify axle compatibility, choose a kit with the right parking brake setup, and follow the break-in procedure.
Before you start, confirm your axle code, measure the brake flange, and order a kit matched to your GMT800 or GMT900 platform. Take your time with cable splicing and brake line routing, and do not skip the bedding-in process. Once complete, you will have a rear braking system that finally matches your truck’s capability. Start by checking your RPO code today and sourcing a quality mid-range kit from a reputable supplier.



