
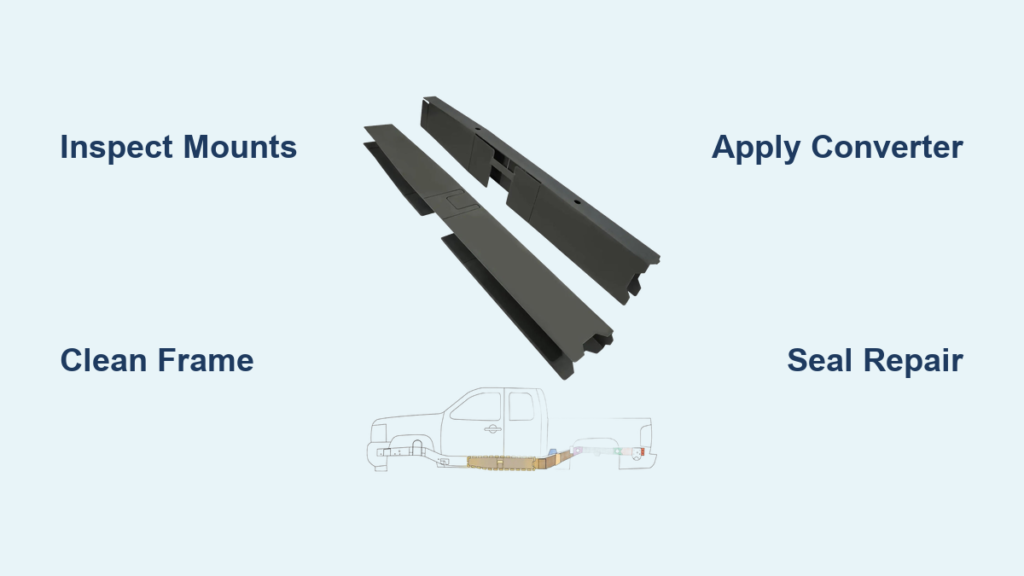
Frame rust is one of the most serious problems facing 2007–2014 Chevy Silverado owners. Unlike surface rust on body panels, frame corrosion attacks the structural backbone of your truck, threatening safety, handling, and resale value. The most vulnerable zones include leaf spring mounts, fuel tank crossmembers, and cab supports, all of which trap moisture and road salt over years of driving.
The good news is that a full frame replacement isn’t your only option. Targeted repair kits from brands like Rust Buster, Mountainpeak, and SafeTCap® let you replace just the damaged sections. This guide covers how to diagnose problem areas, choose the right kit, complete the repair, and protect your frame from future corrosion.
Identify the Worst Rust Zones on Your Silverado

Before ordering parts, you need to know exactly where rust is hiding. Clean the frame thoroughly and probe every suspect area with a screwdriver or wire brush.
Leaf Spring Mounts: The #1 Failure Point
The brackets and U-bolt pads where leaf springs attach to the frame are notorious for trapping moisture. Once rust eats through these mounts, the spring can shift or fail entirely, creating a serious handling hazard.
Visual cues to look for:
– Flaking paint or bubbling undercoating around the U-bolts
– Visible cracks or holes near the spring pads
– A sagging rear end or uneven ride height
Use a mirror and flashlight to inspect the inner side of each mount. That’s where corrosion typically starts before spreading outward.
Fuel Tank Crossmembers
These steel supports sit directly beneath the fuel tank, where road spray and debris constantly attack the metal. The forward section usually fails first because it catches more splash from the front tires.
Two main replacement options:
– Rear Fuel Tank Crossmember (RB7340): $269.99
– Forward Fuel Tank Crossmember (RB7339): $329.99
If the tank is sagging or you notice rust bleeding through the undercarriage near the tank straps, these crossmembers need attention.
Cab and Body Mounts
Rust at the cab mounts causes creaking over bumps, misaligned doors, and a general loss of structural rigidity. The rubber isolators degrade alongside the steel, letting the cab shift on the frame.
Common replacement parts:
– Front Cab/Body Mount (RB7324): $89.99
– Rear Cab Mount (RB7326): $99.99
– Radiator Support Mount (RB7323): $89.99
Check all four corners of the cab where it meets the frame. Any soft metal or flaking coating here warrants replacement.
Mid and Rear Frame Rails
When rust spreads beyond individual mounts, entire frame sections may need replacement. The zone between the rear cab mount and the front of the fuel tank crossmember is a known hotspot for Silverados of this generation.
Popular sectional repair kits:
– Center Frame Repair Kit (RB7338): $279.99
– Rear Mid Frame Repair Kit (RB7336): $249.99
– Mountainpeak Mid-Rear Frame Kit: ~$300
These modular kits let you cut out compromised steel and weld or bolt in new sections without replacing the entire frame.
Choose the Best Repair Kit for Your Truck
Not all kits are created equal. Match the product to your truck’s cab style, model year, and the extent of the damage.
Rust Buster: Best for Targeted Component Repairs
Rust Buster offers the largest catalog of frame-specific parts, with 30+ components covering 1999–2019 models. Their strength lies in precision replacement pieces for isolated damage.
Top picks:
– Leaf Spring Mount (RB7337): $99.99 with 25 reviews, making it the most popular single-component repair
– Center Frame Repair Kit (RB7338): $279.99, covers 2007–2019 1500 models
– Fuel Tank Crossmember (RB7340): $269.99, replaces the rear support with OEM-matching strength
This brand works best for DIYers dealing with spot rust or a single failed mount.
Mountainpeak: Best for Crew and Extended Cabs
Mountainpeak’s mid-rear frame kit is engineered specifically for 2007–2014 Silverado 1500 Extended and Crew Cab configurations. It’s a heavy-duty solution for widespread mid-frame rust.
Key specifications:
– Constructed from alloy steel with a dark green anti-corrosion coating
– Measures approximately 35 inches long with a 30-inch functional repair section
– Weighs 36 pounds
– Includes removable plates that let you notch around existing leaf spring mounts
– Installs without removing the bed or spring mounts, saving hours of labor
The kit ships with two installation videos and full manufacturer support. Most competing kits require major disassembly, so Mountainpeak’s design can cut your labor time in half.
SafeTCap®: Best for Heavy Duty Trucks
If you drive a 2001–2010 Silverado 2500 HD, SafeTCap® is built specifically for your platform. Their system uses high-strength coated steel and includes detailed location guides for precise placement.
What’s included:
– Corrosion-resistant repair sections for rear frame, crossmembers, and spring mounts
– Precise placement charts marking installation points
– Documentation suitable for both professional shops and serious DIYers
No user reviews are available yet, but the HD-specific focus and comprehensive documentation make it a solid choice for work trucks.
Prepare the Frame for a Lasting Repair
Skipping preparation guarantees a failed repair. Rust will return if you don’t neutralize every trace of oxidation before installing new parts.
Clean and Strip the Damaged Area
- Remove undercoating using a heat gun or chemical stripper
- Scrub the exposed metal with a wire wheel or angle grinder until you reach bare steel
- Cut out all rusted sections using a cutoff wheel or plasma cutter, removing any flaking, thin, or perforated metal
Wear a respirator during this process. Inhaling rust particles and coating dust is hazardous.
Apply Rust Converter
Spray Rust Buster’s Rust Converter & Primer (RB9917) directly onto the cleaned bare metal. This product costs $16.99 and neutralizes any remaining oxidation.
Application steps:
– Spray evenly across all exposed surfaces
– Allow 24 hours of drying time
– The converter forms a black protective layer that kills active rust
You cannot weld or paint over live rust. The converter creates a stable surface that bonds properly with new coatings.
Prime and Seal the Repair
After welding or bolting in the new section, apply Total Protection Rust Cover Paint (RB9909) at $48.95. Use it as a final topcoat to seal all welds and joints.
Apply two to three coats, allowing each to dry fully. This paint resists chipping and salt exposure far better than standard undercoating.
Install the Repair Kit Step by Step
Follow these steps for a safe, structurally sound installation. Always consult your specific kit’s instructions first.
Align and Clamp the New Section
- Position the repair section between the rear cab mount and the fuel tank crossmember
- Secure it with C-clamps at multiple points
- Check alignment against the original frame rails, looking for smooth transitions with no gaps or bends
Misalignment stresses the entire frame and can cause handling problems down the road.
Trim Around Existing Obstacles
Most kits require notching to fit around leaf spring mounts and other fixed components.
Mountainpeak’s advantage: Removable plates let you adjust the fit without full disassembly of the suspension.
How to notch properly:
– Mark cut lines with a scribe before cutting
– Use an angle grinder with a cutoff wheel
– Test fit frequently to avoid removing too much material
Never cut load-bearing flanges. Only trim non-structural edges that don’t carry stress from the suspension or body.
Weld or Bolt the Section In Place
Welding is the preferred method for most repairs:
– Use MIG welding with ER70S-6 wire
– Apply staggered beads along all contact edges to control heat buildup
– Avoid continuous welds, which can warp the metal
Bolting works if your kit allows it:
– Use the Truck Bed Bolt Kit (RB9910) at $39.99 for fresh hardware
– Torque all fasteners to manufacturer specifications
– Seal bolt holes with undercoating after installation
Never reuse rusted bolts. They are structurally compromised and won’t hold proper torque.
Reinstall Components and Check Clearance
Once the repair is secure, reattach the fuel tank, leaf springs, exhaust, and any other removed components. Torque all U-bolts and mounting hardware to spec. Lower the truck and check for proper clearance around all moving parts.
Prevent Rust From Returning
A repair is only as good as the protection you apply afterward. Stop future corrosion with these maintenance habits.
Apply Undercoating Every Year
Use Total Protection Rust Cover Paint or a quality fluid film spray each fall in salt-prone regions. Focus on inside frame rails, crossmembers, and around all weld seams.
Flush the Frame Channels Regularly
Salt and slush collect inside enclosed frame sections, creating a constant rust bath.
How to flush properly:
1. Drill half-inch drain holes at frame ends if your truck doesn’t already have them
2. Use a pressure washer or garden hose each spring to flush out accumulated debris
3. Blow out remaining water with compressed air
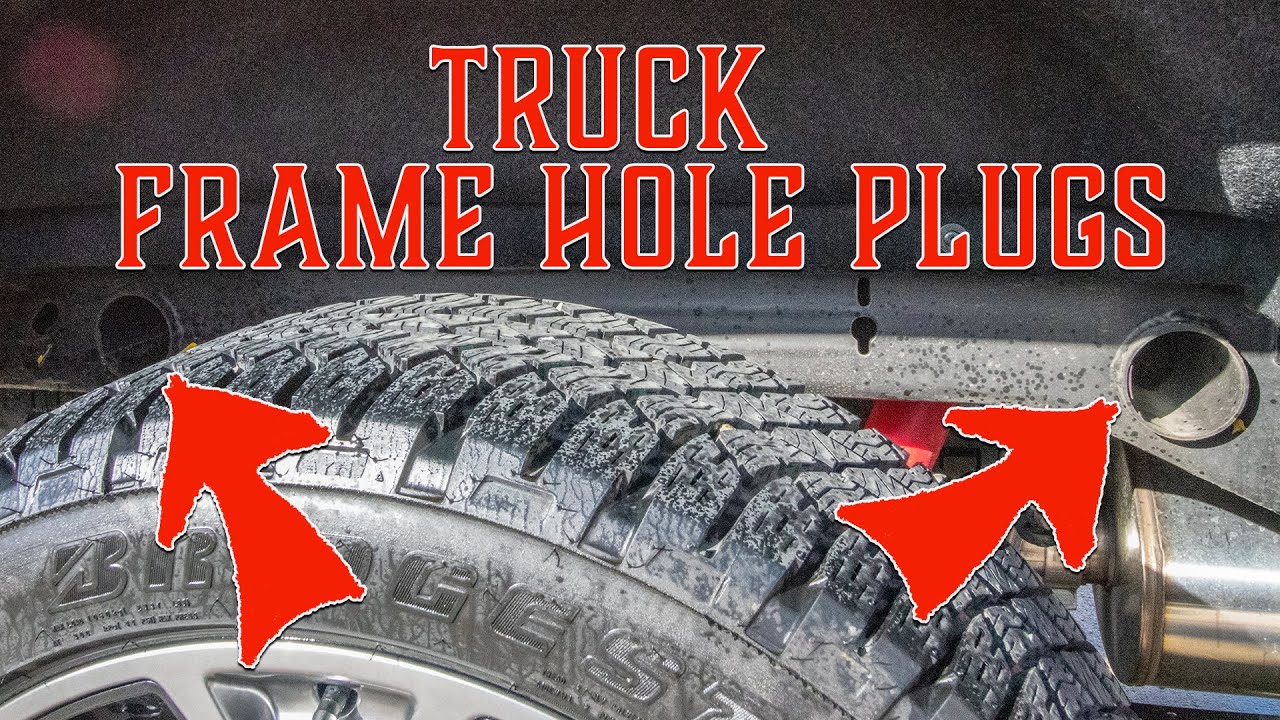
Consider installing frame vent plugs to let moisture escape while keeping dirt out.
Inspect Your Frame Twice a Year
Check in spring (after winter salt exposure) and fall (before snow arrives).
What to look for:
– Bubbling or peeling paint
– Flaking metal
– Soft spots that give under a screwdriver press
Catching rust early means a $100 repair instead of a $1,000+ job.
Repair Cost vs. Full Frame Replacement
Replacing an entire frame runs $3,000 to $6,000 in parts and labor. A sectional repair costs a fraction of that.
Typical DIY cost breakdown:
– Mountainpeak Mid-Rear Kit: $300
– Rust Converter (RB9917): $17
– Rust Cover Paint (RB9909): $49
– Bolt Kit (RB9910): $40
– Total: ~$406
Expect to spend 8–12 hours on the job if you’re a competent DIYer. A solid frame repair can add $2,000 to $4,000 in resale value and prevent costly breakdowns down the road.
Frequently Asked Questions About Chevy Silverado Frame Rust Repair
What years of Silverado are most prone to frame rust?
The 2007–2014 GMT900 generation Silverado 1500 models are particularly susceptible, especially in regions that use road salt. Heavy Duty 2500HD trucks from 2001–2010 also have documented frame corrosion issues.
Can I repair frame rust without welding?
Yes, some kits like certain Rust Buster components are designed for bolt-on installation. However, welded repairs generally provide stronger, longer-lasting results. Mountainpeak’s kit can be installed with either method depending on your skill level.
How do I know if my frame rust is too severe to repair?
If rust has eaten through multiple structural sections or compromised more than 40% of the frame, replacement may be safer than repair. A professional inspection can determine whether sectional repair is viable for your truck.
Is it safe to drive a Silverado with a rusted frame?
Minor surface rust is cosmetic, but perforated metal near suspension mounts, crossmembers, or load-bearing areas creates real safety risks. If you can push a screwdriver through the frame, stop driving the truck until repairs are made.
How long does a frame rust repair last?
A properly executed repair using quality kits like Rust Buster or Mountainpeak, combined with annual undercoating, can last the remaining life of the vehicle. The alloy steel and corrosion-resistant coatings used in modern kits often outlast the original factory frame.
Do frame rust repairs affect resale value?
Yes, positively. A documented frame repair with quality parts typically adds $2,000–$4,000 in resale value compared to a truck with an unrepaired rusted frame. Buyers pay a premium for trucks with solid structural integrity.
Key Takeaways for a Successful Frame Rust Repair
Chevy Silverado frame rust is serious but not a death sentence for your truck. Focus your inspection on leaf spring mounts, fuel tank crossmembers, and mid-frame rails, since these are the most vulnerable zones on 2007–2014 models. Choose a repair kit that matches your specific cab configuration and the extent of the damage. Rust Buster works best for isolated component failures, while Mountainpeak excels at mid-frame section replacement on Extended and Crew Cabs.
Proper preparation makes the difference between a repair that lasts and one that fails. Strip all rust, apply converter, and seal everything with quality undercoating before and after installation. Then commit to twice-yearly inspections and annual fluid film applications to keep new rust from forming.
Start by ordering a Leaf Spring Mount (RB7337) or Mid-Rear Frame Kit, grab the rust converter and cover paint, and schedule a weekend to inspect your frame. Catching the problem now saves you thousands compared to waiting until the damage spreads.



