
You’re backing out of your driveway, gently pressing the brake to control your speed, and suddenly the pedal turns rock hard. No warning. No sponginess. Just a stiff, unresponsive brake that takes all your strength to push. This is the terrifying reality many Chevrolet Silverado owners face when their brakes “don’t work in reverse.” But here’s the truth: your brakes are still working, they’ve just lost power assist. And this specific failure, most common in 2014–2018 Silverados, isn’t a fluke. It’s a known design flaw tied to the vacuum system, and it is fixable.
This issue isn’t about worn pads or air in the lines. It’s about a failing vacuum pump that can’t keep up when you’re slowly maneuvering in reverse, especially when feathering the brake. Without enough vacuum, the brake booster can’t amplify your foot’s force, leaving you with a manual brake system on a 5,000-pound truck. The problem is often accompanied by a loud ticking noise, misdiagnosed as engine-related, but it’s usually the vacuum pump screaming for help. Ignoring it risks complete assist failure, and if oil has leaked into the system, the damage spreads fast.
In this guide, you’ll learn how to diagnose the real cause, understand when it’s just the pump or a full booster replacement, and avoid dealership runarounds using GM’s own Technical Service Bulletin PIT5361B. You’ll also discover cost-saving repair strategies, preventative checks, and why this isn’t your fault or your driving.
Decode the Reverse Brake Failure
Why Reverse Triggers the Problem
The reason this happens in reverse isn’t about direction. It’s about driving behavior. When backing up, especially into a tight spot, drivers tend to feather the brake with light, repeated presses that keep the vehicle crawling. This sustained use drains the vacuum reserve in the brake booster. Under normal conditions, the electric vacuum pump refills it. But in affected Silverados, the original-design pump is too weak to keep up at idle or low RPM.
Once vacuum drops below a critical level, the booster stops assisting. The pedal doesn’t sink. It locks solid after an inch of travel. That’s the signature of vacuum loss, not hydraulic failure. The same scenario can be recreated in forward motion if you mimic parking maneuvers, proving the issue is vacuum-related, not transmission-linked.
Hard Pedal vs. Sinking Pedal: Know the Difference
It’s critical to distinguish between two very different brake failures:
- Hard pedal in reverse → Vacuum assist failure (2014–2018 Silverados). Pedal travels slightly, then becomes immovable.
- Sinking pedal in reverse → Mechanical drum brake issue (older GMT400 trucks). Pedal goes to the floor due to over-extended rear shoes or missing return springs.
If your pedal is hard, you’re dealing with the vacuum system. If it sinks, inspect the rear drum brakes. Mixing these up leads to wasted repairs.
Ticking Noise? It’s Not Just Engine Noise
Many owners report a loud ticking or clicking from the engine bay when braking. Dealers often dismiss this as normal Direct Injection (DI) fuel injector noise. But when the ticking syncs with brake application or gets worse during reverse maneuvers, it’s likely the failing vacuum pump.
Replacing the pump commonly eliminates this noise, which proves it wasn’t engine-related. Don’t let a technician brush it off. This sound is an early red flag.
Diagnose the Vacuum System

Check for Oil in the Vacuum Line
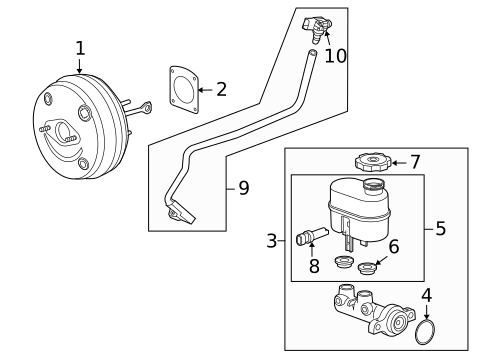
The single most telling diagnostic step is inspecting the vacuum hose between the pump and the brake booster.
- Locate the hose (usually a black rubber line running from the passenger side of the engine to the brake booster).
- Disconnect it from the booster.
- Shine a flashlight inside.
- If you see engine oil: The vacuum pump has failed catastrophically, and oil has contaminated the brake booster. This means all three components must be replaced: pump, hose, and booster. Oil destroys the booster’s internal diaphragm, and cleaning won’t save it.
- If the line is dry: Likely only the vacuum pump needs replacement. Use the updated “new design” part with extra baffles.
Test for Vacuum Recovery at Higher RPM
If the pedal goes hard, try this safety test:
- Shift to Neutral.
- Gently press the brake.
- Rev the engine to 2,000–2,500 RPM.
If the pedal suddenly softens and power assist returns, it confirms the pump can generate vacuum, but only when the engine is running faster. At idle, it’s overwhelmed. This is classic behavior of the undersized OEM pump.
Use GM’s TSB to Force a Proper Diagnosis
Dealers often claim they can’t replicate the issue because it doesn’t happen during a test drive at speed. Stand firm and cite GM Technical Service Bulletin PIT5361B. This bulletin specifically addresses:
- Brake pedal hardening during low-speed reverse maneuvers
- Inadequate vacuum pump output
- The need to replace the pump with the updated design
Print it, bring it in, and demand they follow it. This isn’t a customer complaint. It’s a documented GM directive.
Replace the Failing Vacuum Pump
Install the “New Design” Pump Only
Never replace the pump with the original part. GM released an updated version with additional internal baffles to maintain vacuum under low-flow conditions. This design fix resolves the core problem.
- Part Number: Confirm with your dealer or parts supplier that you’re getting the revised pump (often listed as updated post-2016).
- Cost: $120–$200 for the pump alone.
- Labor: 1–2 hours for a mechanic. DIYers can do it with basic tools.
Full System Replacement: When Oil Is Present
If oil was found in the vacuum line, the repair expands:
- Brake booster: $300–$500
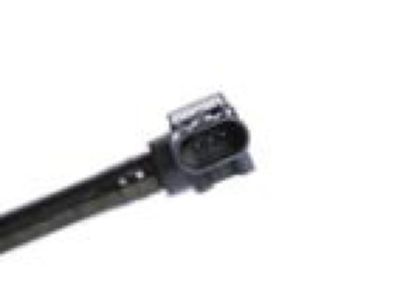
- Vacuum hose: $20–$50
- Pump: $150–$250
- Labor: 3–4 hours
Total cost at a dealer can exceed $1,200. But skipping the booster replacement risks a repeat failure within months. Oil-damaged boosters don’t recover.
What the New Pedal Feel Should Be
After replacement, the brake pedal may feel different, not necessarily softer, but more consistent. Some report a slightly firmer initial bite, which is normal. The key is that it no longer locks up during reverse maneuvers. The ticking noise should also disappear.
Avoid Dealer Excuses and Denials
“It’s the Leveling Kit’s Fault” – Debunked
Dealers sometimes blame front leveling kits for causing vacuum issues. This is a deflection. There’s no mechanical or vacuum system link between suspension height and brake assist. The failure occurs across stock and modified trucks alike. The root cause is the pump’s design, not ride height.
“Aftermarket Catch Cans Void Warranty” – Know Your Rights
If you’ve installed an oil catch can or AOS, dealers may refuse warranty coverage, claiming it interferes with the vacuum system. While GM may use this to deny claims, the underlying pump defect exists regardless. The TSB doesn’t list aftermarket parts as a cause.
If denied:
– Ask for a written denial citing the specific policy.
– Escalate to GM customer service.
– Consider third-party mechanical breakdown insurance (though deductibles may not justify the cost).
Warranty Coverage Reality
- Bumper-to-bumper (3/36,000): Most likely to cover the repair.
- Powertrain (5/60,000): Often denied, as GM classifies the vacuum pump as a brake component, not powertrain.
- Out of warranty: Independent mechanics typically charge 40–60% less than dealers for the same repair.
Prevent Future Failures
Monitor for Early Warning Signs
Catch the problem before it leaves you stranded:
– Listen: A new or worsening ticking noise under the hood, especially when braking.
– Feel: Any slight reduction in brake assist during parking.
– Inspect: Check the vacuum line during oil changes for oil residue.
Act Fast When Symptoms Appear
If the pedal hardens:
1. Shift to Neutral.
2. Rev the engine to 2,500 RPM to restore vacuum.
3. Drive forward and stop safely.
4. Schedule a vacuum system inspection immediately.
This temporary fix can get you home, but the pump is failing.
Upgrade to the Proven Fix
Even if your truck hasn’t failed yet, if it’s a 2014–2018 model and still has the original pump, consider proactive replacement. The updated pump is a known fix. For high-mileage trucks or those used for towing, this is a smart preventative move.
Long-Term Reliability After Repair

The New Pump Solves the Problem
Owners who’ve installed the updated vacuum pump report complete resolution of the hard pedal issue. The improved baffling allows consistent vacuum supply, even during extended reverse maneuvers. No more panic when backing down a driveway.
Maintenance Tip: Inspect Vacuum Lines Annually
Add a quick vacuum line check to your routine maintenance:
– Look for cracks, brittleness, or oil.
– Ensure connections are tight.
– Replace the hose if it shows any sign of wear.
A $30 hose can prevent a $1,000 repair.
Safety First: Don’t Ignore It
This isn’t just an inconvenience. It’s a safety hazard. A hard brake pedal in traffic, on a hill, or with children nearby can lead to accidents. One owner reported nearly hitting a pedestrian while losing assist in a parking lot. If your Silverado exhibits this symptom, treat it as urgent.
Frequently Asked Questions About Silverado Reverse Brake Failure
Why do my Silverado brakes only fail in reverse and not while driving forward?
The issue isn’t about direction but about how you brake in reverse. Backing into a spot requires feathering the brake with light, repeated presses. This sustained use drains the vacuum reserve faster than the weak OEM pump can refill it. Under normal forward driving, the pump keeps up, so assist remains.
How do I know if my brake pedal is hard due to vacuum loss or a sinking pedal from a hydraulic issue?
A vacuum loss pedal travels a short distance, then locks solid and feels rock-hard. A hydraulic failure pedal sinks toward the floor with a spongy or mushy feel. If your pedal hardens after an inch of travel, you’re dealing with vacuum assist failure.
Can I keep driving my Silverado if the brake pedal goes hard in reverse?
You can drive it temporarily, but treat it as urgent. Shift to neutral, rev the engine to 2,500 RPM to restore vacuum, and get to a safe location. Schedule a vacuum system inspection immediately, since complete assist loss can happen without warning.
What is GM Technical Service Bulletin PIT5361B?
PIT5361B is a GM Preliminary Information bulletin that addresses brake pedal hardening during low-speed reverse maneuvers caused by inadequate vacuum pump output. It directs technicians to replace the pump with an updated design that includes additional internal baffles.
Will GM warranty cover the vacuum pump replacement on my 2014–2018 Silverado?
Coverage depends on your warranty type and mileage. The basic 3-year/36,000-mile bumper-to-bumper warranty is most likely to cover it. Powertrain warranties (5/60,000) often deny it because GM classifies the vacuum pump as a brake component. Out-of-pocket repairs at independent shops typically cost 40–60% less than dealer pricing.
Do I need to replace the brake booster too, or just the vacuum pump?
If the vacuum line is dry, you likely only need the updated vacuum pump. If you find engine oil inside the vacuum hose, the booster is contaminated and must be replaced along with the pump and hose. Cleaning a contaminated booster is not sufficient.
Key Takeaways for Fixing Your Silverado’s Reverse Brake Failure
The “Silverado brakes not working in reverse” issue is a well-documented vacuum pump design flaw, not driver error or normal wear. The hard pedal after an inch of travel is the signature of vacuum loss, and the fix is replacing the original pump with GM’s updated design that includes extra baffles. Always check the vacuum line for oil first, since oil contamination requires replacing the pump, hose, and booster together. If your dealer pushes back, cite TSB PIT5361B and request the updated part specifically. Your next step: inspect your vacuum line today, and if you find oil or experience pedal hardening, schedule the repair before a complete assist loss puts you in danger.



