
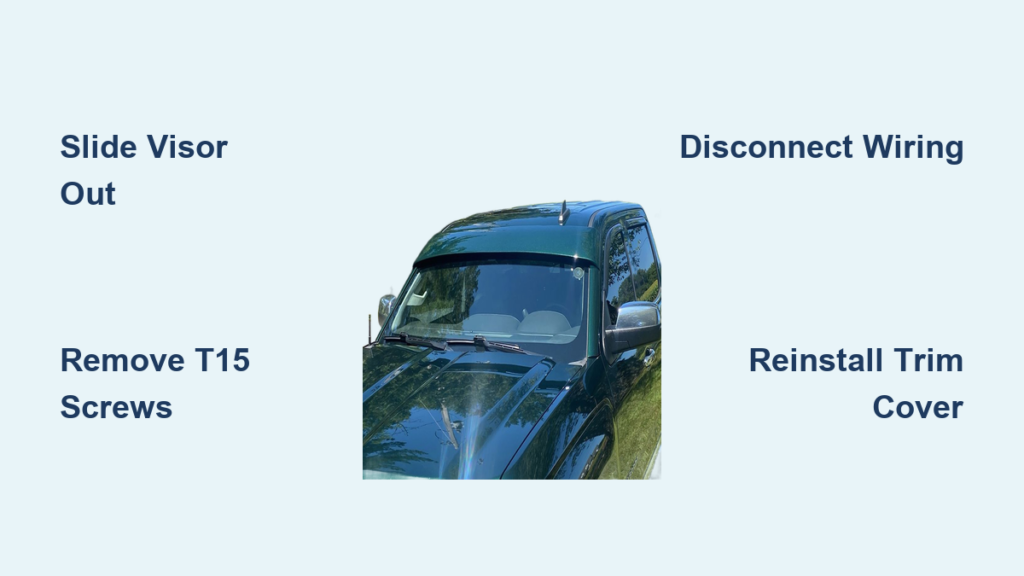
A sagging or damaged sun visor on your Chevy Silverado can be both annoying and unsafe, blocking your view at critical moments. Whether you drive a 2000 classic or a 2025 model, learning how to remove sun visor Chevy Silverado components is a simple DIY project that takes under 15 minutes with the right tools.
This guide walks you through model-specific removal procedures, electrical disconnection steps, and pro tips to avoid cracking plastic trim pieces. You’ll also learn how to troubleshoot common issues and match replacement colors perfectly.
Remove 2014–2019 Silverado Sun Visor

This procedure applies to 2014–2019 Chevy Silverado 1500/2500/3500 models and matches the process for 2015–2020 Tahoe, Suburban, Yukon, and Escalade vehicles.
Slide the Visor Out of the Mount
Start by pulling the sun visor forward and sliding it out of the overhead mounting bracket. On some trucks, fold the visor upward first to clear the pivot arm completely. This exposes the mounting base and gives you safe access to the trim cover without straining wires or clips.
Pro Tip: If the visor feels stuck, gently wiggle it side to side. Do not force it, since older brackets may be stiff but are not locked in place.
Remove the Plastic Trim Cover
Locate the sliding plastic cover above the visor pivot. It conceals three T15 Torx screws.
- Insert a plastic trim tool or firm credit card under the front lip of the cover
- Push in just a few millimeters, since the cover slides off a metal bar via a small internal slit
- Gently pry to release the retaining clips without using excessive pressure
Once loose, slide the cover forward and remove it completely. You should now see three screws arranged in a triangular pattern.
Unscrew the T15 Mounting Screws
Use a T15 Torx bit with a ratchet and extension for the best leverage.
- Remove all three screws slowly and keep them organized
- Support the visor with your free hand when removing the last screw to prevent it from falling and damaging the headliner
Disconnect Wiring on Illuminated Models
If your visor has a vanity mirror with lighting, you’ll need to handle the electrical connection carefully.
- Locate the wiring harness behind the mounting base
- First, unhook the anti-strain loop securing the cable
- Use a small flathead screwdriver to gently pry the connector upward from its socket
- Pull the plug straight out without yanking the wires
Note: Some connectors require a quarter-turn counterclockwise before they release. Check for alignment tabs before pulling.
Remove 2000–2002 Silverado Sun Visor
This process applies to 1999–2002 Silverado 1500/2500/3500 and GMC Sierra equivalents. Parts from 2003–2006 are generally incompatible with these models.
Pry Off the Trim Cover
The mounting bracket is covered by a split plastic trim piece or one with a small slot.
- Use a plastic trim tool or flathead screwdriver to gently pry it off
- Work slowly, since the plastic is prone to cracking if forced
Some models allow removal without fully detaching the visor arm from its position.
Remove the Bracket Screws
Locate two or three screws (Phillips or T15 Torx, depending on build date) securing the bracket to the roof.
- Support the visor with one hand throughout this step
- Remove screws using the correct driver
- After the last screw, the bracket will detach from the roof
If the visor arm is still clipped near the rearview mirror, unhook it gently from the retaining clip.
Check for an Electrical Connection
- Non-illuminated models: No wiring exists, so skip the disconnection step
- Illuminated models: Press the release tab on the small harness and disconnect it carefully
Warning: Older wiring connectors may be stiff. Apply even pressure to avoid breaking the release tabs.
Remove 2019–2025 Silverado Sun Visor
This section covers 2019–2025 Silverado 1500/2500/3500 models, including the updated clip design found on some 2025 trucks.
Extract the Visor from the Bracket
Pull the visor forward and slide it out of the pivot mount. Fold it up if needed to clear the bracket completely. This step is identical to earlier generations and takes only seconds.
Handle Quarter-Turn Clips on 2025 Models
Some 2025 Silverados feature a snap-fit clip instead of exposed screws for specific components.
- Locate the visor base near the windshield
- Rotate the clip 90 degrees (quarter turn) in the direction of the pivot
- After rotation, slide the visor downward to disengage it from the bracket
This design grants access to the shark fin antenna retainer behind the mirror, which is often needed for accessory installations.
For models with the standard T15 setup, remove the sliding trim cover, unscrew the three T15 screws, and support the visor as you extract it.
Reinstall the Sun Visor Correctly
Whether you’re installing a new visor or returning the original, proper reinstallation prevents rattles and droop.
Thread Wiring First
Before mounting, route the electrical connector through the anti-strain loop. This prevents tension on the wires when the visor moves during normal use.
Align and Secure the Screws
- Position the visor mounting base correctly in the bracket
- Hand-start all three T15 screws to avoid cross-threading
- Tighten in a star pattern until snug, but do not overtighten
Over-torquing cracks plastic or strips the threads in the roof structure.
Reconnect the Electrical Plug
- Plug in the harness until it clicks securely
- Re-engage the anti-strain device to hold the loop in place
Snap On the Trim Cover
- Align the plastic cover over the bracket
- Press gently until it clicks on all sides
- A loose cover will rattle while driving
Test Functionality
- Pivot the visor up and down to verify smooth movement
- Slide it side to side if equipped
- Turn on the vanity light (if installed) to confirm power
Re-Cover a Worn Sun Visor

Instead of replacing the entire visor, you can re-cover it with new fabric for a cost-effective restoration.
Remove Old Fabric Safely
- Rip off degraded fabric starting from loose edges
- Use a heavy-duty putty knife to pry out stubborn sections
- Clean all adhesive residue and old backing from the plastic shell
Avoid using solvents that damage plastic surfaces.
Disassemble Components Carefully
- Mounting Clip: Insert a thick screwdriver at the base, pry backward, and lift with steady pressure
- Hinge Pin: Use extra lighting to see clearly, push slightly from the side, and pull gently. Clean with a wire brush and avoid lubricants that stain fabric
- Mirror Assembly: Held by fragile plastic clips, so prying often breaks them. Replace the mirror if damaged
Install New Fabric
- Use headliner-grade fabric with foam backing
- Allow 1–1.5 inches extra on all sides for tucking
- Pull tight at corners first, then work toward edges
- Tuck excess into the internal plastic teeth around the perimeter
Critical: Do not trim fabric early. Wait until fully secured, since trimming too soon causes failure under tension.
Troubleshoot Common Visor Problems
Even after removal or replacement, issues can persist. Diagnose them quickly with these fixes.
Visor Won’t Stay in Place
A drooping visor usually means a worn pivot joint or loose bracket. Replace the entire visor, since pivots aren’t serviceable. Check firmness on used units before installation.
Fabric Peeling or Torn
UV exposure and age cause fabric degradation. Re-cover or replace the unit. Aftermarket re-covers often fail faster than OEM fabric.
Vanity Light Not Working
- Check that the connector is fully seated
- Replace the bulb if it’s burnt out
- Inspect wiring for pinches or disconnections
Non-illuminated trucks lack a wiring harness, so upgrading requires a full wiring run.
Rattling Trim Cover
A cover that isn’t fully snapped in will rattle while driving. Remove and reseat it, or replace it if cracked.
Buy the Right Replacement Visor
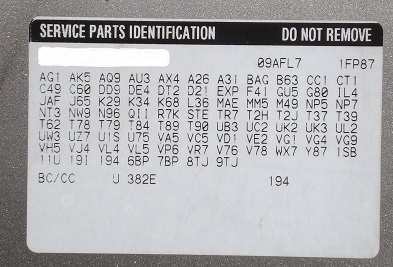
Avoid color mismatch and fit issues by choosing parts wisely.
OEM vs. Aftermarket Comparison
| Type | Price Range | Pros | Cons |
|---|---|---|---|
| New OEM | $100–$150 | Perfect color, fit, and warranty | Expensive |
| Aftermarket | $35–$75 | Affordable | Variable quality and color match |
| Used OEM | $40–$90 | Best value with exact color match | Check pivot tightness |
Match Interior Color Accurately
For 2000–2002 models, interior colors vary widely even within the same category.
- Open the glove box and find the SPID sticker
- Locate the RPO code for interior trim:
- Graphite: 122, 12D
- Gray/Pewter: 922, 92i
- Neutral/Tan: 522, 52i
- Never rely on photos. Always use the RPO code for an exact match
Prevent Damage During Removal
Avoid the most common mistakes that lead to costly repairs.
Don’t Break the Trim Cover
- Use plastic tools, not metal screwdrivers
- Apply gentle, even pressure when prying
- Replace cracked covers, since OEM ones cost only $15–$30
Don’t Overtighten Screws
Snug is enough. Use a ratchet with control, not an impact driver that can strip threads or crack plastic.
Don’t Yank Electrical Connectors
Always disconnect by the plug, not the wires. Release the strain loop first to reduce tension on the connection.
Frequently Asked Questions About Chevy Silverado Sun Visor Removal
What tools do I need to remove a Silverado sun visor?
You need a T15 Torx bit with a ratchet and extension, a plastic trim removal tool (or firm credit card), and a small flathead screwdriver for electrical connectors. Extra lighting helps when working near the headliner.
How long does it take to remove a sun visor?
Standard removal takes under 15 minutes for most model years. Re-covering or light bar installation can extend the job to 30 minutes or more depending on complexity.
Can I install an illuminated visor on a truck that didn’t have one?
It’s possible but complex. Non-illuminated trucks generally lack the wiring harness, so you’ll need to run new wires from the fuse box or headlight switch. Most owners find it easier to stick with the original configuration.
Why does my new visor rattle while driving?
A rattling visor usually means the trim cover isn’t fully snapped in or the screws are loose. Remove the cover, reseat it firmly, and verify all screws are snug but not overtightened.
Are sun visor parts interchangeable between Silverado and Sierra?
For 2014–2019 models, the removal procedure is identical between Silverado, Sierra, Tahoe, Suburban, Yukon, and Escalade. However, color codes and specific part numbers vary, so always verify compatibility using your VIN before purchasing.
How do I match the interior color when buying a replacement?
Check the SPID sticker in your glove box for the three-digit RPO code. Common codes include 122 or 12D for Graphite, 922 or 92i for Gray/Pewter, and 522 or 52i for Neutral/Tan. Never rely on photos alone.
Final Thoughts on Removing Your Silverado Sun Visor
Removing a sun visor on a Chevy Silverado is a straightforward task when you follow the right steps for your model year. From 2000–2002 with exposed screws to 2014–2025 with hidden T15s and quarter-turn clips, each generation has specific nuances.
Use the correct tools, handle electrical connections gently, and always verify color codes with the SPID sticker before purchasing replacements. Whether you’re fixing a drooping visor, upgrading with new fabric, or installing accessories, these procedures ensure a clean, damage-free job.
Next step: Gather your T15 Torx bit and plastic trim tools, then set aside 15 minutes to tackle this project. Your Silverado’s interior will look and function like new.



