
A cracked or shattered Chevy Silverado windshield is more than an inconvenience. It compromises airbag deployment, weakens roof integrity, and can disable critical safety features like Lane-Keeping Assist. Knowing how to remove Silverado windshield glass properly protects your truck’s structural frame and prepares the surface for a leak-free replacement.
This guide breaks down the entire removal process by model year, covering the tools, adhesive types, and safety steps involved. Whether you drive a 1997 K1500 with butyl rubber seals or a 2024 Crew Cab with urethane bonding, you’ll learn exactly what your truck needs and where DIY efforts can go wrong.
Prep Work: Remove Trim and Protect Interior
Before cutting into any seal, clear the surrounding components to avoid costly damage.
Remove Wiper Arms and Cowl Panel
Pop the small plastic cap at the base of each wiper arm and loosen the nut underneath. Lift the arm straight off without prying. Then remove the cowl panel (the plastic cover at the base of the windshield) using a trim tool to release the clips. Disconnect any wiring for rain sensors if equipped.
Take Off Exterior Trim and Moldings
Carefully pry off the outer trim pieces around the windshield with a plastic tool to avoid scratching paint. On older Silverados, these moldings often break during removal, so plan replacements. Remove the A-pillar moldings inside the cab for better access during cutting.
Shield the Dashboard and Cabin
Lay protective blankets or cardboard over the dashboard, seats, and floor. Glass shards fall unpredictably during removal. If you skip dashboard removal, stay cautious near the bottom seal where tools sit inches from expensive interior components.
Identify Your Adhesive Type: Butyl vs Urethane
The removal technique depends entirely on your Silverado’s model year and bonding system.
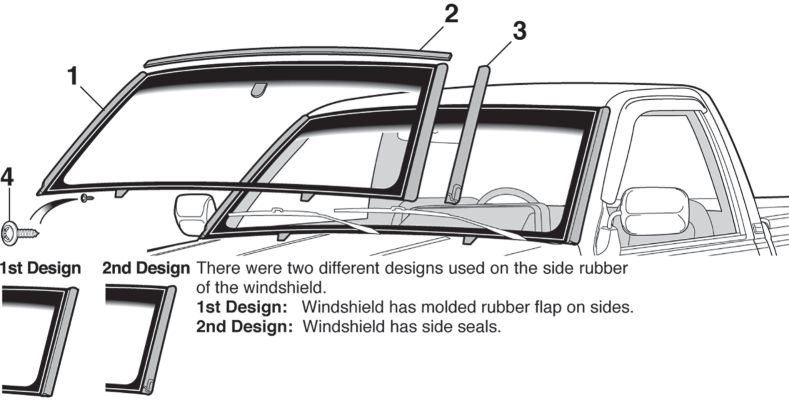
Pre-1999: Butyl Rubber and Gaskets
Trucks from 1997 and earlier (including the K1500) use butyl rubber sealant with rubber gaskets. This black, sticky compound requires a cold knife or flat razor blade for cutting. These models don’t rely on the windshield for airbag deployment, so structural risks are lower, but leaks are common if resealed poorly.
1999 and Newer: Urethane Adhesive Only
From 1999 onward, Chevy switched to structural urethane adhesive. This isn’t just sealant; it bonds the windshield to the metal pinch weld and supports airbag performance and roof strength. You cannot use butyl rubber for replacement. Cutting urethane requires piano wire or a stripped hood release cable, not blades.
Cut the Seal: Top and Sides First
Access and cut the adhesive around the perimeter before attempting to move the glass.
Use Cold Knife for Butyl Models
Insert a cold knife (L-shaped blade with wire handle) between the glass and frame on older trucks. Work from the top down, slicing through the butyl with steady pressure. Repeat along both sides. Avoid twisting the knife, which can gouge the pinch weld and create rust points later.
Thread Piano Wire for Urethane Models
On newer Silverados, poke a small hole through the urethane from the outside using a screwdriver or pick. Thread piano wire (or a stripped hood cable) through the gap from inside the cab. Have an assistant hold one end while you pull the wire back and forth like a saw around the top and sides.
Pro Tip: Work in a cool garage. Heat softens urethane, causing it to re-adhere mid-cut and forcing multiple passes.
Cut the Bottom Seal Without Damaging the Dash
The bottom edge is the trickiest section, especially without removing the dashboard.
Insert Long Knife from Inside
Use a long, flat razor knife (windshield removal bar) inserted between the glass and seal from the interior. Slide it along the bottom edge, cutting the adhesive. Keep your hand low and move slowly to avoid slicing the dash or headliner.
Work in Small Sections
Cut 6 to 8 inch segments rather than the entire bottom at once. If you feel resistance, stop and reposition. On urethane models, you may need to thread piano wire under the glass after making initial cuts to finish the job.
Extract the Windshield Safely
Once the seal is fully cut, remove the glass without shattering it.
Push Out from Inside
Have an assistant sit inside the cab wearing gloves and eye protection. They should gently push the glass outward while you guide it from outside. Suction cups provide better grip and control during this step.
Warning: Never kick or pry the glass from the outside. This risks chipping the pinch weld or sending shards into the cabin.
Handle Broken Glass Carefully
If the windshield is already cracked, wrap it in a blanket before removal to contain shards. Remove all glass fragments from the frame and cabin to prevent injury and ensure a clean surface for the new install.
Clean and Prep the Pinch Weld
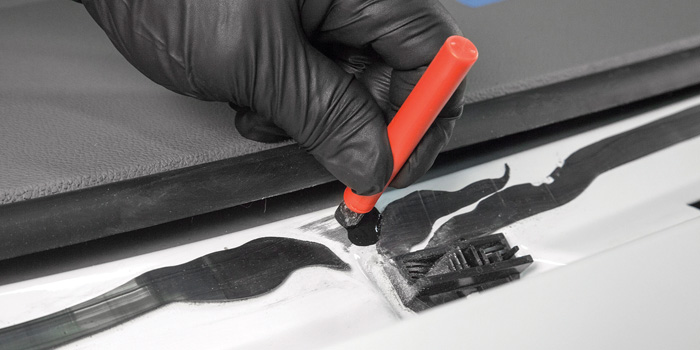
A clean bonding surface is essential for a leak-free, safe reinstallation.
Remove All Old Adhesive
Scrape away every trace of old urethane or butyl from the pinch weld (the metal channel around the windshield opening). Use a plastic or metal scraper, but avoid gouging the metal. Leftover adhesive prevents proper bonding with new urethane.
Clean with Solvent
Wipe the pinch weld with Prepsol or urethane cleaner to remove oils, dust, and residue. Use a lint-free cloth and let it dry completely before moving forward.
Apply Primer to Frame and Glass
Apply manufacturer-recommended primer to both the cleaned pinch weld and the edge of the new windshield. This activates the surface for urethane adhesion.
Critical: Let the primer dry for the specified time (usually 5 to 15 minutes). Applying urethane too soon ruins the bond.
Reinstalling? Key Tips for a Safe Fit
Removal is manageable, but reinstallation demands precision, especially on modern trucks.
Use Proper Urethane and Bead Gun
Apply a continuous bead of SikaFlex or equivalent urethane using a bead gun. The bead should be consistent in thickness, typically 3/8-inch diameter. Avoid gaps or thin spots that cause leaks.
Align and Seat the Glass
Carefully lower the new windshield into place, aligning it with the factory guides. Press it gently into the urethane bead. Install retaining clips or tape to hold it steady during curing.
Wait Before Driving
Do not drive the truck for at least 4 hours after installation. Airflow creates negative pressure inside the cab, which can pull the glass loose before the urethane sets. Some manufacturers recommend 24 hours for a full cure.
When to Call a Professional

Despite the DIY appeal, professional installation is strongly advised for most Silverado owners.
Risks of DIY Reinstallation
- Airbag failure if the windshield detaches during deployment
- Roof collapse in rollovers due to weak bonding
- Water leaks leading to rust and mold
- ADAS malfunction if camera recalibration isn’t performed
Benefits of Professional Service
- Lifetime leak warranty from reputable shops
- ADAS recalibration included (required for 2015+ models)
- Proper tools and training for safe adhesive application
- Insurance-friendly options, including zero-deductible replacement in Florida, Kentucky, and South Carolina
Cost and Time Estimates
Removal Time
- DIY Removal: 1.5 to 3 hours depending on experience
- Professional Removal: Included in replacement service (total job: 2 to 3 hours)
Replacement Cost (2026 Averages)
| Model Year | Cab Type | Average Cost |
|---|---|---|
| 2021–2024 | Crew Cab | $360 to $460 |
| 2020–2021 | Extended Cab | $370 to $540 |
| Older Models | Any | As low as $175 (may exclude ADAS) |
Note: Prices may not include ADAS recalibration, which adds $100 to $200.
Final Steps and Post-Removal Checks
After removal, inspect the frame for rust, dents, or damage before installing new glass.
Check for Frame Damage
Look along the pinch weld for corrosion or misalignment. If the metal is bowed or damaged, repair it before installing a new windshield to ensure a proper seal.
Consider Upgrade Opportunities
- Tinted or solar-control glass for UV protection
- Rain-sensing wiper compatibility
- Sliding rear window for hauling long cargo
Schedule ADAS Recalibration
For 2015 and newer Silverados, ADAS recalibration is mandatory after windshield replacement. This ensures Lane-Keeping Assist, Forward Collision Alert, and Pedestrian Detection function correctly.
Frequently Asked Questions About Silverado Windshield Removal
Can I remove a Silverado windshield without breaking it?
Yes, on older butyl-rubber models with patience and a cold knife. On urethane-bonded models (1999+), use piano wire and work slowly in a cool environment to keep the glass intact.
How long does it take to remove a Silverado windshield?
DIY removal typically takes 1.5 to 3 hours depending on experience and adhesive type. Professional removal is usually included in a 2 to 3 hour replacement job.
Do I need to recalibrate ADAS after windshield replacement?
Yes. Any 2015 or newer Silverado with Lane-Keeping Assist, Forward Collision Alert, or Pedestrian Detection requires recalibration after glass replacement to keep safety systems accurate.
What happens if I drive before the urethane cures?
Airflow creates negative pressure inside the cab, which can pull the glass away from the frame before the bond sets. Wait at least 4 hours; some manufacturers recommend 24 hours for full strength.
Is windshield replacement covered by insurance in every state?
No. Florida, Kentucky, and South Carolina offer zero-deductible glass replacement under state law. Other states vary by carrier and policy, so verify your specific coverage details.
Key Takeaways for Safely Removing Your Silverado Windshield
Understanding how to remove Silverado windshield glass correctly protects your truck’s frame and saves money on professional labor. The critical steps include identifying your adhesive type, using the right tools (cold knife for butyl, piano wire for urethane), and protecting the interior during cutting.
However, removal is only half the job. Reinstallation carries the real safety risks, including airbag failure, roof collapse, and ADAS malfunction if the urethane bond is weak or curing time is skipped. For most owners, professional installation with ADAS recalibration is the safest path forward.
Next step: If your Silverado has a crack larger than a quarter, sits in the driver’s line of sight, or penetrates the inner glass layer, schedule a professional replacement today. Your safety, and your passengers’, depends on a properly bonded windshield.



