
A sagging front bumper on your Chevrolet Silverado isn’t just unsightly. It can make an otherwise tough-looking truck appear worn or damaged. The gap between the bumper and fender, especially at the corners, is a common complaint among owners, particularly on models from 2003–2004 and 2014–2015. But here’s the good news: in most cases, you don’t need new parts or a body shop. With basic tools and the right technique, you can fix a sagging bumper in under 30 minutes. This guide walks you through diagnosing the cause, choosing the correct repair method, and restoring your Silverado’s front end to factory alignment.
Diagnose the Cause First
Before grabbing tools, identify what’s causing the sag. The fix depends entirely on the root issue.
Check for Bracket Droop
On 2003–2004 Silverados, the lower metal support brackets connecting the bumper to the frame often bend downward over time due to vibration and age. Crawl under the front of the truck and inspect these arms behind the wheel wells. If they’re visibly angled down, bracket droop is your problem, and it’s easily reversible.
Look for Hidden Dents
Sometimes the bumper looks fine on the surface but has a small dent behind the license plate or inner structure. These hidden dents push the bumper outward and downward. Remove the bumper or use a flashlight to inspect the inner frame. If you find a dent, it needs straightening.
Test for Loose Hardware
Over time, vibration loosens bumper bolts. Push up on the sagging corner. If it moves noticeably, the mounting hardware may just need tightening or repositioning.
Rule Out Design Tolerance (2014–2015 Models)
On 2014–2015 K2XX Silverados, many owners report the sides of the bumper sitting ½ inch lower than the center. This isn’t always damage. It can be factory design. These bumpers lack outer adjustment brackets, so slight sag is sometimes “normal.” Compare your truck to stock models at a dealership. If the gap exceeds ¼ inch, it’s fixable.
Use a Floor Jack to Lift the Bumper

This method forces bent brackets back into shape without removing the bumper. It’s best for 2003–2004 models with drooping brackets.
Position the Jack Correctly
Park on a level surface. Chock the rear wheels and engage the parking brake. Slide under the front of the truck and locate the lower support bracket on the sagging side. It’s the metal arm connecting the bumper to the frame, just behind the fender liner.
Place a floor jack beneath the drooping section of the bracket. Always use a 2×4 wood block between the jack and metal to prevent damage.
Lift and Reset the Metal
Slowly raise the jack to lift the bracket upward. Don’t stop at the desired height. Lift slightly higher, about ½ inch above level. This compensates for metal “spring-back” when pressure is released.
Lower the jack, then repeat the lift 3 to 6 times. This gradual repositioning helps the metal retain its new shape.
Check the gap. If it’s improved, repeat on the other side for symmetry, even if only one side looked bad.
Pro Tip: Metal fatigues over time. Lifting once may not hold. Multiple lifts rebuild tension.
Loosen Bolts and Realign the Bumper
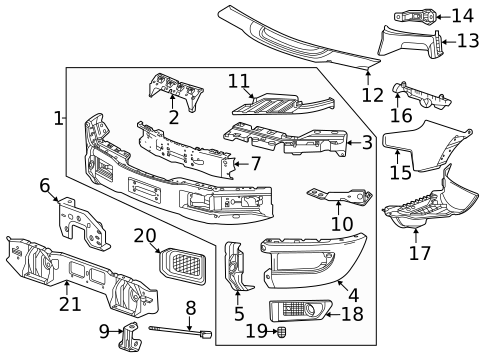
This method works best for minor impacts, loose hardware, or fine-tuning after jacking. If the jack method doesn’t fully close the gap, or if you suspect a shifted mount, loosen the bolts and manually reposition.
Remove or Loosen Mounting Bolts
Use a 15mm socket (standard for 2003 models) to loosen all bumper bolts. Start from the center grille and work outward.
Loosen the side braces too. You can remove them temporarily for better access, but reinstall before final tightening.
Support and Reposition
Place a jack with a wood block under the bumper to support it. Gently lift until the bumper aligns flush with the fender line.
Visually check alignment from the front and side. The bumper should follow the same contour as the body.
Tighten in Sequence
While holding the bumper in place, tighten all bolts gradually. Don’t crank one down fully. Tighten in a crisscross pattern to keep pressure even.
Use a torque wrench if specs are available. Over-tightening can strip threads or distort plastic.
Reinstall braces and lower the vehicle. Inspect from multiple angles.
Modify Brackets for Better Fit
This approach is best for stubborn gaps, hidden dents, or 2014–2015 models with no adjustment. When standard methods fail, you need to modify the mounting system.
Remove the Bumper
For full access, remove the bumper. Disconnect fog lights and unscrew all mounting points. Set it aside on a soft surface.
File Mounting Holes
Use a metal file or angle grinder to slightly elongate the mounting holes on the bumper brackets. File them rearward to allow the bumper to slide back about ¼ inch.
Do the same on the frame-side brackets if needed. This extra movement helps pull the bumper tighter to the body.
Repair Hidden Dents
If a dent behind the license plate is pushing the bumper out, use a hammer and dolly to gently flatten it. Work slowly to avoid cracking plastic or thin metal.
Reinstall and Test Fit
Dry-fit the bumper without bolts. Slide it into the new rearward position. Adjust by hand until the gap looks even.
Once aligned, secure all bolts. Reconnect fog lights and reattach trim.
Warning: Lower plastic trim is hard to reinstall after the fact. Attach it while the bumper is still accessible.
Model-Specific Fixes

2003–2004 Silverado: Jack It Back
This is the most effective fix for older models. The floor jack method works on nearly all 2500 HD and Crew Cab Long Bed trucks with sagging brackets. No parts needed. Results are instant.
- Time: 10–15 minutes per side
- Tools: Floor jack, 2×4, wheel chocks
- Success Rate: High
2007–2013 Silverado: Reset the Mounts
These “NNBS” trucks sometimes sag after installing heavy-duty bumpers. The fix is simple: loosen and retighten all mounting points.
Check the frame-hookup brackets for misalignment. Reset them to factory position before reattaching the bumper.
Take side-angle photos to compare alignment before and after.
2014–2015 Silverado: Accept or Modify
These models have no outer adjustment brackets. The bumper relies on its own rigidity, which can lead to side sag.
- Gap under ¼ inch? Likely factory tolerance. Dealers may refuse to fix it.
- Gap over ½ inch? Probably damage from wheel/tire rubbing or impact.
If it’s damaged, manually bend the bracket upward or file holes for better positioning. Some owners weld in custom adjustment tabs for a permanent fix.
Troubleshoot Common Problems
Bumper Won’t Stay Up
If the sag returns immediately after jacking, the bracket may be cracked or fatigued. Inspect for breaks. If damaged, replace the bracket. It’s the only long-term solution.
Gap Still Visible After Tightening
The bumper itself might be distorted. Remove it and check for warping or dents. If found, repair or replace.
Alternatively, file the mounting holes for more adjustment range.
Fog Light Lens Popped Off
Shifting the bumper can dislodge fog light housings. Before major work, remove the fog lights to prevent damage.
If a lens is cracked, replace it with an OEM or aftermarket unit from a junkyard or online.
Trim Won’t Snap Back
Lower plastic trim (air dams, skid plates) often won’t reinstall once the bumper is fully mounted. Attach trim while the bumper is still loose, or follow a specific reassembly order.
Some models require trim to be installed before the bumper is fully seated.
Dealer Says “It’s Normal”
This is common for 2014–2015 models. If the gap is worse than stock trucks on a dealer lot, insist on repair. Bring photos or a second opinion.
If they refuse, do the fix yourself. You’ll save $200+ in labor.
Prevent Future Sagging
Tighten Bolts Periodically
Vibration loosens hardware over time. Every 6 months or after off-roading, check bumper bolts and retighten if needed.
Inspect Brackets After Impacts
Even a small mailbox tap can bend brackets. If you hit something, inspect underneath. Early correction prevents permanent sag.
Avoid Corrosion
When filing metal or exposing bare steel, apply rust inhibitor or touch-up paint. Corrosion weakens brackets and leads to future droop.
Frequently Asked Questions About Fixing a Sagging Silverado Bumper
Why does my Silverado bumper sag on one side?
The most common cause is drooping lower support brackets, especially on 2003–2004 models. Over time, vibration and age cause these metal arms to bend downward. Minor impacts like hitting a mailbox can also bend the bracket on just one side, creating an uneven sag.
Can I fix a sagging bumper without removing it?
Yes. The floor jack method allows you to push bent brackets back into position without removing the bumper. Place a 2×4 wood block between the jack and the bracket, then lift gradually 3 to 6 times. This works well for older Silverados with bracket droop.
How long does it take to fix a sagging Silverado bumper?
The jack realignment method typically takes under 15 minutes per side. Loosening bolts and repositioning adds another 10 to 20 minutes. Bracket modification with filing may take 30 to 45 minutes, especially if you remove the bumper for access.
Is a sagging bumper on a 2014–2015 Silverado normal?
Sometimes. These models lack outer adjustment brackets, so the bumper relies on its own rigidity. A gap under ¼ inch may be factory tolerance. A gap exceeding ½ inch usually indicates damage from wheel rubbing or an impact, and it can be corrected by bending the bracket or filing mounting holes.
What size socket do I need for Silverado bumper bolts?
On 2003 models, a 15mm socket is standard for the bumper mounting bolts. Start loosening from the center of the grille and work outward toward the sides for the best results.
Will the bumper sag again after I fix it?
It can, especially if the metal has fatigued. To prevent recurrence, tighten bolts every 6 months, inspect brackets after any impact, and apply rust inhibitor to exposed metal. If the sag returns quickly after jacking, the bracket may be cracked and need replacement.
Key Takeaways for Fixing Your Silverado’s Sagging Bumper
Fixing a sagging bumper on your Silverado is one of the easiest, most satisfying DIY repairs. The floor jack method is the go-to solution for 2003–2004 trucks with drooping brackets, while bolt realignment handles impact cases and fine-tuning. For 2014–2015 models with stubborn gaps, bracket modification may be your only option.
Start by diagnosing the cause: bracket droop, loose hardware, hidden dents, or factory tolerance. Then match the repair method to your specific situation. Always treat both sides for symmetry, even if only one side looks bad. With the right approach, you’ll restore your truck’s clean front-end look and keep it looking tough for years to come.



