
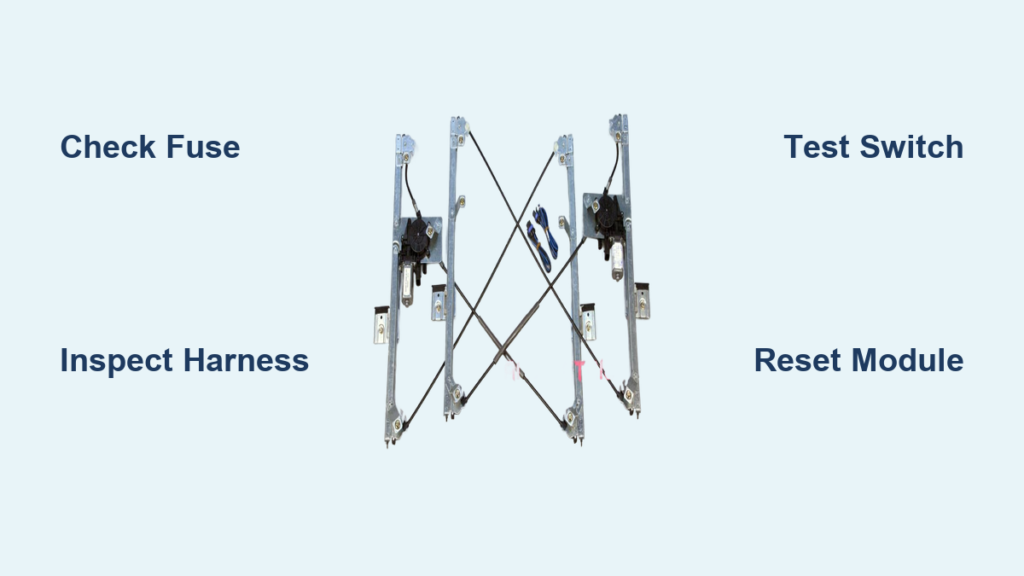
A dead power window on your Chevy Silverado can leave you exposed to rain, compromise security, and even affect resale value. The frustrating part is that the cause can range from a $15 switch to a full regulator swap. Most failures trace back to four culprits: wiring harness fatigue, switch contact degradation, regulator breakdown, or simple electrical faults like blown fuses.
This guide walks you through a complete diagnostic and repair process covering Silverado model years 2001 to 2025. You will learn how to pinpoint the exact failure, test components safely, and apply proven fixes without wasting money on unnecessary parts. By the end, you will know how to restore full window function and prevent the problem from coming back.
Diagnose the Failure Type

Before removing any panels, identify what is broken and where. The pattern of failure tells you exactly where to focus your efforts.
Driver Window Dead, Others Work
This points to localized issues in the driver’s door: a failed master switch, broken wiring in the door jamb, or a bad motor. If only the driver’s window is unresponsive while passenger windows operate normally, start with the switch and harness, not the fuse.
Passenger Window Works Only From Its Switch
If a rear or passenger window rolls up from its own switch but not from the driver’s master panel, the fault lies in the communication link between the master switch and that window’s control circuit. This is often caused by a cut or frayed wire in the door harness, or a triggered Child Safety Lock.
No Windows Operate
When all power windows fail, suspect a system-wide electrical fault. Check the main power window fuse first, since this resolves about 36% of total failures. Also inspect relays and the Body Control Module (BCM), especially if other systems like door ajar warnings or the stereo are acting up.
Window Moves Down But Not Up
This symptom typically means a broken “up” circuit. It could be a severed wire in the door harness, a worn switch contact for the up direction, or a regulator that has jammed in the down position. Test the switch and wiring before assuming motor or regulator failure.
Check Fuses and Electrical Supply
Locate the Power Window Fuse
Start with the driver-side fuse box under the dash. Look for the square power window fuse, often labeled “PW” or “WINDOW.” Also check Fuse #8, which controls passenger window communication in many models. Even if the fuse looks intact, test it with a multimeter or swap it with a known good one.
Pro Tip: Use a voltage tester to confirm 12V at the fuse socket. A blown fuse could indicate a short, so trace the circuit before replacing it.
Test Voltage at the Switch
If fuses are good but the window is dead, test for power at the driver’s master switch connector. Unplug it and use a multimeter to check for voltage on the red power wire (common in 2001–2014 models) or terminal 43 (yellow wire) in 2014–2018 models.
- No voltage? The issue may be upstream, so check the BCM or wiring to the fuse box.
- Low or fluctuating voltage? There is likely a break in the harness or a poor ground.
Inspect the Door Harness Wiring

Find the Door Jamb Boot
The rubber grommet between the door and the truck body houses the wiring harness. Open the door and locate the flex boot near the hinges. This is the most common failure point, especially on 2014–2018 Silverados.
Unwrap and Examine the Wires
Remove the electrical tape sealing the harness bundle. Gently pull back the rubber boot to expose the wires. Look for:
- Cracked or frayed insulation
- Exposed copper strands
- Completely severed wires
Common victims: Red (power), black (ground), and yellow (passenger window signal). In many cases, multiple wires fail at once due to repeated flexing.
Test With the Wiggle Method
With the switch engaged, wiggle the harness in the door jamb. If the window responds intermittently, you have confirmed a broken wire. This is a classic sign of harness fatigue.
Repair or Replace the Wiring Harness
Splice Damaged Wires
For minor damage, repair individual wires using these steps:
- Strip the damaged ends about 1/2 inch.
- Use crimp-on splice connectors (not wire nuts).
- Slide heat shrink tubing over each connection.
- Heat with a heat gun to seal and insulate.
Never use electrical tape alone, as it degrades and will not withstand moisture or movement.
Create a Service Loop
To prevent future breaks, leave a loose loop of extra wire inside the door cavity. This reduces strain on the splices when the door opens and closes.
Secure and Re-Seal
Use zip ties to route the harness away from sharp edges. Re-wrap with UV-resistant electrical tape and tuck the rubber boot back into place. Ensure no wires are pinched when closing the door.
Replace the Entire Harness (If Needed)
If multiple wires are severed or the ground wire is cut, replace the full door harness assembly. OEM or aftermarket kits are available and often more reliable than patching a heavily damaged bundle.
Clean or Replace the Window Switch

Remove the Door Panel
Use plastic trim tools to pry off the door panel. Remove screws behind the door handle and in the faux wood trim. Disconnect the switch and door handle harnesses before setting the panel aside.
Disassemble the Master Switch
Remove the switch module. Carefully pry open the housing to expose the rubber contacts and circuit board. Look for black residue on the contacts, which is carbon buildup from worn carbon pucks.
Clean Contacts With Alcohol
Soak cotton swabs in isopropyl alcohol and scrub all contact points until clean. Let it dry completely. Inspect all switches (locks, mirrors, windows) while open, since degradation often affects multiple functions.
Reassemble and Test
Snap the housing back together, ensuring alignment pins are seated. Reinstall and test. If cleaning does not work, replace the switch.
Replace With Aftermarket Unit
Aftermarket master switches cost as little as $15. Press the new unit into place until the retaining tabs click. Reconnect wiring and test all functions.
Reset the Window Module (2007–2014 Models)
Perform the Re-Seating Reset
For 2007–2014 Silverados, a software glitch can cause the driver’s window to stop working even with good wiring and switch. Fix it with this reset:
- Turn ignition to “Run” (engine off).
- Press and hold the window switch down.
- Unplug the switch connector while holding the switch.
- Reconnect the plug while still holding the switch.
- Release the switch and test.
This forces the Body Control Module to reinitialize communication, often restoring one-touch auto-up function.
Test the Window Motor
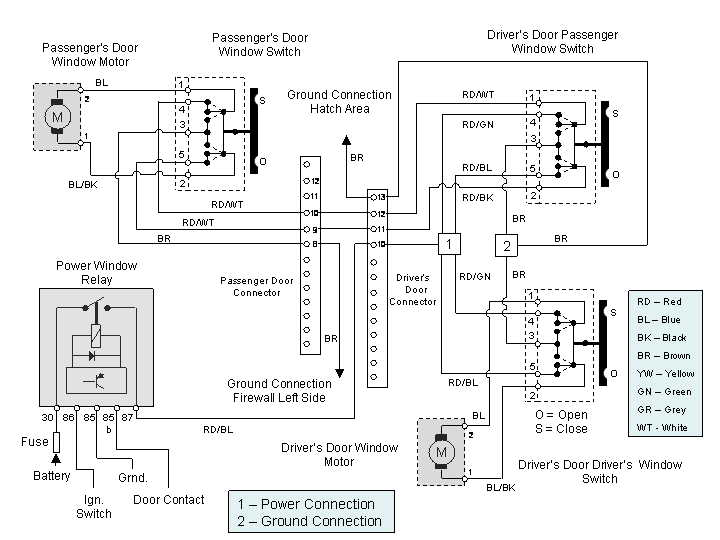
Access the Motor Connector
With the door panel off, locate the motor connector inside the door. It is usually in a waterproof socket near the regulator.
Apply Direct Power
Use jumper wires to apply 12V from a battery:
- Connect positive lead to the green wire.
- Connect negative lead to the brown wire.
If the window moves, the motor is good. Reverse polarity (positive to brown, negative to green). If it still does not move, the motor is dead.
Warning: Always connect to a solid chassis ground. Alligator clips can fail to deliver enough current.
Replace the Window Regulator
Tape the Window in Place
Before removing the regulator, tape the glass securely in the up position using wide painter’s tape. This prevents it from falling and shattering.
Remove Regulator Bolts
Unscrew the three 8mm bolts (top, middle, bottom) holding the regulator. The top bolt is tight, so use a swivel socket or universal joint.
Extract the Old Regulator
Slide it out carefully. Note how the motor is clipped to the assembly. Take a photo for reference.
Install the New Regulator
Use an OEM unit for 2019–2025 models, as aftermarket parts may not align with updated door designs.
- Align the window clips with the glass holes.
- Lower the glass until you hear a distinct “click” to confirm engagement.
- Reattach bolts in order: top, middle, bottom.
Re-Seal the Inner Door Cover
The inner rubber seal has heat-activated adhesive. Clean the door frame, align the seal, and use a low-heat setting on a heat gun to soften and re-bond it. This prevents water leaks.
Address Model-Specific Issues
2014–2018: Harness Wiring Epidemic
This generation is notorious for wire breaks in the door jamb. If replacing the switch does not fix it, inspect the harness first. The yellow signal wire is a frequent failure point.
2007–2014: Communication Glitches
If the window stops suddenly with no noise, try the re-seating reset before replacing parts. This software fix is unique to this model range.
2019–2025: Cold Weather Regulator Stress
In freezing temperatures, regulator cables bind or snap. If the window slows before failing, replace the regulator with an OEM part for proper fit and cold-weather durability.
2001–2006: Polarity and Grounding
If the window goes down but not up, check wire polarity. The green wire should get power, and the brown wire should ground (or vice versa). Also inspect the large black ground wire in the door jamb for breaks.
Prevent Future Window Failures
Install Vent Shades
Rain guards let you crack windows open in rain without water entering the door. This reduces moisture buildup that can corrode motors and switches.
Lubricate Tracks Annually
Use silicone spray on window tracks and regulator rails. Avoid oil-based lubricants, as they attract dirt and cause binding.
Inspect Harness During Maintenance
Every 12 months, check the door jamb boot for cracks or swelling. Early detection of wire fatigue can prevent complete failure.
Avoid Over-Pressing the Switch
Holding the switch after the window is fully up or down strains the motor and regulator. Release it promptly.
Frequently Asked Questions About Fixing Power Windows on Chevy Silverado
Why does my Silverado driver window work but passenger windows do not?
This usually indicates a failed master switch, broken wiring in the driver’s door jamb, or a communication issue between the master switch and the passenger control circuit. Start by checking the Child Safety Lock, then inspect the harness.
Where is the power window fuse on a Chevy Silverado?
The power window fuse is located in the driver-side fuse box under the dash. Look for a square fuse labeled “PW” or “WINDOW.” Fuse #8 also controls passenger window communication in many models.
How much does it cost to fix a power window on a Silverado?
Costs vary widely. An aftermarket switch costs around $15, while professional regulator replacement averages $122 to $179. Dealership repairs for complex electrical issues can exceed $300.
Can a blown fuse cause all windows to stop working?
Yes. A blown power window fuse is responsible for approximately 36% of total window failures. Always check the fuse first before assuming a more serious electrical fault.
What is the wiggle test for power windows?
The wiggle test involves operating the switch while gently wiggling the wiring harness in the door jamb. If the window responds intermittently, it confirms a broken wire in the harness.
How do I reset the window module on a 2007–2014 Silverado?
Turn the ignition to “Run,” hold the window switch down, unplug the switch connector, reconnect it while still holding the switch, then release and test. This forces the BCM to reinitialize communication.
Key Takeaways for Fixing Your Silverado Power Window
Fixing a power window on a Chevy Silverado is often a DIY-friendly job that takes 1 to 3 hours. Start by diagnosing the failure pattern to narrow down the cause, then check fuses and voltage before disassembling anything. The door harness is the most common failure point on 2014–2018 models, while older trucks often suffer from switch degradation or grounding issues.
Your next step: identify your model year, run through the diagnostic checklist, and gather the appropriate tools before beginning repairs. With the right approach, you can restore full window function and avoid unnecessary trips to the dealership.



