
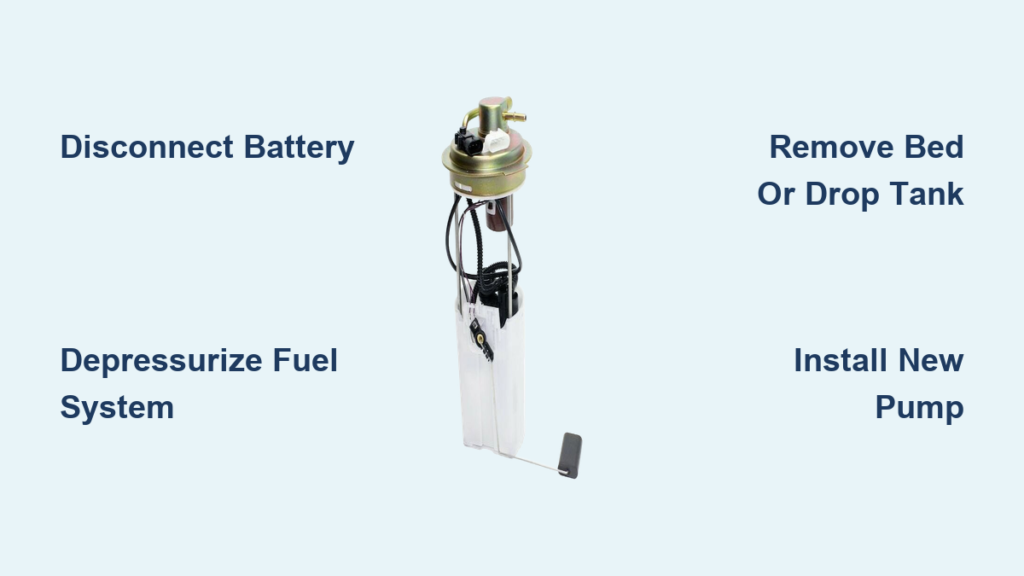
A whining noise from the fuel tank, hard starts, or sudden loss of power while driving are classic signs of a failing fuel pump on a Chevy Silverado. If your truck is struggling to deliver fuel to the engine, the pump is often the root cause. Learning how to change a fuel pump on a Chevy Silverado can save you hundreds in shop labor and get your truck back on the road quickly.
This guide walks you through the entire process for Silverado models from 1999 to 2018, covering both 1500 and heavy-duty 2500/3500 trucks. You will learn how to safely depressurize the system, choose the right access method for your model year, remove the old pump, install the new one, and verify everything works correctly.
Disconnect the Battery Before Starting
Cutting power to the electrical system is the first safety step when changing a fuel pump on a Chevy Silverado. A live electrical system near fuel vapors creates a serious fire risk.
Cut Power to the Fuel System
Use a 10 mm socket to loosen the negative battery terminal and pull the cable away from the post. For 2007–2014 Silverado 2500 and 3500 HD models, you must disconnect two batteries:
- One behind the headlight on the driver side
- One near the firewall on the passenger side
Pull both negative cables off and tuck them away from the terminals. This step is non-negotiable before working on any fuel component.
Why Positive Terminal Disconnection Matters on 2001 Models
On 2001 Silverados, disconnecting the positive terminal is also recommended before crawling under the truck. This adds an extra layer of safety when handling connectors near the fuel tank.
Depressurize the Fuel System
Relieving fuel pressure prevents dangerous spray when you disconnect the lines. The method depends on your model year.
Use the Schrader Valve on 1999–2006 Models
- Remove the engine cover with an 8 mm socket.
- Locate the Schrader valve on the fuel rail, which has a black cap.
- Cover the valve with a rag and press the center pin with a flathead screwdriver.
- Let fuel spray into the rag until it stops flowing.
- Replace the cap once pressure is fully released.
Pull the Fuel Pump Fuse on HD Models
For 2007–2014 HD trucks:
- Open the under-hood fuse box near the brake master cylinder.
- Remove the 25-amp fuel pump fuse or relay.
- Start the engine and let it stall from fuel starvation.
- Turn the key off and the system is depressurized.
Cycle the Ignition on 2014–2018 Models
For newer 1500 trucks:
- Turn the key to ON without starting the engine for 10 seconds.
- Turn the key off.
- Repeat twice to drain residual pressure.
Always keep a rag handy when disconnecting lines to catch any remaining fuel.
Choose Your Access Method
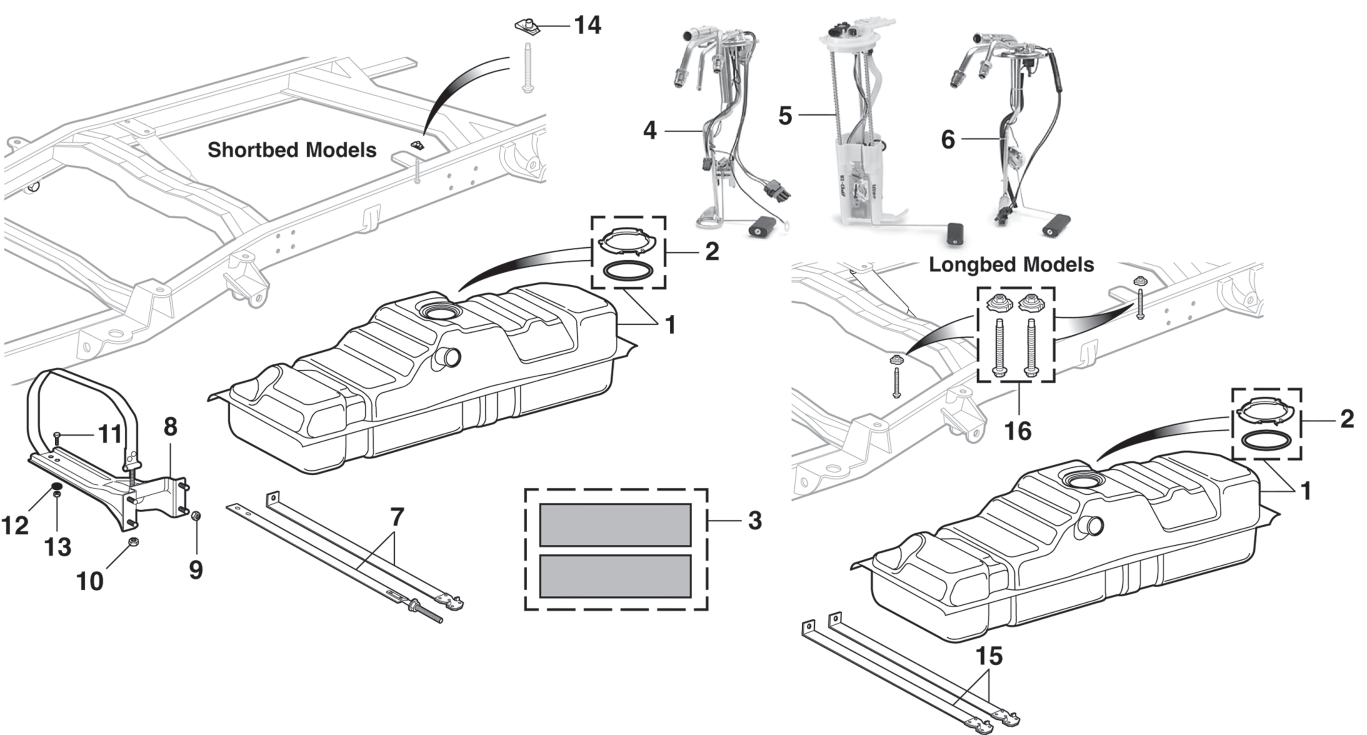
Your Silverado’s model year determines whether you should remove the truck bed or drop the fuel tank.
Remove the Truck Bed on 1999–2006 GMT800
This method offers better visibility and avoids working under a heavy, fuel-filled tank.
Prep the Bed for Removal
- Remove the tailgate by lifting up, pulling the retaining clip, and sliding it out.
- On the passenger side, lift and remove the access panel if your truck has one.
- Unscrew eight 18 mm bolts securing the bed:
– Two at the rear (one per side)
– Two mid-side about 1.5 feet forward
– Two near the front
– Two further back on each side
Disconnect Bed Wiring
Locate the electrical connectors between the bed and frame. Press the white tab on each connector and pull straight out. Tuck the wires aside to avoid damage during lifting.
Lift the Bed Safely
You will need four people, a hoist, or a mini excavator to lift the bed. Lift straight up and slightly back to clear the cab. Never stand under the bed while it is suspended. This is extremely dangerous.
Drop the Fuel Tank on All Models
Dropping the tank is the only option for 2007+ HD and 2014–2018 1500 models. It also works for 1999–2006 trucks if you cannot remove the bed.
Support the Tank Properly
Use a transmission jack with a tank adapter or a floor jack with a wide block of wood. The jack must support the tank body, not the straps. Never rely on jack stands alone because a full fuel tank is extremely heavy and unstable.
Remove Shield or Cover
- 2007–2014 HD: Remove three 13 mm bolts from the black plastic wheel well shield and slide it backward.
- 2014–2018 1500: Remove three 13 mm bolts from the plastic tank cover, tilt it down, and lift to disengage the metal tabs.
Remove the EVAP Canister if Needed
Three lines connect to the canister:
- Lower fuel line: Squeeze the tabs or use a pick to release.
- Middle line: Pinch both ends with pliers.
- Top line: Press the lock tab and pull.
Remove the 13 mm mounting bolt and set the canister aside.
Disconnect Fuel and Electrical Lines

With access clear, disconnect all connections before lowering the tank.
Remove Filler and Vent Hoses
Use an 8 mm socket or screwdriver to loosen the hose clamps. Twist each hose slightly to break the seal. If corroded, work a pick behind the rubber to break up rust. Disconnect from the filler neck side to avoid damaging the tank.
Routing Tip: When reinstalling, route hoses up and over the frame so they do not hang low.
Unplug Electrical Connectors
Two main connectors sit on the tank:
- Main pump connector (blue or black): Press the release tabs and pull straight out. Use a pick if stuck.
- Fuel level sensor connector: Push the lock back and disconnect.
Check for white safety tabs on some models and lift them before pulling. After reconnecting, tug firmly to confirm they are secure.
Disconnect Fuel Lines
Most lines use quick-connect fittings:
- Main line (green lock): Lift the side tabs, remove the green lock, press the white button, and pull the line.
- Smaller lines (5/16 inch): Squeeze the outer tabs and pull back.
Always pull straight off. Never twist, as this can damage the seals.
Remove the Old Fuel Pump
With the tank lowered or bed removed, access the pump assembly on top of the tank.
Clean the Pump Area
Before opening the tank:
- Use compressed air to blow debris off the tank top.
- Wipe the area with a clean rag.
Contamination is the number one cause of new pump failure. A single speck of dirt can clog the replacement.
Remove the Lock Ring
The lock ring secures the pump in the tank. Use a brass punch (non-sparking) and hammer to tap the ring counterclockwise until it loosens. If stuck, soak with rust penetrant first and pry up the small anti-rotation tab if needed.
Warning: Never use steel tools near the fuel tank. Sparks can ignite fuel vapors.
Pull Out the Pump Assembly
Lift the pump straight out. Move the fuel level sender float arm carefully and do not bend it. Drain any leftover fuel back into the tank. Inspect the old pump for excessive wear or play, which confirms failure.
Install the New Fuel Pump

With the old pump out, you are ready to install the replacement.
Replace the Gasket or O-Ring
Never reuse the old seal. Install the new gasket or O-ring that came with the pump and seat it fully in the groove.
Transfer the Fuel Sender if Needed
If the new pump does not include a sender, remove the sender from the old pump. Align it with the new pump because the float only fits one way. Slide it in until it clicks.
Insert the New Pump
- Align the pump with the tank’s inlet and notch.
- Lower it straight in without forcing.
- Ensure the gasket stays seated.
- Verify the alignment tab fits into the tank slot.
Reinstall the Lock Ring
Slide the ring over the pump and tap clockwise with a brass punch until it locks. Listen for a click that confirms it is fully seated. Reinstall any retaining clips your model uses.
Upgrade the Electrical Connector on 1999–2006 Models
If your Silverado has never had the pump replaced, the factory connector may be outdated and prone to failure.
Splice in the New Connector
- Strip one wire at a time to avoid mix-ups.
- Use butt connectors with heat shrink rather than crimp-only connectors.
- Match wire colors and functions carefully.
- Reconnect and lock the tab fully.
- Tug test for security.
Solder for Longevity on 2001 Models
For 2001 trucks, soldering offers the best durability:
- Use marine-grade heat shrink with a glue liner.
- Apply heat evenly to seal out moisture.
- File sharp edges to prevent tubing punctures.
- Wrap in electrical tape and route into the loom.
Only attempt this if you have experience with electrical work. Poor connections can cause pump failure or fire.
Reassemble the System
Reverse the disassembly process carefully.
Reinstall the Fuel Tank
- Lift the tank slowly with the jack.
- Route filler and vent hoses up and over the frame.
- Slide the straps onto the tank.
- Start bolts by hand to avoid cross-threading.
Torque to Specification
- 15 mm strap bolts: 30 ft-lbs (HD and 2014+ models)
- 18 mm bed bolts: 63 ft-lbs (if bed was removed)
- 13 mm tank cover bolts: 13 ft-lbs (2014–2018 models)
Never overtighten plastic covers because they will crack.
Reconnect All Lines and Wires
- Fuel lines: Snap fully until they click. Reinstall green locks.
- Electrical connectors: Engage locks and tug test.
- Filler and vent hoses: Reattach and tighten clamps without crushing plastic.
- EVAP canister: Reconnect all three lines and secure the 13 mm bolt.
- Shields and covers: Reinstall and snug bolts without cracking plastic.
Reinstall the Bed if Removed
Lower the bed straight down and insert all eight 18 mm bolts. Torque to 63 ft-lbs, reconnect electrical connectors, and replace the tailgate.
Test the System
Final checks prevent roadside failures after the job is done.
Prime the Fuel System
- Reinstall the fuel pump fuse or relay.
- Reconnect the battery, negative terminal first.
- Turn the ignition to ON without starting.
- Listen for a 2–3 second hum from the pump.
- Cycle the key 2–3 times to build pressure.
Start the Engine and Check for Leaks
- Start the truck. It should fire up smoothly.
- Inspect the pump top, fuel lines, filler neck, and EVAP canister.
- Look for drips, hissing, or fuel smell.
- Test drive and check for hesitation or stalling.
Pro Tips and Common Mistakes to Avoid
A few extra precautions will ensure long-term success.
Never Skip the Cleaning Step
Blowing debris off the tank top prevents contamination. A single speck of dirt can destroy a new pump.
Use the Right Tools
- Brass punch for the lock ring to prevent sparks
- Torque wrench for straps and bolts
- Heat gun for proper heat shrink sealing
Replace the Fuel Filter on 2001 Models
Pair the pump job with a WIX 33481 filter. Avoid Fram filters, which are known for early failure. Use a flared wrench and hand-tighten first.
Watch for Corrosion
Filler neck clamps and lines often rust. Use a pick to clean before reconnecting rather than forcing stuck parts.
Why Bed Removal Is Safer on 1999–2006 Models
Although it requires more help, removing the bed eliminates the risk of dropping a 70+ pound fuel tank. It also provides better access for inspection and cleaning.
Frequently Asked Questions About Changing a Fuel Pump on a Chevy Silverado
How long does it take to change a fuel pump on a Chevy Silverado?
Most DIYers complete the job in 4 to 8 hours depending on experience and whether they remove the bed or drop the tank. Bed removal takes longer due to setup but is easier overall.
What are the symptoms of a bad fuel pump on a Silverado?
Common signs include whining from the fuel tank, hard starts, loss of power under load, engine stalling, and poor fuel economy. A failed pump often prevents the truck from starting at all.
Can I replace the fuel pump without dropping the tank?
On 1999–2006 models, you can remove the truck bed instead of dropping the tank. On 2007+ HD and 2014–2018 1500 trucks, dropping the tank is the only access method.
Do I need to replace the fuel filter when changing the pump?
On 2001 models, replacing the fuel filter at the same time is recommended. A WIX 33481 filter pairs well with a new pump and helps prevent future issues.
What tools do I need to change a Silverado fuel pump?
Essential tools include a 10 mm socket, 13 mm and 18 mm sockets, a brass punch, a torque wrench, a transmission jack or floor jack, compressed air, and basic hand tools like pliers and screwdrivers.
Is it safe to solder the electrical connector on a 2001 Silverado?
Yes, soldering is the most durable connection method for 2001 models. Use marine-grade heat shrink and work in a well-ventilated area. If you are not confident in your electrical skills, consult a professional.
Key Takeaways for Replacing Your Silverado Fuel Pump
Changing a fuel pump on a Chevy Silverado is a serious but manageable job for most DIYers. The most important steps are disconnecting the battery, depressurizing the fuel system, choosing the correct access method for your model year, and keeping the tank opening clean during installation. Always use a brass punch near the tank to avoid sparks and torque all bolts to specification during reassembly.
Once everything is back together, prime the system, check for leaks, and test drive the truck. If you take your time and follow the steps in order, your Silverado will run reliably for years to come. For complex electrical work or if you feel unsure about handling the fuel tank, consult a professional mechanic. Your safety is worth the investment.



