
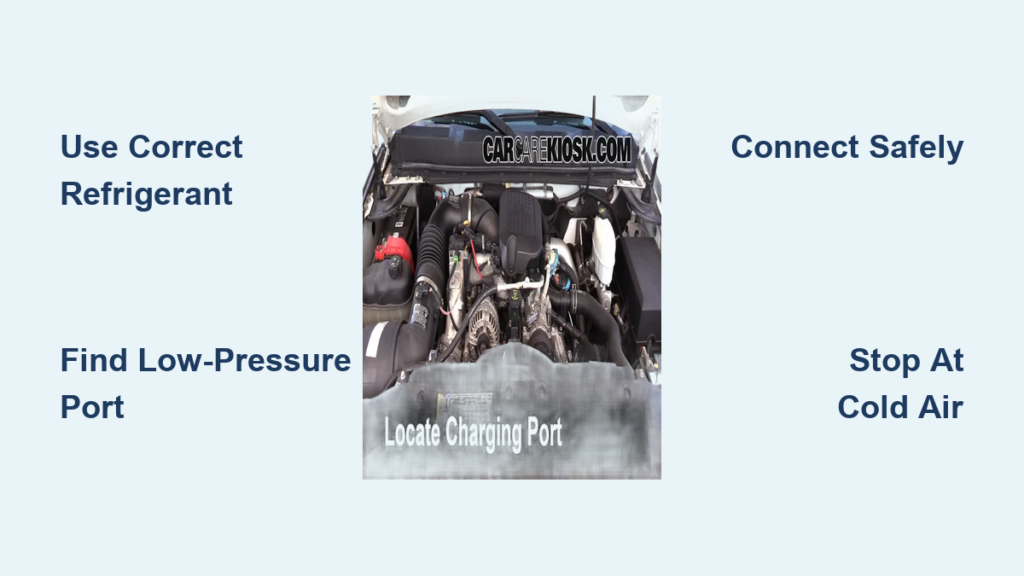
Your Chevy Silverado’s AC is blowing warm air right when you need it most. Whether you’re heading to a job site or a summer road trip, a weak air conditioning system turns every drive into a sweat session. The good news is that learning how to add Freon to your Chevy Silverado is one of the most straightforward DIY repairs you can tackle, and it costs a fraction of what a dealership charges.
This guide covers every model year from 2001 to 2017 and newer, including exact port locations, refrigerant compatibility, and the charging procedure that actually works. You’ll discover which refrigerant your truck needs, where to find the service port, and how to avoid the costly mistakes that send most DIYers to the shop anyway.
Identify the Correct Refrigerant for Your Silverado

R-1234yf for 2017 and Newer Silverados
If your truck rolled off the assembly line in 2017 or later, your AC system uses R-1234yf refrigerant. This newer formula has a much lower global warming potential than its predecessor, which is why automakers made the switch.
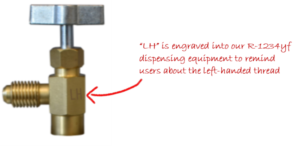
The critical rule here is simple: R-1234yf and R-134a are not interchangeable. Pouring R-134a into an R-1234yf system will damage your compressor, destroy the seals, and potentially ruin the entire AC system. Expect to pay around $60 per can for R-1234yf, and you’ll also need a specialized adapter with reverse threading that costs about $10 to $15 extra.
R-134a for 2001 to 2016 Silverados
Trucks manufactured between 2001 and 2016 use R-134a refrigerant, which dominated the automotive industry for decades. While R-134a is being phased out due to environmental concerns, it remains legal for existing systems and is widely available at auto parts stores.
For a partial top-off, one can usually does the job. But if your V8 engine’s system is completely empty, plan on using two cans to achieve proper cooling performance.
Three Ways to Confirm Your Refrigerant Type
- Check the under-hood label: Look near the radiator or AC components for a sticker stating “HFC-134a” or “R-1234yf.”
- Inspect the service port: R-1234yf ports feature a distinctive reverse-thread design that prevents accidental cross-contamination.
- Verify your model year: This is the easiest method. 2016 and older means R-134a. 2017 and newer means R-1234yf.
Find the Low-Pressure Service Port on Your Silverado

Port Location for 2017+ Silverados
On 2017 and newer models, the low-pressure port sits on the lower side of the engine bay near the firewall. It’s tucked away in a recessed area, so grab a flashlight and take your time locating it. The port has a black or gray rubber cap and uses a reverse-threaded connection that tightens by turning counterclockwise.
Port Location for 2016 and Older Silverados
The exact position varies by engine and model year, but here’s a breakdown:
- 2016 V8 models: On the larger refrigerant line, positioned low and slightly recessed in the engine bay
- 2008 Silverado 1500: Back of the engine bay under a protective cover, with a port diameter of approximately 13 mm
- 2002 Silverado with 4.3L engine: On the larger diameter AC line between the firewall and compressor
- 2001 Silverado 1500 with 4.8L V8: Toward the rear of the compressor assembly (the front port is high-pressure)
Universal Rules for Identifying the Correct Port
The low-pressure port is always on the larger diameter AC line and contains a Schrader valve (similar to a tire valve stem). The high-pressure port sits on the smaller line, usually near the condenser at the front of the engine bay. Charging kits are physically designed to fit only the low-pressure port, which prevents dangerous misconnections.
Never attempt to charge through the high-pressure port. Doing so can rupture the refrigerant can, burst the charging hose, or send liquid refrigerant into the compressor, causing catastrophic damage.
Gather Your Tools and Safety Equipment
Essential Items You Need
- Correct refrigerant: R-1234yf for 2017+ trucks or R-134a for older models
- Charging hose with gauge: R-134a kits use standard quick-connect fittings; R-1234yf requires a specialized reverse-thread adapter
- Safety goggles: Refrigerant escapes at extremely cold temperatures and can cause frostbite or serious eye injury
- Flashlight: Essential for spotting recessed ports on 2002, 2008, and 2017+ models
Optional Items That Make the Job Easier
- Leak detection spray or UV dye for finding existing leaks before you start
- A manifold gauge set for more precise pressure monitoring
- Work gloves to protect your hands from the freezing-cold can
Skip any recharge kit that includes oil injectors unless you’re replacing a major component. Most top-off recharges don’t require additional oil.
Prepare Your Silverado’s AC System for Charging
Start the Engine and Configure the Climate Controls
Turn on your truck and let it idle. The compressor must be running throughout the entire charging process to circulate refrigerant and maintain accurate pressure readings.
Set your climate controls to the following:
- Temperature: Maximum cold
- Fan speed: High
- Mode: Vent (avoid defrost or floor settings)
- Recirculation: On
Let the system run for 2 to 3 minutes to stabilize internal pressure before connecting any equipment. Rushing this step leads to inaccurate gauge readings and poor results.
Connect the Charging Kit to the Service Port
Follow This Connection Sequence
- Locate and visually inspect the low-pressure port for debris or oil residue
- Remove the rubber cap and store it somewhere safe for reinstallation later
- Shake the refrigerant can vigorously for 20 to 30 seconds to mix the contents
- If your can has an inner puncture cap, remove the top cap, unscrew the inner cap, then reattach the top
- Attach the charging hose to the port:
– R-134a systems: Pull up the valve stem on the quick-connect fitting and push it down onto the port until it clicks
– R-1234yf systems: Thread the adapter onto the port and turn counterclockwise to tighten
Check for Leaks Before Charging
Listen for any hissing sounds and look for oil residue around the connection point. If you detect a leak, stop immediately. Recharging a system with an active leak is wasteful and expensive. Repair the leak first, then return to the charging procedure.
Add Freon to Your Chevy Silverado the Right Way

Open the Valve and Begin Flowing Refrigerant
Once everything is connected securely, open the valve on your charging hose or press the pump button. You’ll hear refrigerant flowing into the system, and the can will become extremely cold within seconds. Keep the can upright throughout the process unless your specific kit instructions say otherwise.
Use the Correct Charging Technique
For a full recharge, maintain steady refrigerant flow while watching the pressure gauge. For a simple top-off, use brief 1-second bursts with 30 to 60 seconds of waiting time between each burst. This allows the system to absorb the refrigerant and prevents overcharging.
Shake the can occasionally if your kit instructions recommend it.
Monitor Pressure and Vent Temperature
Your target pressure range is 25 to 40 psi, shown as the green zone on most gauges. However, ambient temperature affects readings significantly. On a 90°F day, your pressure may read higher than expected, and that’s normal.
The most reliable indicator of a successful charge is the air temperature coming from your vents. When that air turns ice-cold, stop charging regardless of what the gauge says.
How Long Does the Process Take?
A complete DIY recharge typically takes 10 to 15 minutes. You should feel cold air within minutes if the system is functioning properly.
Finish the Recharge and Verify Your Work
Disconnect the Equipment Safely
Close the valve on your charging hose, release any remaining pressure in the line, then disconnect the adapter from the service port. Immediately replace the rubber cap on the port to prevent leaks and keep debris out of the system.
Run a Final System Check
Let the AC run for 5 minutes and confirm the following:
- Air stays cold at idle and under light acceleration
- No hissing sounds around the service port
- Pressure gauge stays within the green zone
If cooling fades quickly after recharging, you almost certainly have a leak that needs professional attention.
Troubleshoot Common Problems After Recharging
AC Still Blows Warm Air
If cold air doesn’t return after a full recharge, the likely culprits are a significant refrigerant leak, a blocked expansion valve, or compressor failure. These issues require professional diagnosis and repair.
Cooling Works Briefly Then Fades
This classic symptom points to a refrigerant leak. Common failure points include the Schrader valve at the service port, O-rings on the hoses or compressor, and the condenser (which sits in front of the radiator and is vulnerable to rock damage). A professional leak-down test using UV dye can pinpoint the exact source.
Pressure Reads Higher Than Expected
In hot weather, gauge readings above 40 psi are completely normal. Don’t panic and assume you’re overcharged. If the vent air is ice-cold and the system runs smoothly, your charge level is fine.
Avoid These Expensive DIY Mistakes
Using the Wrong Refrigerant Type
This is the single most costly error. R-134a in an R-1234yf system destroys components. Always verify your refrigerant before connecting anything.
Overcharging the System
More refrigerant does not mean colder air. Overcharging increases pressure beyond safe limits, damages the compressor, and actually reduces cooling performance. Stop when the gauge hits the green zone or when vent air turns cold, whichever happens first.
Ignoring Existing Leaks
Recharging a leaking system is like filling a swimming pool with a hole in the liner. You’ll waste refrigerant and money without solving the underlying problem. Find and fix leaks before recharging.
Forcing the R-1234yf Adapter Clockwise
The reverse-threaded design on 2017+ models tightens by turning counterclockwise. Forcing it the wrong way strips the port threads and creates an expensive repair.
Maintain Your AC System for Long-Term Performance
Prevent Refrigerant Loss
Always replace the service port caps after every recharge. Inspect your engine bay annually for oil stains around AC lines, the compressor, and connections. Avoid prolonged idling with the AC on maximum when you know refrigerant is low.
Know When to Call a Professional
Seek expert service if you’ve added more than two cans without achieving cold air, the compressor makes grinding or squealing noises, the system was completely empty (which requires vacuum evacuation and precise weighing), or you suspect a blocked condenser or expansion valve.
Professionals use vacuum pumps to remove moisture and weigh refrigerant for exact fill amounts, both of which are critical for long-term reliability in severely depleted systems.
DIY vs Dealership: Cost and Time Comparison
| Factor | DIY Recharge | Dealership Service |
|---|---|---|
| Cost (R-1234yf) | $70 to $75 | $300 or more |
| Cost (R-134a) | $30 to $50 | $200 to $400 |
| Time Required | 10 to 15 minutes | 1 to 2 hours |
| Leak Test Included | No | Yes |
| Vacuum and Weigh | No | Yes |
DIY recharging works best for quick top-offs and routine maintenance. For complete system failures or suspected leaks, professional service ensures proper diagnosis and repair.
Frequently Asked Questions About Adding Freon to a Chevy Silverado
What type of Freon does a 2017 Chevy Silverado use?
The 2017 Chevy Silverado uses R-1234yf refrigerant, which replaced R-134a in most vehicles starting with the 2017 model year. This newer refrigerant has a lower global warming potential but requires a specialized adapter with reverse threading for DIY recharging.
Where is the low-pressure port on a 2008 Chevy Silverado?
On a 2008 Silverado 1500, the low-pressure port is located at the back of the engine bay under a protective cover. The port is approximately 13 mm in diameter, distinctly smaller than the 16 mm high-pressure port. You’ll need a flashlight to see it clearly.
How much does it cost to add Freon to a Silverado at a dealership?
Dealership AC recharges typically cost between $200 and $400, depending on your model year and refrigerant type. R-1234yf service on 2017+ models often exceeds $300. The higher price includes leak testing, vacuum evacuation, and precise refrigerant weighing that DIY kits don’t provide.
Can I use R-134a in a 2017 or newer Silverado?
No. Using R-134a in a 2017+ Silverado will damage the compressor, seals, and other AC components. The R-1234yf system uses different compressor oil and seal materials that are incompatible with R-134a. Always match the refrigerant to your model year.
How do I know if my Silverado AC is low on Freon?
Common signs include warm or lukewarm air from the vents when the AC is on maximum cold, the compressor cycling on and off frequently, and visible ice buildup on AC lines. If your AC gradually loses cooling power over weeks or months, a slow refrigerant leak is the most likely cause.
Is it safe to add Freon to my Silverado myself?
Yes, DIY recharging is safe when you follow proper procedures. Wear safety goggles to protect your eyes from refrigerant exposure, connect only to the low-pressure port, and never overcharge the system. The entire process takes under 15 minutes and requires no special mechanical training.
Key Takeaways for Successfully Adding Freon to Your Chevy Silverado
Adding Freon to your Chevy Silverado is a straightforward repair that saves hundreds of dollars compared to dealership pricing. The three most important steps are matching the correct refrigerant to your model year, connecting only to the low-pressure service port, and stopping the charge when vent air turns ice-cold rather than chasing a specific pressure number.
Your next step is simple: verify your model year, purchase the correct refrigerant and adapter kit, and set aside 15 minutes in a well-ventilated area. With the right preparation and this guide in hand, you’ll have cold air blowing through your vents before the afternoon is over.



