
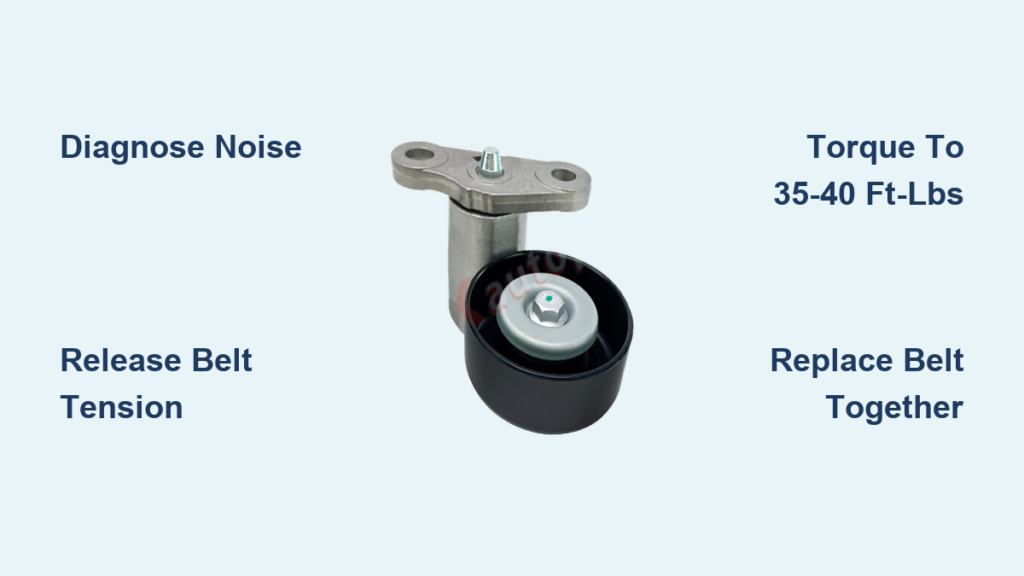
A loud squeal from under the hood of your Chevy Silverado is never a good sign. If that noise gets louder when the engine is cold or wet, or you notice the power steering feels sluggish, the tensioner pulley is often the hidden cause. This small but vital component keeps your serpentine belt tight enough to drive the alternator, water pump, A/C compressor, and power steering pump.
Learning how to change tensioner pulley on Chevy Silverado trucks saves you a trip to the shop and gives you control over the parts used. This guide covers 1999 through 2021+ models with 4.8L, 5.3L, and 6.6L Duramax engines. You will learn how to spot a bad pulley, swap it out, and confirm everything works correctly.
Spot the Symptoms of a Failing Tensioner Pulley
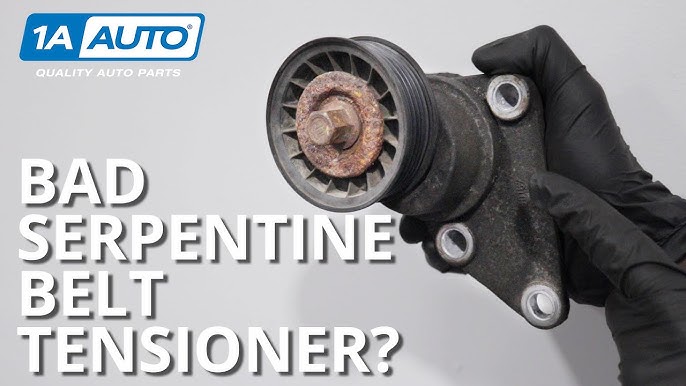
Before you start turning wrenches, confirm the tensioner is actually the problem. Misdiagnosis leads to wasted time and money.
Listen for Engine Bay Noises
Different sounds point to different issues:
- Squealing or chirping: Often means the belt is slipping because tension is too low.
- Grinding or rumbling: Suggests worn bearings inside the tensioner or idler pulley.
- Rattling at startup: Points to a broken internal spring or loose mounting hardware.
Noises that rise and fall with engine RPM usually come from the belt drive system, not internal engine parts.
Check Movement and Belt Condition
With the engine off, open the hood and look for:
- Cracks, fraying, or shiny spots on the belt
- Pulleys that sit crooked or wobble
- A tensioner arm that feels loose or does not snap back when pushed
A tensioner arm that moves too easily or returns slowly has a weak spring. That unit needs replacement.
Spin the Pulleys by Hand
Remove the serpentine belt and rotate each pulley:
- Good pulley: Spins smoothly with no resistance.
- Bad pulley: Feels gritty, rough, or binds. Replace it right away.
If the tensioner fails any of these tests, move on to replacement.
Gather the Right Tools and Parts
Using the correct tools prevents stripped bolts and damaged components.
Tools You Will Need
- 15mm socket and ratchet
- 3/8-inch drive ratchet for square-drive tensioners
- Box-end wrench set
- Torque wrench
- Flashlight or work light
Parts to Have Ready
- New tensioner pulley assembly
- New idler pulley if your model uses a separate one
- New serpentine belt
🔧 Pro Tip: Buy a complete tensioner and belt kit matched to your engine size. Kits ensure compatibility and often cost less than buying parts separately.
Release the Serpentine Belt Tension
Removing the belt is the first hands-on step.
Find the Belt Routing Diagram
Look for a sticker on the fan shroud or radiator support showing the belt path. If the sticker is gone, snap a photo of the belt before removal.
Locate the Tensioner
The tensioner sits near the crankshaft pulley. It has a spring-loaded arm and a single pulley with nothing driving it directly.
Release the Spring Pressure
Tensioners come in two common designs:
Square Drive Style
- Insert a 3/8-inch ratchet into the square hole on the tensioner body.
- Rotate counterclockwise to release tension.
Bolt Head Style
- Fit a 15mm socket onto the center bolt.
- Turn the bolt to swing the arm away from the belt.
Hold the tool in place to keep tension released.
Slip the Belt Off
- Pull the belt off the alternator or idler pulley.
- Slowly let the tensioner arm return to its rest position.
- Set the old belt aside.
⚠️ Warning: Never pry on the tensioner arm with a screwdriver. You can destroy the spring mechanism.
Remove the Old Tensioner Pulley
With the belt out of the way, the tensioner comes off next.
Unbolt the Tensioner Assembly
- Use a 15mm socket to remove the mounting bolt.
- Some models require removing a shield or bracket first. Remember where each piece goes.
Pull the Tensioner Free
- Slide the tensioner straight off the mounting stud.
- Check the stud for rust or damage. Clean it before installing the new unit.
Remove the Idler Pulley if Needed
- Unbolt the idler pulley with the same 15mm socket.
- Note the orientation. Some pulleys have offset flanges that only fit one way.
Install the New Tensioner Pulley

Careful installation prevents early failure.
Align the New Tensioner
- Match any locating tabs on the new unit with the slots on the engine block.
- Slide the tensioner fully onto the mounting stud before inserting the bolt.
Hand-Start the Mounting Bolt
- Thread the 15mm bolt in by hand.
- Turn it several rotations to avoid cross-threading.
Torque to the Correct Specification
- Use a torque wrench to tighten the bolt to 35–40 ft-lbs.
- Do not guess this number. Overtightening cracks the housing. Undertightening lets the unit loosen over time.
🔧 Expert Note: Torquing matters more here than on most bolts. The tensioner housing can crack if you overdo it.
Mount the New Idler Pulley
- Install the idler in the same orientation as the old one.
- Torque its bolt to 35–40 ft-lbs as well.
Route and Reinstall the Serpentine Belt
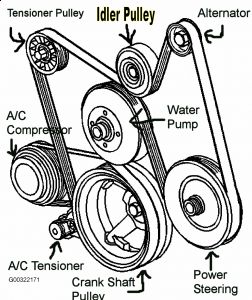
Wrong belt routing destroys a new belt fast.
Match the Belt to Your Engine
- Check the belt length, width, and rib count against your engine.
- Kits usually include the correct belt for your setup.
Follow the Correct Path
Route the belt in this general order (always verify with your diagram):
- Crankshaft pulley
- Water pump pulley
- Power steering pump
- A/C compressor
- Idler pulley
- Alternator
- Tensioner pulley
Make sure every rib sits fully inside the pulley grooves.
Apply Tension and Seat the Belt
- Use your ratchet or wrench on the new tensioner to compress the spring.
- Slip the belt over the last pulley, usually the alternator.
- Slowly release the tensioner to apply pressure.
Confirm the belt tracks centered on every pulley before closing the hood.
Test the System After Installation
Never assume the repair worked without checking.
Start the Engine and Watch
- Start the truck with the hood open.
- Look for belt wobble, jumping, or slipping.
- Listen for squeaks, chirps, or grinding.
If noise continues, shut off the engine and recheck routing, alignment, and seating.
Verify Each Accessory Works
- Power steering: Turn the wheel lock-to-lock. It should feel smooth.
- A/C: Turn on max cooling. Air should drop in temperature quickly.
- Electrical system: Check the dashboard for the battery light. Use a multimeter to confirm voltage reads 13.5–14.5V with the engine running.
Recheck the Bolt Torque
After the engine cools, recheck the tensioner bolt torque if you can reach it safely. Thermal cycling can settle components.
Handle Engine-Specific Details

Different Silverado engines have unique quirks during this job.
4.8L and 5.3L V8 Models
- Common in 1500 series trucks.
- Tensioner is easy to reach from the top.
- Routing diagram is usually visible on the fan shroud.
6.6L Duramax Diesel
- Tensioner access can be tighter due to engine covers.
- Coolant bleeding is required after belt replacement. Air pockets in the cooling system cause overheating.
- Bleed procedure: Run the engine with the radiator cap off, squeeze the upper hose, and top off coolant until flow is steady.
3.0L Duramax (2019+ Light-Duty)
- Compact layout means less working space.
- A swivel-head ratchet helps reach the tensioner bolt.
- Front shields or brackets may need removal first.
2021+ Models
- Some trims require partial front-end disassembly to reach the tensioner.
- Reinstall every bracket and shield. Missing pieces cause vibration and noise.
Troubleshoot Common Post-Repair Issues
Even careful work can leave small problems behind.
Belt Squeals After Replacement
- Cause: New belt breaking in, misrouting, or oil contamination.
- Fix: Recheck routing. Clean the belt with degreaser if oily. Noise usually fades after a few days.
Grinding or Rumbling Returns
- Cause: Defective new pulley or a bad idler.
- Fix: Remove the belt and spin each pulley by hand. Replace any that feel rough.
Belt Throws Off While Driving
- Cause: Misaligned pulley, bent bracket, or wrong belt size.
- Fix: Verify the part number. Inspect every pulley face for flatness.
Tensioner Arm Feels Stiff
- Cause: Over-torqued bolt or damaged spring.
- Fix: Loosen the bolt and re-torque to 35–40 ft-lbs. Replace the unit if stiffness remains.
Prevent Future Tensioner Failures
A few habits keep your new parts running longer.
Replace Components as a Set
- Always swap the belt, tensioner, and idler pulley together.
- A worn belt destroys a new tensioner. A weak tensioner ruins a new belt.
Inspect During Every Oil Change
- Look for cracks in belt ribs.
- Check for glazed or shiny belt sides.
- Spin pulleys by hand to feel for roughness.
Choose Quality Parts
- Cheap tensioners often have weak springs that fail early.
- Trusted brands include ACDelco, Gates, and Dorman.
Frequently Asked Questions About Silverado Tensioner Replacement
What are the symptoms of a bad tensioner pulley on a Chevy Silverado?
Common signs include squealing or grinding noises from the engine bay, visible belt wobble, loss of power steering assist, A/C blowing warm air, and a battery light on the dashboard. A tensioner arm that does not snap back when pushed also points to a failing unit.
How long does it take to replace a tensioner pulley on a Silverado?
Most DIYers finish the job in 1 to 2 hours. Models with tight engine layouts or front-end disassembly requirements can take longer.
What size bolt holds the tensioner pulley on a Chevy Silverado?
The mounting bolt is a 15mm on most 1999 through 2021+ models. Some tensioners also have a square drive hole that accepts a 3/8-inch ratchet for releasing tension.
What torque should I use on the tensioner bolt?
Tighten the tensioner mounting bolt to 35–40 ft-lbs using a torque wrench. This range applies across most 4.8L, 5.3L, and 6.6L Duramax configurations.
Should I replace the serpentine belt at the same time as the tensioner?
Yes. Replacing the belt, tensioner, and idler pulley together prevents early failure of the new parts. A worn belt stresses a new tensioner, and a weak tensioner cuts the life of a new belt short.
Do I need to bleed the coolant after replacing the tensioner on a Duramax?
Yes. On 6.6L and 3.0L Duramax engines, the belt drives the water pump. Air pockets can enter the cooling system during the repair, so a coolant bleed procedure is required to prevent overheating.
Final Thoughts on Replacing Your Silverado Tensioner Pulley
Knowing how to change tensioner pulley on Chevy Silverado trucks puts you in control of a repair that shops often charge hundreds of dollars for. With basic hand tools, a torque wrench, and about two hours of work, you can restore quiet, reliable operation to your accessory drive system.
The most important steps to remember:
- Diagnose carefully using noise, movement, and spin tests.
- Always torque the mounting bolt to 35–40 ft-lbs.
- Replace the belt and idler pulley at the same time.
- Follow the routing diagram on your fan shroud exactly.
Once you fire up the engine and hear silence where the squeal used to be, you will know the job is done right. Keep up with regular inspections, and your new tensioner should deliver many trouble-free miles.



