
Few things are more frustrating than opening your truck door at night and stepping into complete darkness. Chevy Silverado interior lights not working is a common complaint across model years 1997 through 2023, and the root cause can range from a simple dimmer switch oversight to a hidden wiring short behind the headliner. The problem affects dome lights, courtesy lights, visor vanity lights, and instrument panel backlighting in different combinations.
This guide provides a proven, model-specific diagnostic process to identify and fix interior lighting failures in your Silverado. You will learn how to check the correct fuses, test door jamb switches, perform a system reset for newer models, and avoid costly misdiagnoses. Whether you drive a 1997 K1500 or a 2023 AT4X, these steps will help you restore your interior lights without an unnecessary trip to the dealership.
Verify the Dimmer Switch and Manual Controls First

Before checking fuses or wiring, rule out the most common oversight: the dimmer switch position and manual override buttons.
Rotate the Dimmer to Maximum Brightness
The dashboard dimmer switch controls interior light brightness and activation. If it is turned too low or accidentally switched off, your lights will not come on, even when doors open.
- Location: Left side of the dash on older models, or upper console near the rearview mirror on 2021+ trucks.
- Action: Rotate the knob fully clockwise until you feel a distinct click. This forces all interior lights ON, overriding automatic door activation.
- Test: Open the door or press the overhead console button. If lights come on, the switch was the issue.
Check the Upper Console Button on Newer Models
Silverados from 2014 onward feature an “Open Door Off” button near the rearview mirror with an LED indicator.
- LED Indicator: If the LED is lit, the system is active. If not, the button may be engaged, disabling automatic lighting.
- Troubleshoot: Press the button to toggle it off. Try turning lights on manually.
- Key Insight: If the LED works but lights do not respond, the switch is not the problem. Focus your attention on fuses, switches, or wiring.
Skipping this step leads many owners to replace fuses or visit dealerships unnecessarily.
Perform a System Reset for 2023+ Models
Modern Silverados use smart logic that can “time out” if a door signal is not properly registered, causing interior lights and even the sunroof to fail simultaneously.
Recognize Timeout Symptoms
- Interior lights and sunroof stop working at the same time.
- Fuses are intact and switches function normally.
- The issue occurs after a door was left ajar or did not fully close.
This is not a hardware failure. It is a software lockout that requires a manual reset.
Complete a Full Door Cycling Reset
- Open all doors, including the tailgate on crew cab models.
- Wait 10 seconds with all doors fully open.
- Close each door firmly, ensuring they latch completely.
- Test the lights by opening one door or using the manual override.
This resets the BCM door status memory. In confirmed cases on 2023 GMC AT4X models, this simple fix restored full functionality without tools.
Pro Tip: Perform this reset after any battery replacement or jump-start. System resets often resolve phantom electrical issues.
Inspect Critical Fuses by Model Year
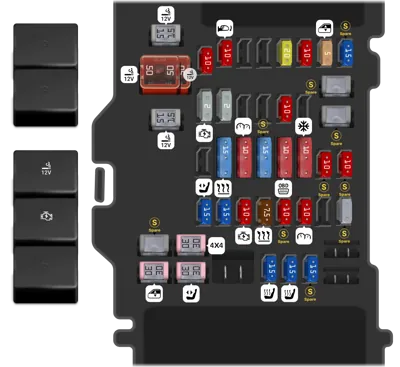
Blown or corroded fuses are the leading cause of interior lighting failure across all Silverado generations.
2014–2023 Silverado: Check BCM Fuses
Locate the three instrument panel fuse boxes on the left, right, and center of the dashboard.
- Target Fuses:
- BCM1 (left side)
- BCM5 (left side)
- BCM6 (right side)
- Amperage: Typically 10A or 15A. Verify by reading the label under the fuse box cover.
- Action:
1. Pull each fuse and inspect for a broken filament.
2. Even if intact, clean the socket with electrical contact cleaner.
3. Wiggle the fuse while reinserting to break through corrosion.
4. Replace with a same-rated fuse if damaged.
Warning: Never install a higher-amp fuse. This can damage the BCM and create a fire hazard.
1997–2007 Silverado: Focus on Fuse #3 and Fuse #180
Older models rely on two key fuses for interior lighting.
- Fuse #3: Primary dome and courtesy light fuse. Replacing this fixed total blackout in multiple 1997 K1500 cases.
- Fuse #180: Center-mounted fuse powering dome lights, radio, and cargo light in 1993–1997 models.
Hidden Problem: Corrosion in the socket can block power even when the fuse itself is good.
- Fix: Spray contact cleaner into the socket, then insert and remove the fuse 5–6 times to clean the contacts.
- Test: Use a multimeter or test light to confirm power at the socket.
User Tip: One owner fixed his 1997 Extended Cab by cleaning Fuse #3 socket. No replacement was needed.
Test and Clean Door Jamb Switches

These small switches tell the BCM when a door is open. A stuck or corroded switch can disable courtesy lighting entirely.
Locate and Inspect Each Switch
- Position: In the door frame, near the latch mechanism.
- Visual Check: Look for dirt, ice buildup, or physical damage.
- Manual Test: Press the plunger with your finger. It should snap back and produce a clear click sound.
Free and Clean Stuck Switches
If the plunger does not return properly:
- Pull it out gently using pliers or your fingernails.
- Spray electrical contact cleaner into the base of the switch.
- Cycle it 10 times to clear debris and oxidation.
- Lubricate lightly with dielectric grease. Avoid WD-40, which attracts dirt.
Critical Note: A single faulty door jamb switch can prevent all courtesy lights from activating, even if other doors are working perfectly.
Replace switches that are cracked or unresponsive. OEM parts cost $15–$25 each and install in minutes with basic tools.
Diagnose BCM Issues and Connector Problems
The Body Control Module is the brain behind interior lighting. If fuses and switches check out, the BCM may be at fault.
Identify Signs of BCM Failure
- All interior lights are dead.
- Fuses are good, dimmer is functional, and door switches click properly.
- No response to manual or automatic activation.
Scan for BCM Fault Codes
- Tool Needed: OBD2 scanner capable of reading BCM-specific codes, such as Autel, Fixd Pro, or a dealer-level tool.
- Look For:
- U0100 (Lost Communication with BCM)
- B2424 (Interior Lamp Circuit Failure)
- Door switch input errors
Soft codes may clear with a reset. Hard failures typically require module replacement.
Check BCM Connector Pins
GM issued more than 10 technical bulletins about loose pins in BCM connectors, particularly in 2019+ models.
- Access: Remove the BCM, usually located under the dash or near the glovebox.
- Inspect: Look for bent, corroded, or backed-out pins in the connector.
- Fix: Reseat the connector firmly. Apply dielectric grease to prevent future corrosion.
Reality Check: BCM replacement often requires dealer programming. Avoid aftermarket modules unless they come pre-programmed for your vehicle.
Inspect the Wiring Harness Behind the Headliner (2019+ Models)
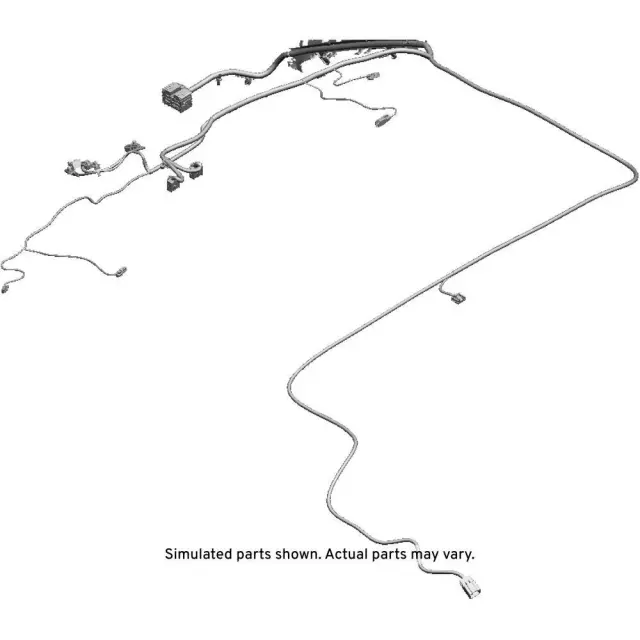
A known defect in 2019–2023 Silverados causes wiring to rub through behind the headliner, creating a short to ground.
Identify the Failure Zone
- Location: Driver’s side visor area, behind the headliner fabric.
- Wires Involved: Red and black wires powering visor and console lights.
- Damage Pattern: Insulation worn through, exposing copper conductor to the metal body.
Perform a Visual Harness Inspection
- Remove the driver’s side visor by unclipping or unscrewing the mounting hardware.
- Peel back the headliner fabric gently to access the wiring.
- Inspect the harness where it bends near the roof support structure.
- Look for: Fraying, melted insulation, or direct contact with metal edges.
User Case: A 2019 GMC Denali owner spent 5 days at a dealership before technicians found this short. The fix required replacing the entire visor assembly.
Repair Options
- Splice in New Wiring: If accessible, cut out the damaged section and solder in new wire using heat shrink tubing.
- Replace Visor Assembly: Safer and more reliable. OEM parts include a new harness.
- Secure the Harness: Use zip ties to keep wires away from metal edges and prevent future wear.
Prevention: For 2019+ models, inspect this area annually, especially if lights flicker or go out intermittently.
Address Backlighting Failure in 1999–2007 Models
In older Silverados, backlighting for buttons and controls can fail while dome lights continue to work normally.
Recognize the Symptoms
- No illumination on dimmer, HVAC, or console buttons.
- Controls function normally without any visible glow.
- Dome lights may or may not work depending on the circuit design.
Avoid the Common Misdiagnosis
Many owners replace the dimmer switch first. This rarely fixes backlighting issues and wastes money.
Identify the True Causes
- Dash Cluster Failure: The instrument cluster powers some backlight circuits. A failing cluster reduces illumination across multiple controls.
- Backlighting Fuse: A separate, often overlooked fuse distinct from the dome light fuse.
- Wiring Degradation: Age-related breaks in the illumination circuit.
Apply the Correct Fix
- Check the Fuse Box: Look for a fuse labeled “ILLUM,” “BACKLIGHT,” or “INST LPS.”
- Swap the Dash Cluster: Some owners fixed the issue with a used cluster from a salvage yard.
- Professional Repair: Cluster repair services can restore LED backlighting for approximately $100.
Pro Tip: If your gauges are dim as well, the cluster is almost certainly the culprit.
Follow the Final Diagnosis Flowchart
Use this sequence to avoid wasted time and unnecessary parts:
- Try the dimmer click test to rule out switch position.
- Cycle all doors on 2023+ models to reset system logic.
- Check fuses and clean sockets to verify power delivery.
- Test door jamb switches by pressing each plunger.
- Inspect the visor harness on 2019+ models for visible damage.
- Scan the BCM for fault codes using an OBD2 tool.
- Check the dash cluster on 1999–2007 models for backlighting issues.
Frequently Asked Questions About Chevy Silverado Interior Lights Not Working
Why are my Silverado interior lights not working but the fuse is good?
Corrosion in the fuse socket is the most likely cause. Even when the fuse filament is intact, oxidation on the contacts prevents power flow. Clean the socket with electrical contact cleaner and reseat the fuse several times to restore connection.
Can a bad door switch prevent all interior lights from working?
Yes. A single faulty or stuck door jamb switch can disrupt the BCM signal and disable all courtesy lights. Test each switch by pressing the plunger. It should click and spring back freely.
Where is the interior light fuse on a 2014 Silverado?
Check three locations: BCM1 and BCM5 on the left side of the instrument panel, and BCM6 on the right side. These 10A or 15A fuses power the BCM circuits responsible for interior lighting.
What causes visor lights to stop working on a 2019 Silverado?
A wiring harness short behind the headliner is a known defect. The red and black wires powering the driver’s side visor can rub against the body, exposing copper and creating a short to ground. This often requires visor assembly replacement.
How do I reset interior lights on a 2023 Silverado?
Open and close all doors firmly, including the tailgate. Wait 10 seconds with all doors open before closing them. This resets the BCM door status memory and resolves timeout glitches that disable interior lights and the sunroof.
Will replacing the dimmer switch fix backlighting issues?
Rarely. In 1999–2007 models, backlighting failure is usually caused by a failing dash cluster or a dedicated backlighting fuse. The dimmer switch controls brightness but is rarely the root cause of total backlighting loss.
Key Takeaways for Fixing Chevy Silverado Interior Lights

Start with the simplest solutions before assuming component failure. The dimmer switch position, a system timeout reset, or a corroded fuse socket resolve the majority of interior lighting issues across all Silverado generations.
For 2019+ models, always inspect the headliner wiring near the driver’s visor when fuses and switches check out. This hidden short has caused extended dealership diagnoses and is a confirmed failure mode in multiple user cases.
Keep your interior lighting system reliable with annual maintenance. Clean door jamb switches with contact cleaner, cycle the dimmer switch monthly to prevent oxidation, and inspect fuse seating during routine oil changes. These small steps prevent the most common causes of Chevy Silverado interior lights not working and keep your truck functional for years to come.



