Your Chevy Silverado’s ABS light just came on, and now the brake warning light is flashing too. Maybe you hear a constant humming from under the hood. These are classic signs of a failing ABS module, one of the most common (and expensive) issues Silverado owners face. The problem affects trucks from 1999 to 2021, with the highest failure rates in 1999–2007 and 2015–2021 models.
The good news? Most failures are repairable without replacing the entire unit. This guide walks you through identifying your module type, running proper diagnostics, choosing between repair and replacement, and preventing future failures. Whether you go DIY or use a professional mail-in service, you can restore full braking function for a fraction of dealership costs.
Identify Your Chevy Silverado ABS Module Type
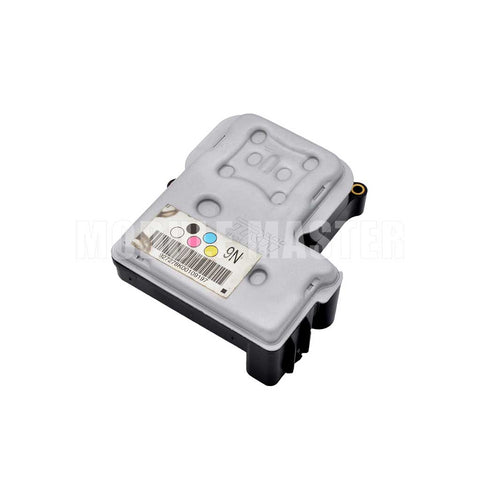
Before any repair, confirm your module type and part number. Sending the wrong component or using the wrong repair method wastes time and money.
Kelsey Hayes vs TRW Modules
For 1999–2007 Silverados, two manufacturers supplied ABS modules: Kelsey Hayes and TRW. Only Kelsey Hayes 325 (KH325) modules work with common repair methods. Look for “Kelsey Hayes” stamped on the module cover. If it says “TRW,” most repair services won’t accept it because the internal design differs. TRW units typically require full replacement.
1999–2007 Compatible Part Numbers
These part numbers are linked to repairable Kelsey Hayes 325 units:
- 1247-series: 12475228, 12475557, 12475562, 12475564
- 1912–1930-series: 19122252, 19244881, 19299980, 19301633
- 8893–8904-series: 88934715, 88982286, 89040386, 89040732
- UpFix-compatible: 13354716, 13451106, 13567112, 13642509G
Always verify the number printed on your actual module. Don’t rely on VIN lookups or dealership records, which can be inaccurate.
2015–2021 Module Compatibility
Newer Silverados use integrated pump-and-module assemblies. Common part numbers include:
- 84256780
- 84256781
- 84778358
- 23380704
These require sending the entire ABS assembly for repair, not just the electronic module. The EBCM isn’t easily separable and needs CAN-bus testing after repair.
Recognize ABS Warning Symptoms Early
Catching symptoms early can save your pump motor and prevent costly secondary damage.
ABS Light and Brake Warnings
The most common indicator is the ABS light illuminating on your dashboard. Often, the brake system warning light appears too. These lights mean the EBCM has detected an internal fault and disabled anti-lock braking. Traction and stability control will also stop working.
Continuous ABS Pump Running
A constant humming or whining from under the dash or frame rail means the ABS pump is stuck on. This is a critical failure. Pull the 50A–60A ABS fuse immediately to prevent motor burnout. This symptom almost always points to a failed EBCM, typically from cracked solder joints or relay failure.
Speedometer Failure on 2015+ Models
On 2015–2021 trucks, the ABS module sends wheel speed data to the instrument cluster. If the EBCM fails, your speedometer may read zero or fluctuate wildly. This isn’t a programming error. It’s a dead signal from the module.
Diagnose With OBD2 Trouble Codes
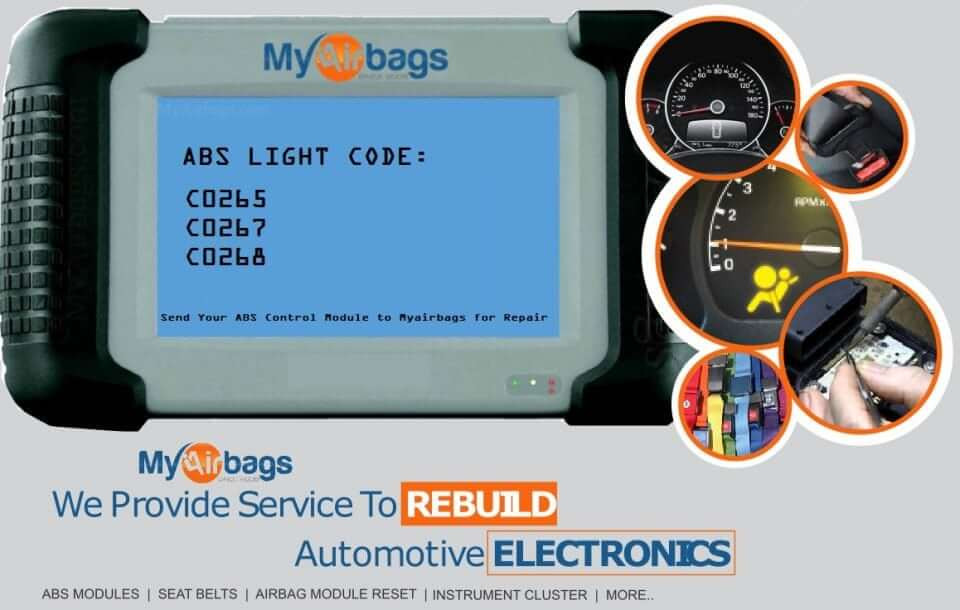
Use a scan tool to pull DTCs before assuming the module is bad. Some codes point to wiring or sensors, not the EBCM itself.
Key ABS Trouble Codes
| Code | Likely Cause |
|---|---|
| C0265 | Pump motor circuit failure, the most common EBCM fault |
| C0267 / C0268 | Pump motor open/short or feedback error, check ground wire |
| C1248 | EBCM internal fault, confirms module issue |
| C0035–C0048 | Wheel speed sensor faults, may indicate EBCM connector pin failure |
| C0040 / C0041 | ABS control module range/performance failure |
If C0265 returns immediately after clearing, the EBCM is likely the problem. Persistent wheel speed codes after sensor replacement also suggest EBCM connector issues.
Confirm the Diagnosis
- Scan for codes using a capable OBD2 tool (Autel, Snap-On, or GM Tech2).
- Clear codes and test drive. If C0265 returns within minutes, the fault is active.
- Check communication. If the scanner can’t talk to the ABS module, it may be dead.
- Command the pump using the scan tool to activate the ABS pump. If it doesn’t respond, the EBCM isn’t sending the signal.
- Inspect the brown ground wire near the module. Clean corrosion and ensure a tight connection (critical for C0268).
Decide Between Repair and Replacement
Choosing the right path saves time and money. Most cases favor repair over replacement.
When to Repair the Module
- You have a Kelsey Hayes 325 unit (1999–2007)
- Symptoms include C0265 or continuous pump running
- No physical damage (cracks, burns, water entry)
- Cost is a concern. Repair runs 50–70% cheaper than new
When to Replace Instead
- TRW module, not repairable via standard methods
- Physical damage like a burnt circuit board or broken housing
- 2015+ models with integrated failure, best sent for professional rebuild
- Failed ICs or microcontrollers, beyond DIY or standard repair scope
Compare Professional Repair Services
Professional repair restores your original module with no programming needed. Most services offer 1-day turnaround and 1-year warranties.
Top ABS Repair Providers
| Service | Price | Turnaround | Warranty |
|---|---|---|---|
| Circuit Board Medics | $249.99 | 1 business day | 1-year (up to 5-year option) |
| UpFix | $139.99 | Fast (same day) | 1-year |
| XeMODeX | $299.00 | Same day | Lifetime limited |
| Automotive Electronics (SA) | ~$135–$200 | Varies | Not specified |
All include prepaid shipping labels. UpFix and XeMODeX use CAN-bus test beds to simulate real-world conditions.
What the Repair Process Involves
- Order online and print the shipping label.
- Remove only the electronic module (1999–2006) or the entire pump assembly (2015+).
- Ship it in. No core deposit needed.
- Technicians diagnose, reflow solder joints, replace relays, and upgrade weak components.
- Test on a bench using simulated CAN signals.
- Return within 1–2 days. Plug and play upon reinstallation.
Avoid services that don’t specify component-level repair or CAN-bus testing.
DIY Repair for Kelsey Hayes 325 Modules
If you’re handy, you can fix a Kelsey Hayes 325 module yourself. This method does not work on TRW or newer integrated units.
Tools You’ll Need
- Hook-tip razor blade
- Small flathead screwdriver
- Reverse pliers (e.g., Hand Dandy)
- Chisel-tip soldering iron
- Flux and rosin-core solder
- Isopropyl alcohol and lint-free cloths
- Black automotive silicone (Permatex)
- Magnifying glass or microscope
Step-by-Step DIY Fix
Open the Module Case
Cut the black silicone seal around the lid using a hook-tip blade. Work slowly to avoid damaging the plastic. Insert a flathead to create a gap, then use reverse pliers to evenly lift the lid. Avoid prying with metal tools that could crack the housing.
Inspect the Circuit Board
Under magnification, check:
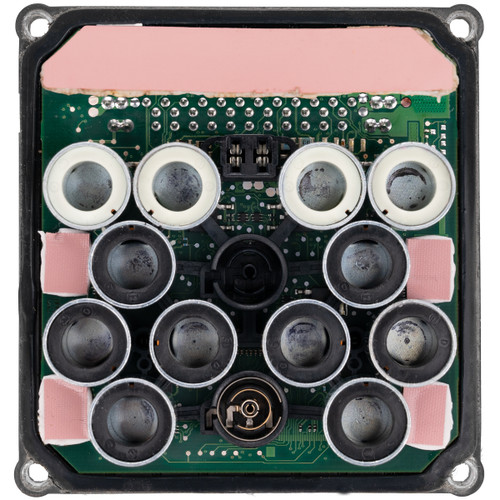
- Solder joints on relays, solenoids, and ground points. Look for cracks or a dull, grainy appearance.
- Connector pins. Wiggle them gently. Loose pins cause intermittent faults.
- Burn marks or corrosion. If present, DIY repair may not succeed.
Reflow Critical Solder Joints
Apply flux to suspect areas. Use a chisel-tip iron to gently heat each joint until the solder reflows and re-bonds. Focus on:
- Pump motor relay solder points
- Ground connections (larger pads)
- Connector pin through-holes
Do not overheat. Excessive heat can destroy ICs. Work quickly and let the board cool between spots.
Clean and Re-Seal
Wipe the board with isopropyl alcohol to remove flux residue. Apply a thin bead of black silicone around the housing edge. Reattach the lid and secure:
- Screwed models: Use tape on screw heads to prevent spinning.
- Screwless models: Clamp until silicone cures (2–3 hours).
Install the Repaired Module Correctly

Proper reinstallation prevents future issues and ensures reliable operation.
Disconnect the Battery First
Always remove the negative battery terminal before touching any electrical components. This prevents short circuits and ECU glitches.
Reconnect the Harness Securely
Inspect the wiring harness connector for bent or corroded pins. Plug it in firmly until it clicks. Apply dielectric grease to the pins to block moisture and corrosion.
Fuse and Test Procedure
- Reinstall the ABS fuse (50A–60A, under hood).
- Reconnect the battery.
- Clear all DTCs with a scan tool.
- Drive above 20 mph to trigger the ABS self-test.
- Confirm no warning lights return.
If lights come back, recheck connections or consider a deeper internal failure.
Prevent Future ABS Module Failures
Even after repair, protect your investment with these maintenance tips.
Maintain the Ground Connection
The brown ground wire near the module is a common failure point. Remove the bolt, sand the frame and terminal until shiny, and reinstall tightly. This prevents C0268 codes and erratic behavior.
Seal Against Moisture
Ensure the module is properly sealed during reassembly. Use OEM-grade silicone. For trucks in wet climates, consider routing the module away from direct splash zones if possible.
Use Dielectric Grease on Connectors
Apply dielectric grease to all electrical connectors before mating. It doesn’t conduct electricity but blocks water and oxidation, critical for long-term reliability.
Act Fast on Pump Noise
If the ABS pump starts running again, pull the fuse immediately. A stuck pump can burn out in hours. Address the module before secondary damage occurs.
Compare Repair vs Dealer Costs

Repairing the ABS module saves hundreds over dealership pricing.
| Option | Cost | Programming Needed? | Turnaround |
|---|---|---|---|
| Professional Repair | $135–$300 | No (Plug & Play) | 1–2 days |
| DIY Repair | ~$50 (tools/materials) | No | 3–5 hours |
| Dealership Replacement | $600–$1,200 | Yes | 1–2 days |
| Aftermarket Module | $300–$500 | Often yes | Immediate |
Most professional repairs pay for themselves in labor savings alone.
Troubleshoot Common ABS Scenarios
ABS Pump Runs Constantly
Pull the ABS fuse right away. The issue is almost certainly a failed EBCM. Repair or replace the module. Do not drive with the fuse out. Standard brakes work, but ABS is disabled.
C0268 Code at Low Speed
Check the brown ground wire. Clean the connection point on the frame and terminal. Retighten. If the code returns, the pump’s internal feedback circuit may be dead, requiring pump or module replacement.
Speedometer Dead on 2015+ Silverado
A failed ABS module isn’t sending speed data. Replace or repair the entire ABS assembly. No fuse or sensor fix will resolve this.
Repair Service Says “No Fault Found”
You may be charged a bench test fee ($50–$100). This means the module works. Your real issue is likely a wheel speed sensor, tone ring, or wiring harness. Diagnose sensors before sending the module.
Frequently Asked Questions About Chevy Silverado ABS Module Repair
What are the most common ABS module symptoms on a Chevy Silverado?
The most common symptoms are an illuminated ABS light, a brake warning light, and in severe cases, the ABS pump running continuously. On 2015+ models, a failed module can also cause the speedometer to stop working.
Can I drive my Silverado with the ABS light on?
Yes, standard brakes still function, but anti-lock braking, traction control, and stability control are disabled. If the pump is running constantly, pull the ABS fuse immediately to prevent motor burnout.
How much does it cost to repair a Chevy Silverado ABS module?
Professional mail-in repair typically costs $135–$300. DIY repair runs about $50 in materials. Dealership replacement can cost $600–$1,200 including programming and labor.
Which Silverado years are most prone to ABS module failure?
The 1999–2007 and 2015–2021 model years show the highest failure rates. The 1999–2007 models commonly use Kelsey Hayes 325 modules, which are prone to cracked solder joints and connector pin failure.
Is it worth repairing the ABS module or should I just replace it?
Repair is usually the better value. It costs 50–70% less than replacement, requires no programming, and preserves your original module. Replacement makes sense for TRW units, physically damaged modules, or newer integrated assemblies where DIY repair isn’t feasible.
Can I repair the ABS module myself?
DIY repair is possible for 1999–2007 Kelsey Hayes 325 modules using a solder reflow method. It requires basic soldering skills and specific tools. This method does not work on TRW units or 2015+ integrated assemblies.
Key Takeaways for Chevy Silverado ABS Module Repair
Start by identifying your module type and confirming the part number matches a repairable unit. Use OBD2 codes to distinguish between module failure and sensor or wiring issues. If you have a Kelsey Hayes 325 with a C0265 code or continuous pump running, repair is almost always cheaper and faster than replacement.
Pull the ABS fuse immediately if the pump runs nonstop. A stuck pump can burn out in hours, turning a $150 repair into a $500+ replacement. Whether you choose professional mail-in service or DIY reflow, act quickly when symptoms appear to avoid cascading damage.
Next step: Verify your module’s part number against the compatible lists above, then decide between a professional repair service or a DIY fix based on your skill level and module type.