You’re turning the key, and the engine cranks—barely. The dashboard lights flicker, the radio cuts out, and no matter how long you drive, the battery stays weak. If your Chevy Silverado won’t charge, you’re not alone. A battery not charging Chevy Silverado issue ranks among the most reported electrical problems across model years 1999 to 2019. While many drivers assume a dead alternator is the cause, the real culprit is often something simpler and far cheaper to fix.
This guide breaks down every possible reason your Silverado isn’t charging, from blown fuses to hidden fusible links and PCM control failures. You’ll learn how to diagnose the problem in under 30 minutes, avoid costly misdiagnoses, and get back on the road fast. Whether you drive a 2004 5.3L or a 2018 model, this step-by-step troubleshooting plan covers all generations and known weak points.
Start With the Basics
Before diving into complex diagnostics, rule out the obvious. Many “no charge” issues stem from preventable oversights. A quick 10-minute inspection can save you hundreds in unnecessary replacements.
Inspect Battery Terminals and Cables
Loose or corroded terminals are silent killers of charging systems. Even if they look clean, high resistance can block current flow.
- Check tightness: Both positive and negative terminals must be snug. Use a wrench to secure them.
- Clean corrosion: Use a wire brush to remove white or green buildup. Apply dielectric grease after cleaning.
- Test cable integrity: Wiggle the cables near the battery and alternator. If they feel brittle or cracked, replace them.
Pro Tip: A voltage drop test across the terminals while cranking can reveal hidden resistance. More than 0.2V drop means clean or replace the cables.
Examine the Serpentine Belt
No belt spin means no charge. The alternator relies on the serpentine belt to turn at proper RPM.
- Look for wear: Cracks, fraying, or glazing (shiny spots) mean it’s time to replace.
- Check tension: Press the belt midspan. It should deflect about ½ inch. Too loose and the alternator won’t spin fast enough.
- Listen for squealing: A slipping belt often squeals on startup, especially in damp conditions.
If the belt is loose or worn, replace it and retest charging voltage.
Test Charging Voltage Accurately

Your multimeter is the most important tool here. Voltage readings tell the real story.
Measure Static Battery Voltage
Turn off the engine and all accessories. Set your multimeter to DC volts and touch the probes to the battery posts.
- 12.6V or higher: Fully charged
- 12.4V: Acceptable
- Below 12.2V: Discharged or failing battery
If it’s below 12.2V, charge the battery fully before proceeding.
Check Charging Voltage While Running
Start the engine and measure again at the battery.
- Normal: 13.5V to 14.7V
- Under-charging: 12.0V to 12.6V (alternator not working)
- Over-charging: Above 15V (voltage regulator failure)
If voltage doesn’t rise above 12.6V, the alternator isn’t charging.
Visual Cue: If voltage fluctuates between 12.4V and 14.5V when the engine warms up, suspect thermal failure or a loose connection.
Check Year-Specific Failure Points
The fix depends heavily on your Silverado’s generation. Don’t guess; target the known weak spots.
1999–2007: Inspect the “Little Red Box”
This red plastic junction, located near the battery or alternator, houses a fusible link built into the positive cable.
- Why it fails: Overheating, corrosion, or voltage spikes can blow the link.
- How to test: Use a multimeter in continuity mode. Disconnect both ends and check for a complete circuit.
- What to look for: Melted plastic, discolored wires, or a visible break inside.
If the fusible link is blown, replace the entire cable assembly. Never bypass it because it’s a fire safety device.
Case Study: A 2000 Silverado showed no voltage at the alternator B+ terminal. Battery and alternator tested good. The culprit was a blown fusible link in the red box. After replacement, charging was restored.
2014–2019: Test Fuse #37 and Battery Terminal Fuses
Newer models rely on smart charging controlled by the PCM. A single blown fuse can kill the system.
Test Interior Fuse #37
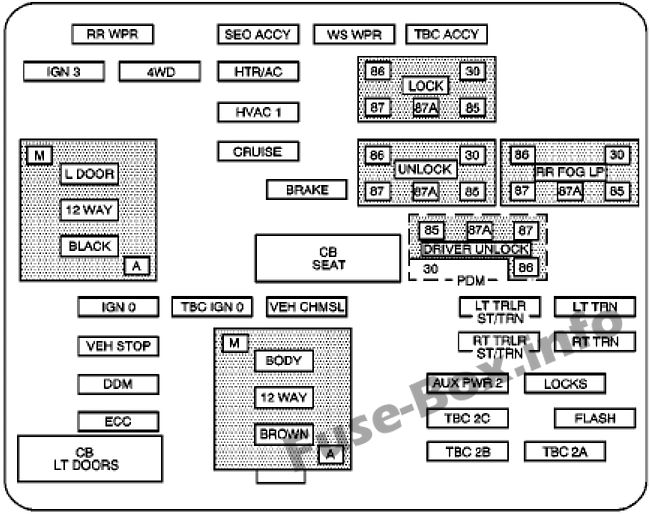
- Location: Driver-side dash fuse box (look for label “Battery Current Sensor”)
- Function: Powers the sensor that tells the PCM the battery’s state
- Failure effect: No signal means no charge command
Don’t trust your eyes. A fuse can look good but be broken inside. Use a multimeter to test for continuity.
Check Battery-Side Fuse Block
- Location: Mounted directly on the positive battery terminal (passenger side, behind coolant tank)
- Contains: Up to six high-amperage fuses, including the main alternator feed
- How to test: Remove each fuse and check with a multimeter
If the alternator feed fuse is blown, replace it. But investigate why it blew because a short or failing alternator could be the root cause.
Pro Tip: Keep spare fuses in your glove box. Fuse #37 is a common failure and easy to miss.
Diagnose Ground and Signal Issues

Even with good voltage and fuses, a bad ground or PCM signal can stop charging.
Verify Key Ground Connections
The charging circuit needs a solid return path. Weak grounds disrupt communication and power flow.
- Engine-to-chassis ground: Check the strap from engine block to firewall. Clean and tighten both ends.
- Battery-to-chassis ground: Ensure the negative cable is tight and corrosion-free.
- Instrument cluster ground (2001 models): A known failure point. If dash lights are out and charging fails, this may be why.
Test method: Use a test light connected to battery positive. Touch the probe to the alternator case. If it lights, the ground is good.
Scan Tool Clue: If the dash only powers up when a scan tool is plugged in, the cluster ground is bad. The scan tool provides a temporary ground through the DLC.
Confirm PCM Control Signals
Modern alternators are controlled by the Powertrain Control Module. Two wires are critical.
- Gray wire: Carries a duty cycle signal from PCM to alternator
- Brown wire: Controls the charge indicator (grounds when not charging)
Diagnostic steps:
1. Back-probe the gray wire with an oscilloscope or multimeter (duty cycle mode).
2. With engine running, you should see a fluctuating signal (typically 10–90% duty cycle).
3. If no signal, check PCM, wiring, or fuses.
4. If signal is present but no output, the alternator is faulty.
Expert Note: If a new alternator fails immediately, recheck grounds and fuses before blaming the part. A bad ground can fry a replacement.
Test the Alternator Correctly
After ruling out fuses, links, and grounds, it’s time to test the alternator itself.
Perform a Direct Output Test
Measure voltage at the alternator’s B+ terminal (large stud on the back) while the engine is running.
- If B+ voltage is 14V+ but battery is low: Fault is in the cable or fusible link between alternator and battery.
- If B+ voltage is low: Alternator or control circuit is bad.
This test isolates the alternator from the rest of the system.
Diode Test for Parasitic Drain
Failed diodes in the alternator can cause the battery to drain overnight, even if it charges while driving.
How to test:
1. Set multimeter to AC volts.
2. With engine running, measure voltage at the battery.
3. Normal: Less than 0.1V AC
4. Bad diodes: More than 0.5V AC (indicates AC ripple leaking into DC system)
High AC voltage damages batteries and electronics over time.
2014–2019 Alert: Failed diodes are a common cause of “battery not charging” symptoms in these models due to parasitic drain, not lack of output.
Replace Components Smartly

If testing points to a failed part, replace it, but avoid common pitfalls.
Choosing a Reliable Alternator
Not all alternators are equal. Reports show some aftermarket brands fail quickly.
- Avoid the cheapest option: Low-cost remans often have bad voltage regulators or diodes.
- Stick to reputable brands: AC Delco, Duralast Gold, or OEM.
- Test before install: If possible, bench-test the new alternator at an auto parts store.
Warning: If a new alternator fails immediately, the issue was likely a bad ground or blown fuse, not the alternator itself.
Replacing the Fusible Link (1999–2007)
The fusible link isn’t a standard fuse. It’s a section of wire designed to melt under overload.
- Replacement: Buy a pre-made repair cable with the link included.
- Installation: Disconnect battery negative first. Route the new cable away from heat sources.
- Never bypass: Removing the fusible link risks electrical fire during alternator failure.
Prevent Future Charging Failures
A little maintenance goes a long way in avoiding repeat issues.
Schedule Routine Checks
- Every oil change: Inspect serpentine belt and battery terminals.
- Every 12 months: Test all critical fuses with a multimeter.
- Every 30,000 miles: Check ground straps and clean connections.
Upgrade for Reliability
- Heavy-duty ground cables: Install thicker straps from battery to chassis and engine.
- High-output alternator: If you’ve added accessories like a winch, lights, or audio, upgrade to a 180+ amp unit.
- Fuse protection: If modifying the electrical system, add an inline fuse or circuit breaker. Don’t remove factory protection.
Critical Safety Reminders
- Don’t drive far on battery power: Once the alternator fails, you’re running on borrowed time. The engine can die suddenly.
- Never disconnect the battery while running: This outdated test can send voltage spikes that fry the PCM. Use a multimeter instead.
- Work on cool engines: Alternators and exhaust manifolds get extremely hot. Wait 30 minutes after shutdown.
- Always disconnect negative terminal first: Prevents accidental shorts when servicing electrical components.
Frequently Asked Questions About Chevy Silverado Battery Not Charging
Why is my Chevy Silverado battery not charging even with a new alternator?
A new alternator can fail immediately if the root cause was a bad ground, blown fuse, or faulty PCM signal. Before replacing the alternator again, recheck Fuse #37 (2014–2019), the fusible link (1999–2007), and all ground connections. Also verify the gray duty cycle wire from the PCM is sending a proper signal.
How do I know if my Silverado alternator or battery is bad?
Measure static battery voltage with the engine off (should be 12.4V–12.6V). Then start the engine and measure again. If running voltage stays at 12.0V–12.6V, the alternator isn’t charging. If running voltage is normal (13.5V–14.7V) but the battery dies overnight, suspect a failing battery or parasitic drain from bad alternator diodes.
Where is the fusible link on a 1999–2007 Silverado?
The fusible link is housed inside a small red plastic junction box (called the “Little Red Box”) located on the positive cable between the alternator and battery. It protects the charging circuit from overload. Check it for melted plastic, discoloration, or a visible break in the wire.
What does Fuse #37 do on a 2014–2019 Silverado?
Fuse #37 powers the Battery Current Sensor in the driver-side dash fuse box. If this fuse blows, the PCM cannot detect the battery’s state and will not command the alternator to charge. Always test it with a multimeter, since visual inspection can miss internal breaks.
Can a bad ground cause a Silverado to not charge?
Yes. The charging circuit requires a complete ground loop. Bad grounds at the engine block, chassis, or instrument cluster (common on 2001 models) can prevent the alternator from engaging or cause the dashboard to malfunction. Use a test light on the alternator case to confirm a solid ground.
Is it safe to drive with the battery light on in a Silverado?
No. Once the battery light comes on, the alternator is not charging and the vehicle is running on battery power alone. You typically have 20–30 minutes of driving before the engine stalls. Drive directly to a repair shop or home to avoid being stranded.
Key Takeaways for Fixing Your Chevy Silverado Charging System
A battery not charging Chevy Silverado issue is rarely just a bad alternator. Start with the basics: tight terminals, a healthy belt, and proper voltage readings. Then target generation-specific weak points, including the Little Red Box fusible link (1999–2007) and Fuse #37 (2014–2019). Always verify grounds and PCM signals before replacing parts, because a new alternator can fail instantly if the real problem is upstream.
Your next step is simple: grab a multimeter, check your static and running voltage, and work through this guide systematically. In most cases, you’ll find the culprit in under 30 minutes and spend less than $20 to fix it. Bookmark this page so the next time that battery light appears, you’ll know exactly where to start.