
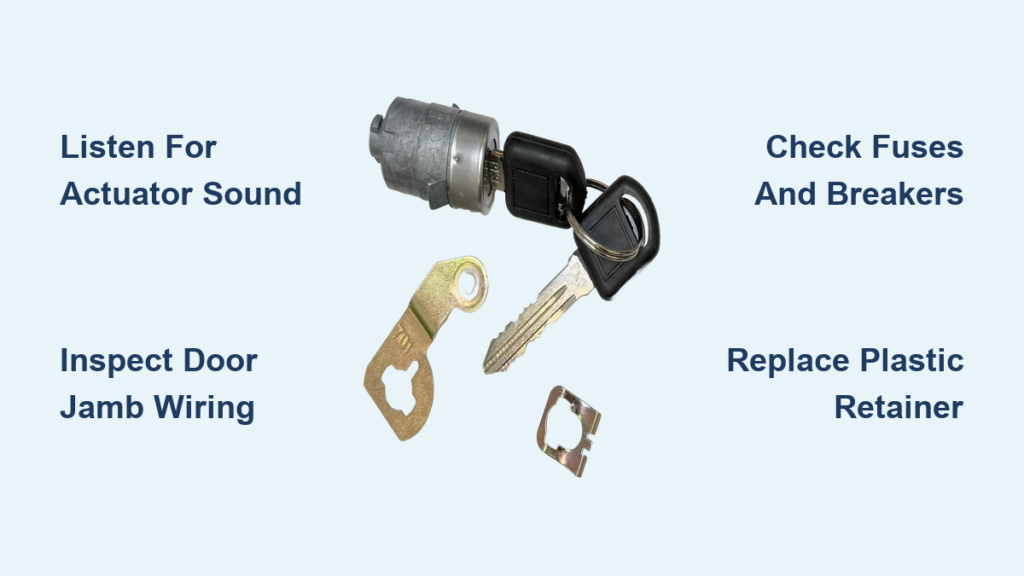
Hearing nothing when you hit the lock button on your Silverado is frustrating, especially when the alarm still arms and the mirrors still fold. If your Silverado driver door lock not working has become a daily annoyance, you are dealing with one of the most common electrical and mechanical faults on 2007–2016 trucks. The problem usually starts as a delayed response, then escalates to total silence.
The good news is that most owners can pinpoint and fix this issue at home with basic tools. This guide walks you through the exact diagnostic steps technicians use, starting with the simplest checks and ending with component-level repairs. You will learn how to tell whether the fault is mechanical or electrical, how to repair broken door jamb wires, and when the BCM is actually to blame.
Listen for Actuator Sound Before Replacing Anything

The first and most important diagnostic step costs nothing and takes seconds. Press the lock button on your key fob or interior switch and listen carefully at the driver door.
No Sound Means an Electrical Break
If you hear no clicking, whirring, or motor noise, power is not reaching the actuator. The fault lies upstream in the wiring, fuse box, or BCM. Replacing the actuator will not fix anything.
Sound Without Movement Means a Broken Retainer
If you hear the motor running but the lock does not move, the actuator is working. The problem is a broken plastic retainer that connects the motor to the lock rod. This is a $10 fix instead of a $100 part swap.
Inspect the Door Jamb Wiring Harness

For silent locks across one or more doors, the number one culprit is fractured wires in the rubber boot between the driver door and the A-pillar. This harness flexes thousands of times over the truck’s life, and copper strands eventually fatigue and snap.
Locate the Rubber Boot
Find the black rubber sleeve running between the door and the cab. Gently pull it back from both ends to expose the wires inside.
Look for These Warning Signs
- Wires with kinks, stiff spots, or sharp bends
- Visible copper strands poking through insulation
- Discoloration, brittleness, or cracking
- Intermittent lock function when wires are flexed
Even if the harness looks fine externally, internal breaks are common. Flex each wire gently while a helper tests the lock. If the locks work intermittently during flexing, you have found the break.
Repair With Solder and Heat Shrink
Twisting wires together and wrapping them in electrical tape is a temporary fix that fails within months. Vibration and moisture will undo it.
Proper repair steps:
1. Cut out the damaged section of wire
2. Strip back clean insulation on both ends
3. Solder in a short jumper wire using rosin-core solder
4. Slide heat shrink tubing over the joint before soldering
5. Seal with a heat gun for a watertight, vibration-proof finish
Pro Tip: Pull the harness through the speaker hole in the door for better working room. This gives you space to solder without straining the wires further.
Test Fuses and Circuit Breakers

Before tracing wires, rule out simple fuse failures. Even with silent locks, blown fuses can cut power to the entire lock circuit.
Locate Both Fuse Blocks
- Driver’s side dash panel (instrument fuse block)
- Passenger side (right instrument panel junction block)
Check These Specific Fuses
- Door Locks
- BCM (Body Control Module)
- Accessory Power
- Power Mirrors (shared circuit)
Use a fuse tester or multimeter to verify continuity. A fuse can look intact and still be failed.
Reset the Circuit Breaker
Some models include a resettable circuit breaker in the right junction block. If a short has tripped it, the locks lose power. Disconnect the battery ground for 30 seconds to reset the breaker, then reconnect and test.
Diagnose the Body Control Module
If fuses are good and the wiring harness shows no damage, the BCM may be failing. The BCM sends lock and unlock commands to the actuators. If it is damaged, no command reaches the door.
Signs of BCM Failure
- All power locks dead simultaneously
- Alarm still arms when you press the fob
- Mirrors fold but doors will not lock
- Constant voltage at the actuator plug with no signal change
Test With a BCM-Capable Scan Tool
A basic OBD2 code reader will not help here. You need a scanner with BCM output control capability.
Steps:
1. Connect the scanner and navigate to Special Functions or Output Tests
2. Command “Lock All” and “Unlock All”
3. Watch the data stream for “Lock Command: Active”
4. Check voltage at the actuator plug while commanding
If the BCM sends the command but no voltage reaches the actuator, the BCM output driver or the integrated relay in the fuse block has failed.
Warning: Vehicles with a history of aftermarket alarm installations are at higher risk for BCM damage. T-splices into the BCM harness can cause electrical feedback even after the alarm is removed.
Replace the Plastic Retainer (When the Motor Runs)

If you hear the actuator whirring but the lock does not move, the plastic retainer has snapped. This tiny clip transfers motion from the motor to the lock rod. It is a known wear item.
Skip the Full Actuator Replacement (At First)
The motor is likely fine. A full actuator costs $60 to $100. A retainer kit costs $8 to $15.
Steps to replace the retainer:
1. Remove the door panel (screws behind the handle, trim pieces, and speaker)
2. Peel back the water shield carefully
3. Locate the actuator mounted to the latch
4. Unclip or unscrew the actuator from the latch
5. Inspect the linkage for the broken retainer
6. Install the new retainer from a multi-size repair kit
7. Reassemble and test before snapping the panel back on
Expert Note: If the actuator gear is stripped or the motor sounds weak, replace the full unit. But in 70% of cases, the retainer alone solves the problem.
2009 Silverado: Watch for Wiring Mismatches
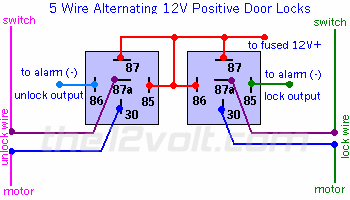
The 2009 model year has documented wiring quirks that cause confusion and misdiagnosis.
4-Wire vs. 5-Wire Actuator Plugs
Factory specification calls for a 5-wire actuator. Many replacement harnesses ship with only 4 wires, often from a different cab style such as a Regular Cab swapped onto a Crew Cab.
This mismatch can cause:
– Constant power to the actuator
– Sparks when probing pins with a test light
– Locks stuck in one position
Verify the Wire Colors
A standard 5-wire setup includes:
- Black: Ground
- Orange: Constant power
- Grey: Lock signal
- Tan/White: Unlock signal
- Tan: 5V reference (sometimes absent)
If orange or tan wires are missing from your plug, the harness does not match your VIN. Replace it with a VIN-matched unit from GM Parts Direct or a verified salvage yard.
Fix the “Sticky Lock” Before Total Failure
Many owners report a predictable progression before complete lock failure:
- Driver door slow to respond
- Passenger doors need multiple presses
- Rapid cycling causes total silence
- Complete lock failure across all doors
This pattern is classic progressive wire break. As copper strands fracture one by one, electrical resistance increases. The locks respond slowly, then stop working entirely once the circuit opens.
Act Fast at the First Sign
If your locks are “sticky,” inspect the door jamb harness now. Early repair prevents full failure and saves hours of troubleshooting later.
Rapid cycle test: Press lock and unlock five times quickly. If the locks stop responding, you have an open circuit. Repair the wiring immediately.
Source Parts Without Overpaying
You do not need dealer prices for most repairs.
Door Lock Actuator
- Aftermarket: $60 to $90 on eBay or Amazon
- OEM: GM Parts Direct (use your VIN for exact match)
- Salvage: Local yards with tested units
Plastic Retainers
- Assorted kits run $8 to $15 at auto parts stores
- Look for “door lock linkage repair kit”
Fuse Block (If the Integrated Relay Failed)
- New: $200 to $400
- Refurbished: $120 to $180
- Salvage: $80 to $120
Critical: Match the fuse block to your VIN. Pinouts vary by cab style, trim level, and installed options.
Prevent Future Lock Failures
A one-time fix is not enough if you want long-term reliability.
Inspect Wiring Annually
During oil changes, open the door boot and check the wires. Early fraying is repairable in minutes. Total failure takes hours.
Avoid Slamming Doors
Forceful closure stresses the latch and retainer. Gentle closing extends the life of every component inside the door.
Seal Every Wire Repair Properly
Any splice must be soldered and covered with heat shrink. Electrical tape fails within months in a high-vibration door environment.
When to Call a Professional
DIY repairs work for most cases, but professional help makes sense if:
- You do not own a multimeter or scan tool
- The wiring repair feels beyond your skill level
- BCM replacement is required
- The truck has a history of aftermarket alarm work
A technician with a BCM-capable scan tool can confirm output failures in minutes, saving you hours of guesswork.
Frequently Asked Questions About Silverado Door Lock Problems
Why is my Silverado driver door lock not working but the other doors still lock?
This usually points to a broken plastic retainer in the driver door actuator. The motor runs but cannot transfer motion to the lock rod. It can also indicate a break in the door jamb wiring harness specific to the driver door circuit.
Can a bad key fob battery cause the driver door lock to stop working?
A weak fob battery can cause inconsistent locking but rarely causes complete failure of one specific door. If your alarm still arms and other fob functions work, the fob is likely fine and the problem is in the truck.
How much does it cost to fix a Silverado door lock actuator?
Aftermarket actuators cost $60 to $100. OEM units from GM Parts Direct run slightly more. Professional installation adds $150 to $300 in labor if you choose not to DIY.
Where is the door lock relay on a 2009 Silverado?
The door lock relay is integrated into the instrument fuse block on the driver’s side dash. It cannot be replaced individually. If the relay fails, the entire fuse block assembly must be replaced.
Will replacing the BCM fix my door locks?
Only if the BCM is actually faulty. Most lock failures are caused by wiring breaks or broken retainers. Replace the BCM only after confirming it is not sending voltage to the actuator during a scan tool command test.
How do I know if my door jamb wires are broken?
Look for kinks, exposed copper, or stiff spots in the rubber boot between the door and cab. Flex each wire while a helper tests the lock. If the locks work intermittently during flexing, you have found the break.
Key Takeaways for Fixing Your Silverado Door Lock
The Silverado driver door lock not working is almost always caused by one of two issues: a broken plastic retainer inside the actuator or fractured wires in the door jamb harness. Start by listening for actuator sound. Sound means a $10 retainer fix. Silence means a wiring repair.
Before spending money on a new actuator or BCM, pull back the rubber boot in the door jamb and inspect every wire. Solder any breaks and seal them with heat shrink. This single repair solves the majority of total lock failures on 2007–2016 trucks.
Your next step: Grab a multimeter and a screwdriver, then start with the 30-second listening test. That one clue tells you exactly which repair path to follow.



