
If your 2005–2009 Chevy Silverado brake job has stalled because the rotor won’t budge, you’re not alone. Even after removing the caliper and pads, the front rotor often stays fused to the hub from rust, corrosion, or factory retention hardware. Learning how to take rotors off Chevy Silverado trucks the right way protects your wheel bearings and saves hours of frustration.
This guide breaks down the exact process for Silverado 1500 and 2500HD models from 2005–2009, covering retention identification, mechanical puller methods, hammer techniques, and prevention tips. You’ll learn which tools to use, how to avoid common damage, and how to keep your next rotor swap smooth from start to finish.
Identify Rotor Retention Type Before You Start

Pulling a rotor blind is a fast way to damage your hub. Two retention systems appear on these trucks, and each demands a different first step.
Check for Star-Head Retaining Screws
Some factory rotors on the 2005 Silverado 1500 come secured with small star-head (Torx) screws positioned near the lug studs. These prevent the rotor from shifting during shipping and must come out before anything else.
- Visual Check: Scan the rotor face between the lug studs for star-shaped screw heads.
- Tool Needed: A T27 or T30 Torx bit on a ratchet.
- Action: Remove every screw. Leaving even one in place will block removal and risk damaging your puller.
Pro Tip: These screws often seize from corrosion. Hit them with penetrating oil and wait 10 minutes before attempting removal.
Locate Threaded Puller Holes
Most Silverado rotors, especially on 2006–2009 2500HD models, include two small threaded holes between the lug stud holes. These are factory service points designed for rotor removal.
- Thread Spec: Roughly 5/16-inch coarse thread.
- Purpose: Accept bolts that push the rotor straight off the hub.
- Quick Test: Thread a 5/16″ bolt into one hole. If it bites cleanly, you can use the mechanical method.
Warning: Skipping these holes means missing your safest removal option.
Use the Mechanical Puller Method First

If threaded holes are present, this is your go-to approach. It pushes the rotor off without impact, protecting your wheel bearings.
Insert Two 5/16″ Puller Bolts
Grab two 5/16-inch coarse-thread bolts, about 1.5 to 2 inches long. Grade 5 or Grade 8 bolts offer the strength you need.
- Thread one bolt into a puller hole by hand.
- Thread the second bolt into the hole directly across from it.
- Use a wrench to tighten both bolts evenly and alternately.
Tighten Bolts to Push the Rotor Off
As the bolts bottom out against the hub, they create outward pressure that forces the rotor off its taper.
- Technique: Turn each bolt a half-turn at a time. Never fully tighten one before the other.
- Result: The rotor separates cleanly and slides off the hub.
Why It Works: The hub has a slight taper. The bolts break the rotor’s grip by pushing it straight off without shock or impact.
Pro Tip: If the bolts spin freely without pushing, they’re too long. Switch to shorter bolts or add washers to increase push distance.
Switch to Hammer-Based Removal When Stuck
If the mechanical method fails or your rotor lacks threaded holes, controlled impact force is the next step. Done right, it’s safe and effective.
Apply Penetrating Oil First
Spray WD-40 or PB Blaster generously around the center hub and inner hat where the rotor meets the spindle.
- Let it soak for 10–15 minutes.
- Reapply if the area dries out.
- This breaks down rust bonds and dramatically improves success rates.
Alternate Hammer Strikes on the Rotor Edge
A 3–5 lb deadblow hammer works best, though a sledgehammer will do the job.
Correct Technique:
1. Strike the outer edge of the rotor, never the braking surface.
2. Hit one side, then move to the opposite side.
3. Repeat, rotating around the rotor.
Why Alternate Sides? Hitting only one side can wedge the rotor tighter onto the taper. Alternating shocks it evenly and breaks the rust seal.
Avoid: Striking the smooth braking surface. It can warp or crack the rotor if you planned to reuse it.
Use Front Face Impact for Stubborn Rotors
If edge strikes don’t free it, move to the front face of the rotor, the side facing the wheel.
- Deliver firm, centered blows with a 5 lb sledgehammer.
- Focus on the flat area between the lug holes.
- The goal is vibrational shock, not destruction.
Community Verdict: Many technicians confirm that aggressive hammering, done safely, reliably frees seized rotors when nothing else works.
Safety Reminder: Always wear safety glasses and gloves. Flying rust and metal chips are common.
Remove the Entire Hub Assembly as a Last Resort
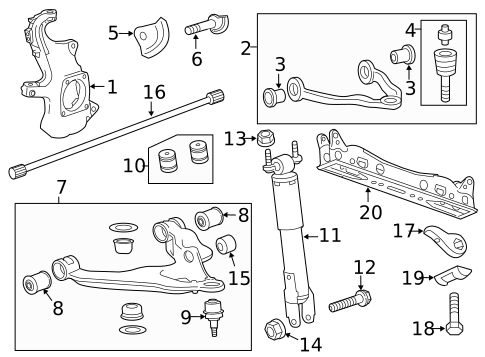
If rust has essentially welded the rotor to the hub, remove the hub and rotor as one unit and take it to a press.
Disconnect the Hub from the Knuckle
This takes more time but gives you full access for a hydraulic press.
Steps:
1. Remove the axle nut if you have a 4WD model.
2. Disconnect the ABS sensor wiring.
3. Unbolt the hub assembly from the steering knuckle, typically 3–4 bolts.
4. Pull the hub and rotor off together.
Press the Rotor Off at a Machine Shop
Once removed:
– Take the assembly to a machine shop.
– Use a hydraulic press to separate the rotor from the hub.
Best For: Situations where the rotor is being scrapped or the hub needs bearing service.
Warning: This method adds hours to the job and requires a wheel alignment afterward. Use it only when all other options fail.
Troubleshoot Common Removal Problems
Even with the right approach, issues pop up. Here’s how to handle the most frequent roadblocks.
Rotor Still Won’t Budge After Caliper Removal
Run through this checklist:
– All Torx screws removed? A single missed screw locks the rotor in place.
– Puller holes used? Don’t give up on the 5/16″ bolt method too early.
– Penetrating oil applied? Re-soak and wait longer if needed.
Quick Fix: Carefully heat the rotor hat with a torch to expand the metal and break rust bonds. Keep flame away from the ABS sensor, rubber seals, and brake lines.
Hammering Causes the Rotor to Bind
If the rotor starts to cock or jam:
– Stop hammering immediately.
– You’re likely hitting one side too much.
– Switch to strict alternating strikes.
– Or pivot straight to the puller bolt method.
Wrong Rotor Installed Previously?
Compare the old and new rotor side by side:
– Do both have Torx screw holes?
– Do both have 5/16″ puller holes?
If not, the previous rotor was incompatible. This causes fitment issues and makes future removal harder. Always verify part numbers against your VIN before installation.
Prevent Future Seizure During Reinstallation

A rotor that fought you once will fight you harder next time, unless you take these preventive steps.
Clean the Hub and Rotor Surfaces
Before installing the new rotor:
– Use a wire brush or sandpaper to remove rust and debris from the hub face.
– Wipe clean with brake cleaner.
– Confirm the surface is flat and smooth.
Why It Matters: Debris causes uneven seating, which leads to vibration and rotor warping under braking.
Apply Anti-Seize Compound
Coat the hub face and center pilot hole with high-temperature anti-seize.
- Use sparingly. A thin, even layer is all you need.
- Avoid: Getting anti-seize on the braking surface or lug stud threads.
Result: The rotor slides on easily and comes off cleanly next service.
Reinstall Retaining Screws If Applicable
If your new rotor has Torx screw holes, install fresh factory-style screws.
- Use new screws rather than reusing old, stretched ones.
- Torque to manufacturer spec, typically 60–80 in-lbs.
- These screws don’t carry braking load. They simply hold the rotor during installation.
Essential Tools Checklist
Having the right tools ready saves time and frustration.
Must-Have Tools
- Socket set (standard and metric)
- Torx bit set (T27, T30)
- 5/16″ coarse-thread bolts (1.5–2″ long)
- Deadblow or sledgehammer (3–5 lb)
- Penetrating oil (WD-40 or PB Blaster)
- Wire brush and brake cleaner
Optional but Helpful
- Hydraulic rotor puller (if threaded holes are missing)
- Torque wrench (for axle nut and lug nuts)
- Anti-seize compound
- Gloves and safety glasses
Pro Tip: Toss a pair of 5/16″ bolts in your truck toolbox. They’re a Silverado owner’s secret weapon against seized rotors.
Frequently Asked Questions About Removing Chevy Silverado Rotors
What Size Bolts Do I Need for the Rotor Puller Holes?
You need 5/16-inch coarse-thread bolts, roughly 1.5 to 2 inches long. Grade 5 or Grade 8 bolts provide enough strength to push the rotor off without snapping.
Can I Reuse a Rotor That I Had to Hammer Off?
It depends on condition. Inspect the braking surface for cracks, deep scoring, or warping. If the rotor shows any of these, replace it. A hammer strike on the braking surface can cause hidden warping that leads to vibration under braking.
Do All Silverado Rotors Have Threaded Puller Holes?
No. Some rotors, particularly certain factory units on the 2005 Silverado 1500, may lack these holes. Always inspect the rotor face before assuming you can use the mechanical method.
How Long Should Penetrating Oil Soak Before Hammering?
Give it at least 10–15 minutes to break down rust bonds. For severe corrosion, reapply and wait longer. Patience here saves time during the actual removal.
Is It Safe to Heat the Rotor to Loosen It?
Yes, but with caution. Apply heat only to the rotor hat and keep the flame away from the ABS sensor, rubber seals, and brake lines. Heat expands the metal and can break rust bonds when chemicals and impact fail.
Key Takeaways for Removing Silverado Rotors
Knowing how to take rotors off Chevy Silverado models from 2005–2009 comes down to three things: identification, technique, and prevention.
Summary of Essentials:
– Always check for Torx screws first and remove them before anything else.
– Use 5/16″ bolts in the puller holes as your first removal method. It’s safe, clean, and effective.
– If stuck, alternate hammer strikes on opposite sides to avoid binding the rotor on the taper.
– Apply anti-seize during reinstallation to prevent future seizure.
– Never skip hub cleaning. A smooth, rust-free surface ensures proper rotor fit and long braking life.
By following this guide, you’ll avoid common pitfalls, protect your wheel bearings, and finish the job faster, whether you’re replacing worn rotors or prepping for new wheels.
Now grab your tools, head to the garage, and get those rotors off the right way.



