
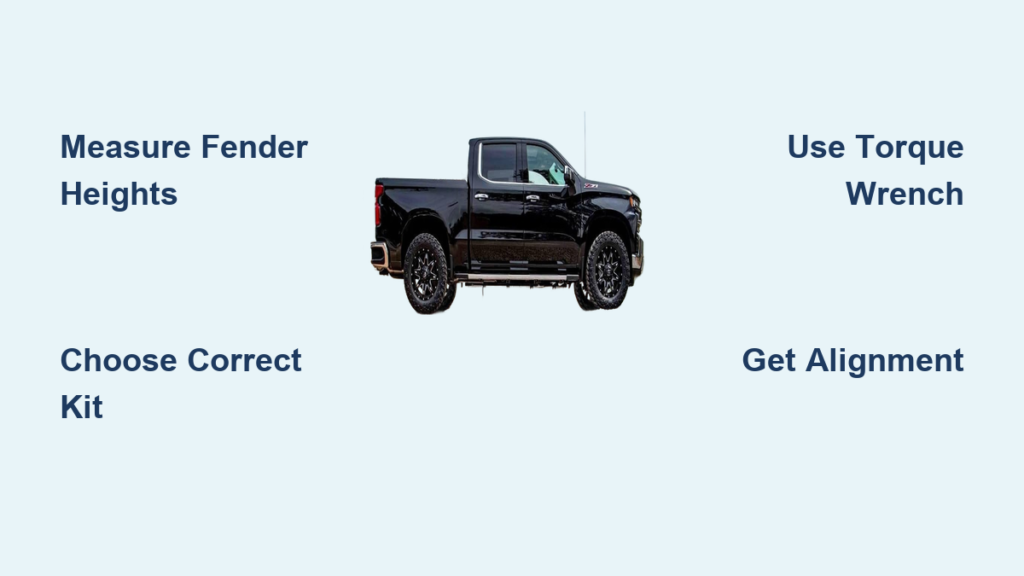
Most Silverados roll off the lot with a noticeable rake, where the rear sits higher than the front. Installing a leveling kit corrects this factory stance, giving your truck a more aggressive look while creating clearance for tires up to 33 inches. The job is completely doable in your driveway with basic tools and a free afternoon, provided you follow the right steps for your specific model year.
The process changes significantly depending on when your truck was built. 2005–2006 models use torsion bar suspensions and require replacement keys, while 2007–2018 trucks use coilover struts that accept billet aluminum spacers on top. 2019 and newer models have trim-specific variations that demand careful measurement before buying any kit. This guide covers every step, from initial measurements to final torque specs, so you can install a leveling kit on your Silverado safely and correctly.
Measure Your Silverado’s Current Stance
Before buying any kit, you need to know exactly how much rake your truck has. Factory tolerances vary widely between trucks of the same trim, so guessing leads to a nose-high or uneven result.
Park on Level Ground
Find a flat, hard surface like a garage floor or level driveway. Soft asphalt or sloped concrete will give false readings. Make sure your tires are properly inflated and the truck is completely unloaded, with no cargo, tools, or heavy accessories in the bed.
Take Fender-to-Wheel Measurements
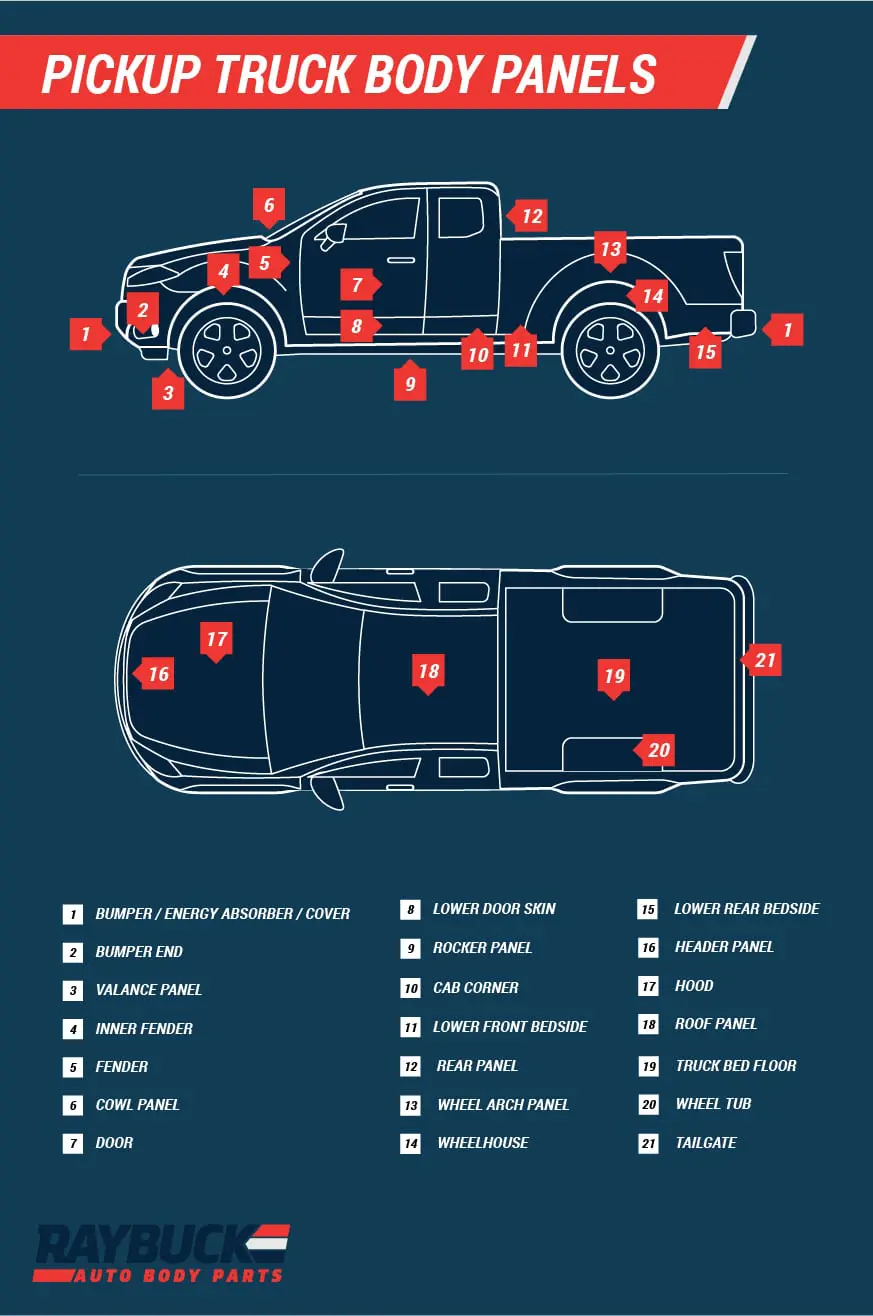
Measure from the bottom of the front fender lip down to the top of the front tire tread. Repeat the process on the rear fender and rear tire. Take measurements on both sides and average them for accuracy.
- Example: Front = 35.25″, Rear = 36.25″ means you have a 1-inch rake
- Your target is to reduce this difference to zero, or slightly positive front if you tow heavy loads
Choose the Right Lift Height
Match your spacer thickness to your measured rake and how you use the truck.
- 1.25-inch spacer: Best for minimal rake or towing applications
- 1.5-inch spacer: Most common for 2007–2018 trucks and achieves a true level stance
- 2-inch spacer: Ideal for LT trims with significant factory rake, but can look nose-high if overdone
Trim-specific notes for 2019+ models:
– High Country typically needs 1.25″ to 1.5″
– Trail Boss requires 1.5″
– Sierra AT4 needs 1.375″ (1 3/8″)
– LT trim may require a full 2″
Measure twice, order once.
Select the Correct Kit for Your Model Year
Not every kit fits every Silverado. Choosing based on your suspension design prevents wasted money and installation headaches.
Torsion Key Kits (2005–2006 Models)
Early Silverados use torsion bar front suspension, so leveling requires offset torsion keys that increase preload and lift the front 1.5″ to 2″.
- No strut spacers involved
- Requires a dedicated torsion bar adjustment tool
- Never use a C-clamp; it can fail catastrophically under torsion bar pressure
Strut Spacer Kits (2007–2018 Models)
GMT900 and K2XX platforms use coilover strut suspensions. Leveling is done by installing billet aluminum spacers between the strut top and the frame.
- Spacers range from 1.25″ to 2″ thick
- Solid one-piece construction prevents cracking
- Basic hand tools are sufficient
- Some kits include extended bump stops, which are recommended
2019+ Models Require Per-Truck Measurement
Newer T1XX trucks have significant factory variance. High Country may already sit nearly level, while LT trims often need more lift. Always measure before purchasing.
Gather Tools and Safety Equipment
The right tools make this job faster and safer. Skipping safety gear or improvising with improper tools risks serious injury.
Essential Safety Equipment
- Jack stands rated for your truck’s weight (never work under a jack alone)
- Work gloves and safety glasses
- Bungee cord to support the brake caliper
- Floor jack with a wide saddle for control arm support
Socket and Wrench Sizes
- 10mm: Brake line brackets
- 15mm: Sway bar links, lower strut bolts
- 17mm: Spacer nuts, sway bar re-torque
- 18mm: Upper control arm, top strut nuts
- 21mm: Tie rod nut
- 22mm: Lug nuts
Specialty Tools
- Torsion bar adjustment tool (2005–2006 only)
- 5/16″ Allen key for spacer stud installation
- Cutoff wheel or grinder for trimming studs
- Channel locks, pry bar, rubber mallet
- Torque wrench for final assembly
Consumables
- Red Loctite for stud threads
- New lower shock bolts (never reuse old ones)
- New U-bolts if installing a rear block
Install Torsion Keys (2005–2006 Silverado)
For GMT800 trucks, leveling means swapping factory torsion keys for offset versions that lift the front without changing suspension geometry.
Unload the Torsion Key Safely
- Lift the front end and secure on jack stands.
- Locate the torsion key adjustment bolt on the crossmember.
- Insert the dedicated torsion bar tool into the dimple on the key.
- Hand-crank the tool to relieve tension. Do not use an impact wrench, as it can damage the tool or key.
Never use a C-clamp on a torsion bar. It is not rated for the pressure and can snap violently.
Remove the Factory Key
Once tension is fully released, slide the factory torsion key out of the housing. Inspect for wear or corrosion. The old key looks identical to the new one but lacks the offset hole pattern.
Install the Offset Torsion Key
- Slide the new offset key into the housing.
- Reinsert the torsion bar and tool.
- Slowly crank the tool by hand to apply tension.
- As tension builds, the key migrates upward, creating the lift.
- Back off the tool slightly and reinstall the retaining bolt.
- Tighten the bolt slightly past flush to lock in the new height.
Repeat on the Opposite Side
Perform the same steps on the other side. Lower the truck, re-measure fender heights, confirm even lift, and schedule an alignment.
Install Strut Spacers (2007–2018 Silverado)
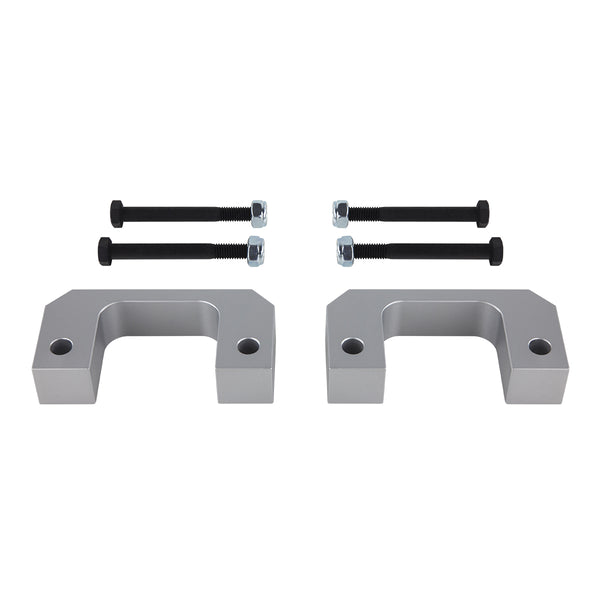
This is the most common leveling method. Billet spacers sit on top of the strut assembly, lifting the front 1.5″ to 2″ while preserving factory ride quality.
Remove the Front Wheel
- Loosen lug nuts with a 22mm socket while the truck is on the ground.
- Jack up the front and secure on jack stands.
- Remove lug nuts and wheel.
Disconnect Brake and Sway Bar
- Remove two 10mm bolts securing the brake line bracket (one behind the rotor, one on the control arm).
- Gently drape the caliper aside and secure it with a bungee. Never let it hang by the hose.
- Disconnect the sway bar end link using a 15mm wrench on top and 15mm socket on the bottom.
Separate Steering and Suspension
- Remove the 21mm tie rod nut.
- Tap the steering knuckle (not the tie rod) with a hammer to break the taper.
- Use a pry bar to separate the upper ball joint from the knuckle.
- Remove the 18mm nut connecting the upper control arm to the strut.
Extract the Strut Assembly
- Support the lower control arm with a jack stand.
- Remove two 15mm bolts securing the strut to the lower control arm.
- Carefully lower the control arm.
- Remove three 18mm nuts from the top of the strut inside the engine bay.
- Wiggle the strut out of the wheel well.
Clear any wiring harnesses with a screwdriver to avoid damage during removal.
Prepare and Mount the Spacer

With the strut free, you can now install the spacer.
Install Studs in the Spacer
- Apply Red Loctite to the base and threads of each stud.
- Thread studs into the spacer’s recessed holes.
- Ensure the flat side of the spacer faces up to mate with the frame.
- Tighten with a 5/16″ Allen key.
Studs are often sold separately. Buy grade 8 studs for maximum strength.
Trim the Studs to Length
- Mark the spacer’s orientation so it reinstalls correctly.
- Clamp the spacer in a vise or secure with a bungee.
- Use a cutoff wheel to trim studs just above the threads.
- Deburr edges and rotate the spacer 180° if alignment is off during reinstallation.
Attach the Spacer to the Strut
- Place the spacer on top of the strut assembly in the correct orientation.
- Thread nuts onto the trimmed studs.
- Tighten securely with a 17mm socket.
Reinstall the Strut Assembly
Putting everything back together requires patience and attention to detail.
Insert the Strut into the Wheel Well
- Slide the strut back into position.
- Start the three top nuts but leave them loose for now.
- Align the bottom of the strut with the lower control arm.
Reattach Lower Strut and Control Arm
- Insert the two 15mm lower strut bolts.
- Reconnect the upper control arm to the strut.
- Use a pry bar to compress the arm if needed.
- Secure with the 18mm nut.
A second person helps here by holding the arm down while you tighten.
Reconnect Tie Rod and Sway Bar
- Slide the tie rod back into the knuckle.
- Install and tighten the 21mm nut. Use a socket against the nut to prevent spinning.
- Reconnect the sway bar end link.
- Torque to 17 ft-lbs.
Reattach Brake Line and Wheel
- Reinstall brake line brackets with 10mm bolts.
- Mount the wheel and hand-tighten lug nuts in a crisscross pattern.
- Lower the truck.
- Torque lug nuts to 140 ft-lbs in a crisscross pattern.
- Recheck torque after 50 miles.
Install a Rear Block If Needed
Most leveling kits focus on the front, but a 1-inch rear block helps if your rear sags or you want a perfectly level stance.
When to Add a Rear Block
- Your truck has visible rear sag
- You removed a factory 0.25″ block
- You want even stance with larger tires
Remove the Axle and Replace the Block
- Jack up the rear and support with jack stands.
- Place a floor jack under the axle.
- Remove U-bolts securing the leaf spring to the axle.
- Lower the axle slightly.
- Remove the factory block.
- Install the new 1-inch block.
- Reinstall U-bolts and tighten.
Installing new U-bolts and rear shocks at the same time improves long-term durability.
Torque and Recheck
Torque U-bolts to manufacturer spec (usually 80–100 ft-lbs), lower the truck, and re-measure fender heights to confirm a level stance.
Follow These Critical Torque Specs
Ignoring torque specs leads to loose components, vibration, or failure. Always use a torque wrench on critical fasteners.
- Lug Nuts: 140 ft-lbs
- Lower Shock Bolts: 37 ft-lbs
- Sway Bar Links: 17 ft-lbs
- Upper Control Arm Nut: Factory spec (typically 85–100 ft-lbs)
- Tie Rod Nut: Factory spec (typically 65–80 ft-lbs)
- U-Bolts (Rear Block): 80–100 ft-lbs per kit manual
Never reuse old shock bolts. They are torque-to-yield and prone to shear.
Get a Professional Wheel Alignment

This step is non-negotiable. Installing a leveling kit changes suspension geometry, affecting camber, caster, and toe.
Why Alignment Matters
- Prevents uneven tire wear
- Restores proper steering response
- Eliminates pulling or wandering
- Maximizes tire life and safety
What to Tell the Shop
Tell the technician you installed a front leveling kit and ask them to maximize caster for stability, set camber to factory specs or slightly positive, and adjust toe precisely to OEM standards. Most shops charge $80–$120, which is well worth protecting your new tires.
Avoid These Common Mistakes
Even experienced DIYers make errors. Here’s how to avoid the top pitfalls.
Using C-Clamps on Torsion Bars
This is a major safety hazard. C-clamps cannot handle torsion bar pressure and may fail explosively. Always use a proper torsion bar tool.
Skipping the Alignment
You will save $100 now but spend $500 on premature tire wear within six months. Get the alignment.
Assuming All Trucks Are the Same
Two 2018 High Country trucks may need different lift heights. Measure each one individually.
Reusing Old Shock Bolts
These bolts are torque-to-yield and should never be reused. Always install new ones.
Letting the Brake Caliper Hang
This can damage the brake hose. Secure it with a bungee cord during strut removal.
Final Checks and Test Drive
Before hitting the road, perform a thorough inspection.
Walk-Around Inspection
- Check all nuts and bolts for tightness
- Inspect brake lines for kinks or strain
- Confirm no tools are left in wheel wells
- Verify tire pressure
First 50 Miles
- Drive cautiously and listen for clunks or squeaks
- Stop and recheck lug nuts and critical fasteners
- Visit the alignment shop
Frequently Asked Questions About Leveling Kits
What size leveling kit do I need for my Silverado?
Most 2007–2018 Silverados achieve a level stance with a 1.5-inch front spacer. LT trims with significant factory rake may need 2 inches. High Country and Trail Boss models often require less lift. Measure your truck’s fender heights before buying.
Can I install a leveling kit without professional help?
Yes. The strut spacer method for 2007–2018 trucks is rated as moderate difficulty and takes about two hours with basic tools. Novices have completed it successfully by following safety protocols and using proper equipment.
Will a leveling kit affect my Silverado’s ride quality?
Properly installed billet aluminum spacers maintain factory ride quality. Cheap welded spacers may introduce noise or vibration. Rear block additions can slightly increase ride stiffness but improve load leveling.
Do I need an alignment after installing a leveling kit?
Yes, a professional alignment is mandatory. The kit changes suspension geometry, and skipping alignment leads to uneven tire wear and poor handling within a few thousand miles.
What is the largest tire I can run with a 2-inch leveling kit?
A 2-inch front leveling kit typically allows fitment of up to 33-inch tires without rubbing on 2007–2018 Silverados. Larger tires may require additional modifications like trimming or aftermarket wheels.
Why can’t I use a C-clamp on torsion bars?
C-clamps are not rated for the extreme pressure stored in torsion bars. They can bend or snap violently, causing serious injury. Always use a dedicated torsion bar adjustment tool cranked by hand.
Key Takeaways for Your Silverado Leveling Kit Install
A properly installed leveling kit transforms your Silverado’s stance and capability without sacrificing ride quality. Measure your truck before buying any kit, choose the correct type for your model year, and never cut corners on safety equipment or torque specs. Replace old shock bolts, use Red Loctite on spacer studs, and finish with a professional alignment.
Your next step: gather your tools, measure your fender heights, and order the correct kit for your model year. With a free afternoon and careful attention to detail, you can complete this upgrade and enjoy a level, aggressive stance for years to come.



